-from HP Support Forum
Sometimes in order to fix a HP computer, we need to change HP laptop boot order in BIOS. However, most of users are lack of such knowledge about how to do that in HP desktop or laptop. In this article, we are aim at discussing about it.
Here are the table of contents:
Part 2: How to Access HP BIOS Before Changing Boot Order
Part 3: How to Change Boot Sequence in HP Windows OS
Part 1: What is Boot Order?
When a HP PC starts, the BIOS system begins to examine an advanced list of drives and devices that might contain an operating system such as Windows 10, 8.1, 8, 7, Vista, XP, etc. The Boot order in which the devices are checked is configurable through BIOS setup menu. In other words, Boot Order is the order in which the hardware storage devices are read by computer. The default boot order contains Floppy disk drive, Optical drive (DVD, CD-ROM), Hard drive, USB device and network adapter.
Part 2: How to Access HP BIOS Before Changing Boot Order
In order to change BIOS order, you need to access BIOS utility at first. Switch on or reboot the HP computer. When the display is blank, press F key to enter BIOS setup utility.
How to Enter HP BIOS? Here are the keys to access:
- Press the F1, F10, or F11 key after restarting the computer.
- HP Tablet PCs may use F10 or F12.
- Other HP computers may allow access to BIOS using the F2 or Esc keys.
Part 3: How to Change Boot Sequence in HP Windows 10/8.1/8/7
Different HP PC shows different BIOS interfaces. Nowadays, the main motherland BIOS in HP is HP BIOS, AMI BIOS, Phoenix-Award BIOS, no matter your computer operating system is Windows 10, 8.1, 8, 7, Vista or XP.
Option 1. Configure HP Boot Order in BIOS Setup Utility
BIOS Setup Utility is equal to AMI BIOS. It is the common and basic BIOS interface. You can see it in lots of computer brands. There is no exception in HP computer.
Here are the steps to change Boot order:
1. Refer to the keys in Part 2 to enter BIOS Setup Utility.
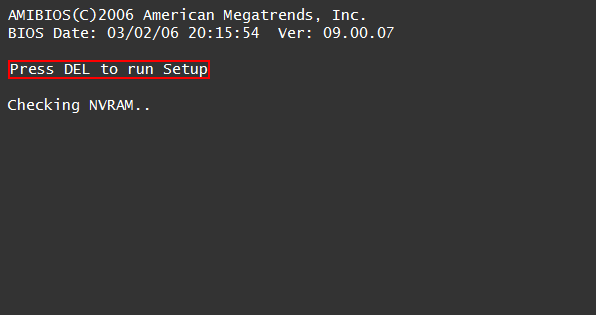
2. Choose “Boot” tab by typing the left and right arrow keys.
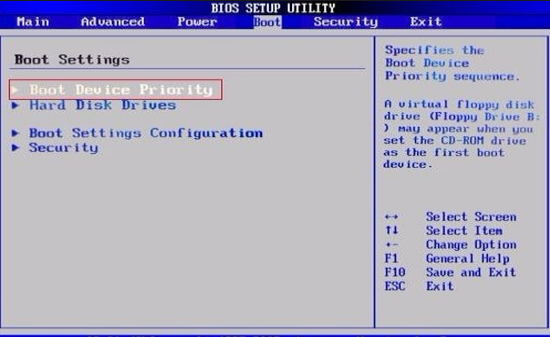
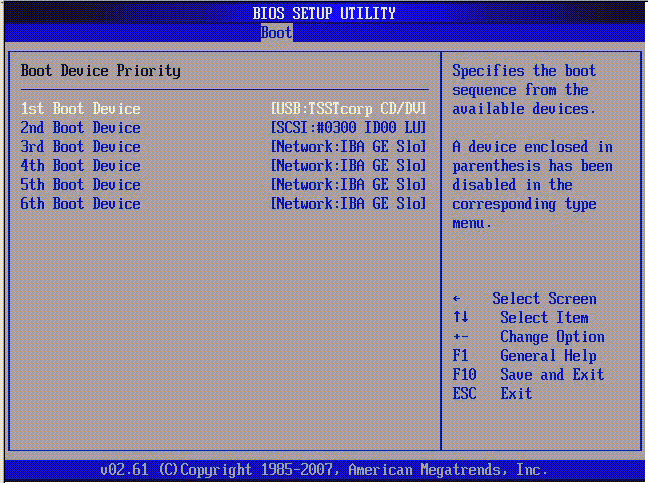
3. Choose “Boot Device Priority” by typing the up and down arrow keys. Change boot order by following the on-screen instructions.
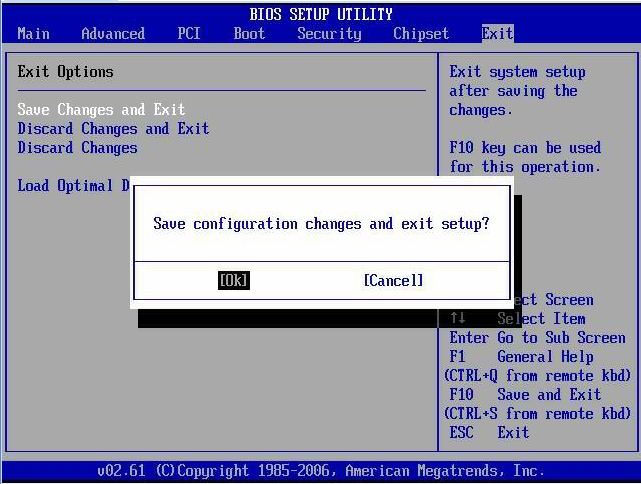
4. Use left and right arrow key to move to the “Exit” tab, use up and down arrow key to choose “Save Changes and Exit” option. Type “OK” to confirm the action. Or directly press F10 to save your settings.
Option 2. Change HP Boot Priority in Phoenix - AwardBIOS CMOS Setup Utility
Phoenix-Award BIOS is also frequently-used in HP desktop or laptop machine. You can find it in most PCs based on Windows Vista/XP operating system.
User guide is appeared in the following:
1. Find the keys in Part 2 to enter Phoenix - AwardBIOS CMOS Setup Utility.
2. In the main interface, choose “Advanced BIOS Features” tab.
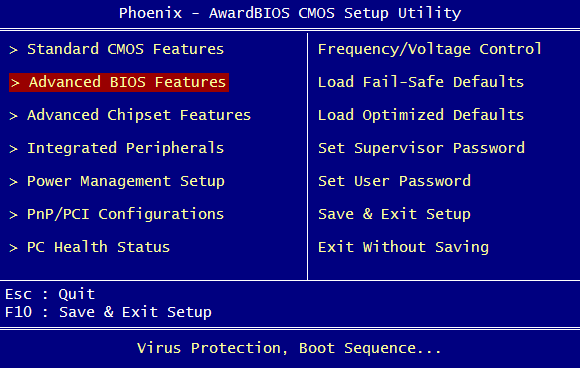
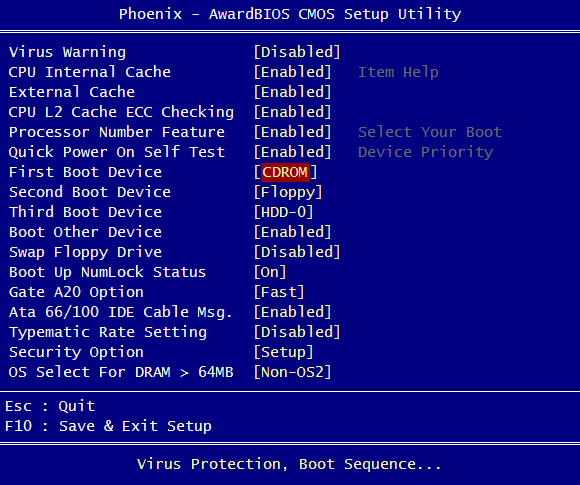
3. Move to “First Boot Device” to select your boot device priority.
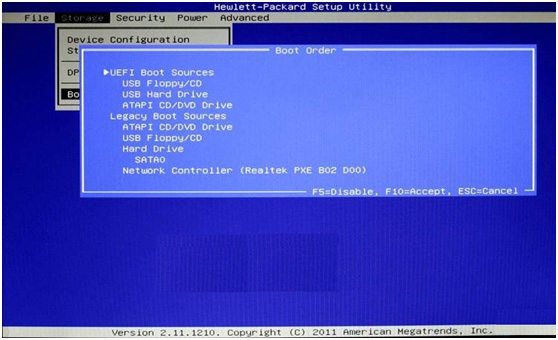
Option 3. Change HP Boot Sequence in Hewlett-Packard Setup Utility
HP is short for Hewlett-Packard. This is exclusive for HP PCs because it is made by HP company.
Let’s see the user guide and change boot sequence:
1. Refer to the keys in Part 2 to enter Hewlett-Packard Setup Utility.
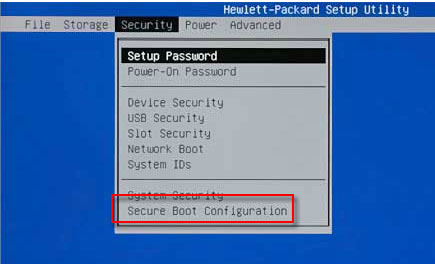
2. Press the “Security” and then choose “Secure Boot Configuration”.
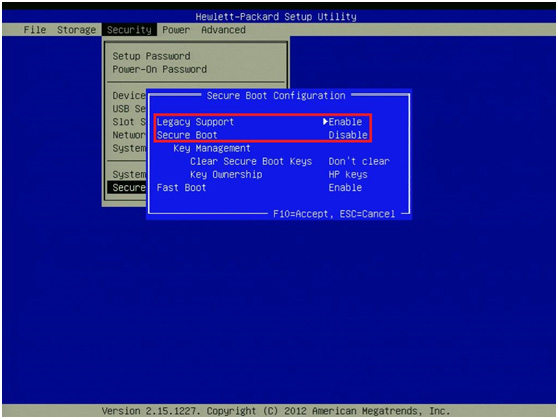
3. In the pop up window, enable “Legacy Support” and Disable “Secure Boot” option. Then press F10 to save the change.
4. Reboot HP PC and press F9 to access BIOS again. Choose “Storage” and then select “Boot Order”. Finally, you can change boot Sequence successfully.
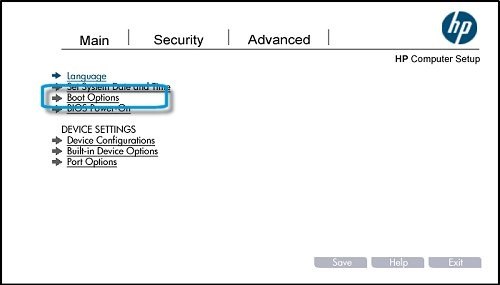
Wow, that’s all the information I have known about how to change boot order in HP Envy, Pavilion, EliteBook, etc.. By the way, if you HP PC is crashing or won’t boot with blue or blue screen of death, Windows Boot Genius is your life saver.