iTunes in the Cloud as one of iTunes 11's features makes downloading, and re-downloading music, TV shows, and music from iTunes easier than ever before. With iTunes in the Cloud, you can easily get back song, film, or episode you previously bought on your Mac or Windows PC by a click away. So in this article, we will take a look at how to use iTunes in the Cloud under iTunes 11.
P.S.:Want to restore from iTunes but unfortunately forgot iTunes backup password? Don't panic! iTunes Backup Unlocker is here for you to unlock iTunes backup password immediately.
Part 1: How to Enable iTunes in the Cloud under iTunes 11
With iTunes in Cloud, you can remove the physical copy of the items you purchased from iTunes off your hard drive but they are still in the Cloud which you can re-download whenever you want, thus iTunes in the Cloud in a perfect backup for its users especially for those having small hard drives. Follow the steps below to enable iTunes in the cloud under iTunes 11.
- 1. Launch iTunes 11 on your Mac or PC and open "Preferences".
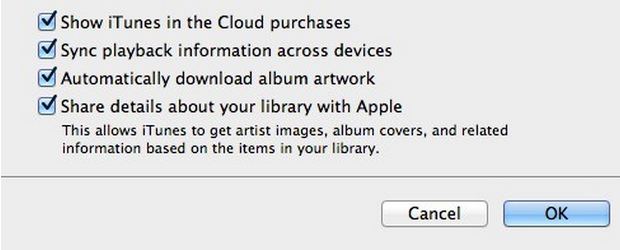
- 2. Click on the Store tab and in the bottom portion of the Store tab makes sure the option is checked for "Show iTunes in the Cloud purchases" and iTunes in the Cloud is now enabled.

Part 2: How to Stream iTunes in the Cloud Content under iTunes 11
iTunes in the Cloud supports streaming in iTunes for anything that you've purchased directly from iTunes. If you have some music, movies which you don't access very frequently, you can stream them in iTunes instead of downloading them.
- 1. Launch iTunes 11 on your Mac or PC.
- 2. Find the song, album, movie, or TV show that you've purchased from iTunes that you would like to stream.
Note:items with the small "cloud icon" next to it are not downloaded to your computer but in the cloud.
- 3. Double click on the media item in order to start streaming it.

Part 3: How to Download iTunes in the Cloud Content in iTunes 11
After that, you may wonder how to download the items from the cloud. Keep reading and you will soon find the answer.
- 1. Launch iTunes 11 on your Mac or PC.
- 2. Find the items you want to download and click on the smallcloud icon in order to download it.
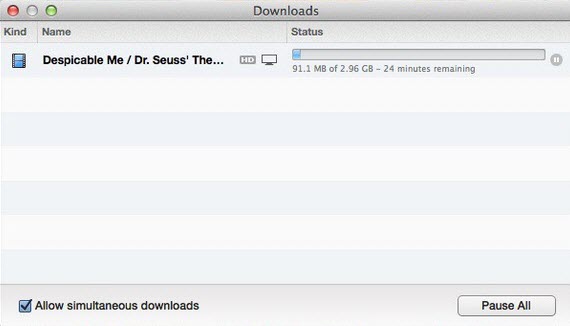
- 3. Then you can see a "Download icon" in the upper right hand corner of iTunes 11. Click on it, you can see the download windows where shows all your items downloading from iTunes in the cloud to your computer.

Part 4: How to Move Items Back to iTunes in the Cloud under iTunes 11
Just as you can download items to your computer, you can also move them back to iTunes in the cloud. Here is how:
- 1. Run iTunes 11 on your PC or Mac.
- 2. Find the music, movie, or TV show you'd like to remove from your actual computer. And Right click on it and choose the Delete option.
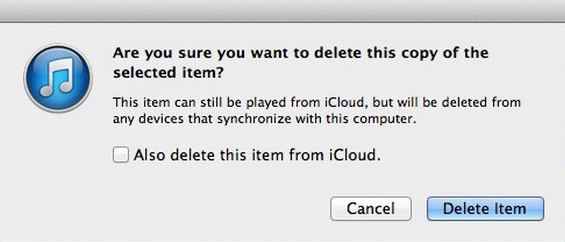
- 3. Then iTunes will prompt you to confirm that you'd like to delete the file from your computer. Click "Delete Item" and make sure the option "Delete from iCloud" is unchecked. And choose "Move to Trash" on the next window.
Note:You'll still see the title in your library but you'll now notice it is back in the Cloud which is symbolized by the small cloud icon in the upper right hand corner of the media item.

After reading this article, I believe you already have an idea about how to use iTunes in the Cloud under iTunes 11. And if you want to delete iTunes in the Cloud in iTunes 11, simply follow the steps of part 4 but make sure the option "Delete from iCloud" is checked.


