Accompanying with many useful programs, Windows is used to complete a variety of tasks, both personal and professional. It is powerful enough, but that doesn't mean that it is safe from virus attacks and other problems. Your files on hard drive you can't afford to lose should be backed up. Windows backup essentially means to create a copy of everything you wish to save, including your Windows system, photos, Microsoft Office Documents or spreadsheets, your music, videos, and anything you don't want to lose.
How to Backup Windows?
How often, and how to backup Windows, you ask? Look at this way: Any data on your computer you can't afford to lose (what will take long time to recreate or is unique and can't be recreated) should be stored on two physical separate media. You should backup system image on a weekly basis or on a daily basis if anything important has changed.
Use Windows Backup software to backup OS, as well as files, folders, partitions, and even the entire hard disk. When disaster attacks, you can restore OS and get back lost data immediately. It can used to backup Windows 7, backup Windows 8, backup Windows XP and backup Vista. Compared with other similar software, it is more flexible for you to backup Windows no matter you can login into Windows, or not.
If you need to backup Windows or want to see how to backup OS, consider these:
Part I: Prepare to Backup Windows
Step 1: Create a Windows Boot CD/USB
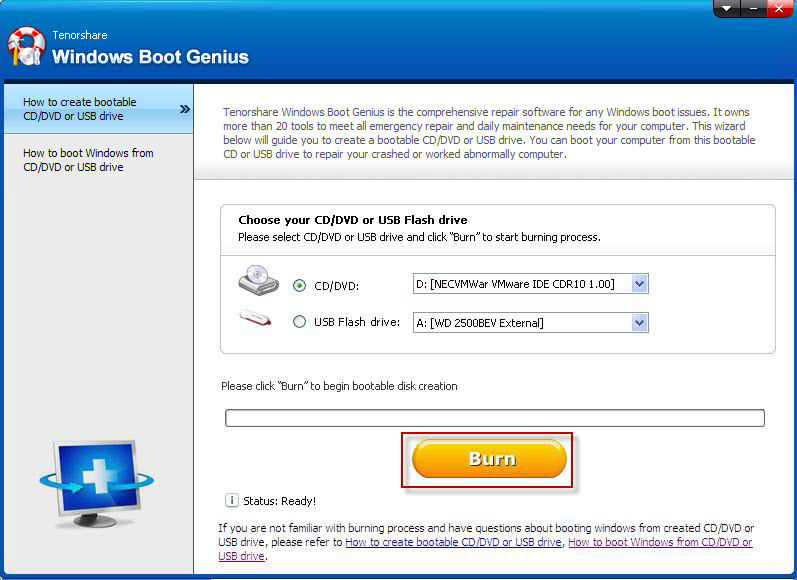
Insert a blank CD or writable USB flash drive onto your computer. If you can't access to your Windows, utilize another working computer for this step. Launch this Windows backup software, and click "Burn" to start burning a Windows boot disk.
Step 2: Boot Computer from CD/USB
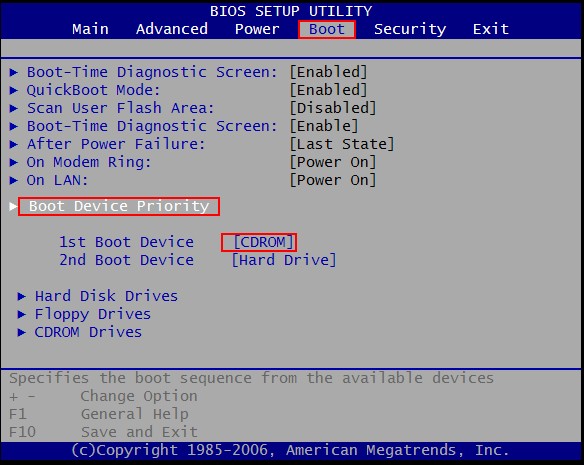
Insert the newly burned disk to the computer that you want to backup. Start it and go to BIOS to set the CD or USB as the first boot device. Your computer will restart.
Please note that all the steps below proceed with a boot disk connected.
Part II: How to Backup Windows?
Step 1: Select Windows Backup Mode
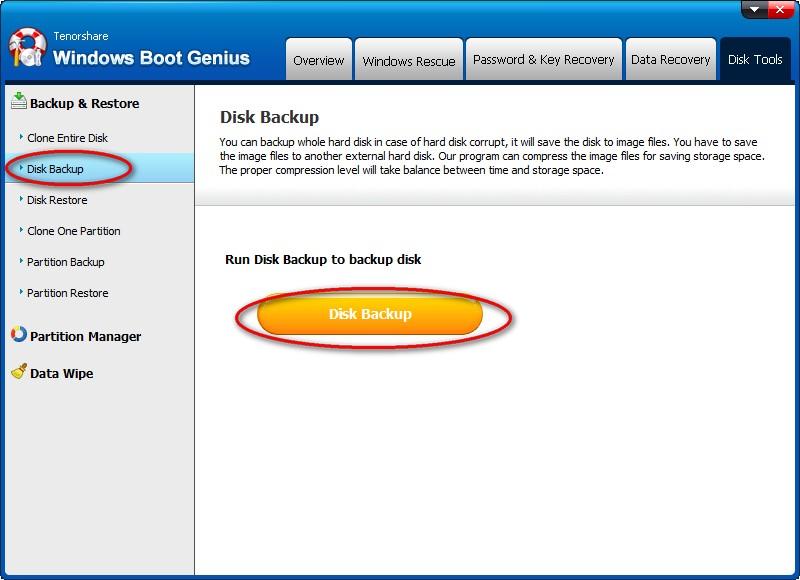
Connect an external hard drive onto your computer. Then launch this backup Windows software under WinPE, and select "Disk Tools", and here you should select "Disk Backup". If you just want to backup OS, select "Partition Backup".
Step 2: Select the Source Drive
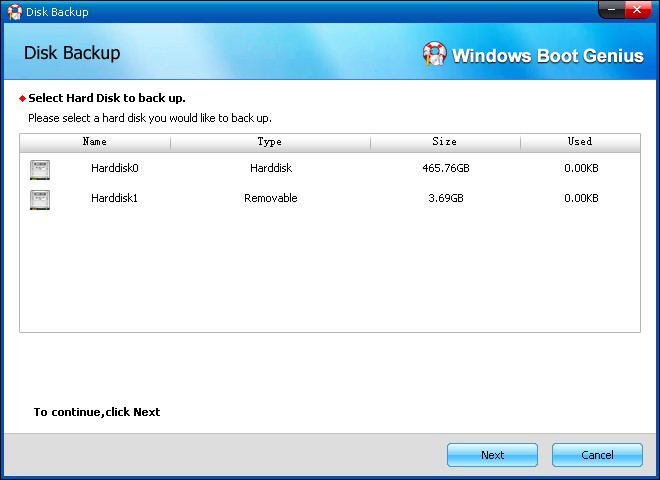
Select the disk or the partition containing your Windows system or other vital data which you want to back up. Hit "Next".
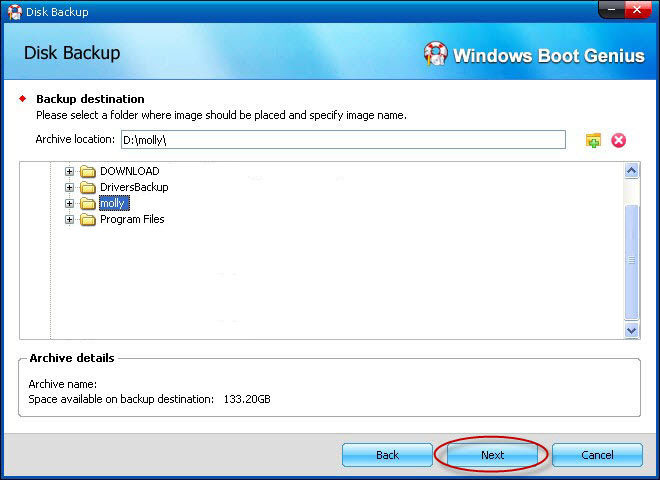
Step 3: Choose a Location to Save Image File
Specify a location on your external hard drive to save the image file this program extract and name it with an .img suffix after the location.
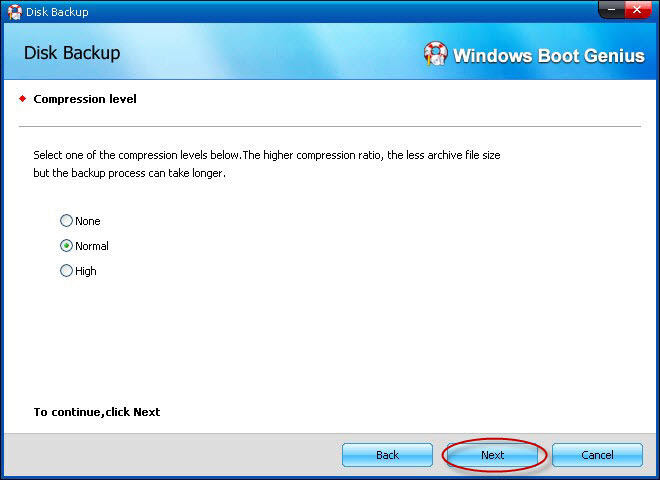
Step 4: Choose Compression Level for Windows Backup
Tick a compression level you need: the higher the level is, the smaller the size of achieve file is. However, it will take relative longer time if you select high level. Click "Next" to initiate Windows backup.
Part III: How to Restore Windows?
When a computer suffers a severe crash, you need to restore Windows. The guide below is suitable if you need to restore Windows 7, restore Windows 8, restore Windows XP and restore Windows Vista.
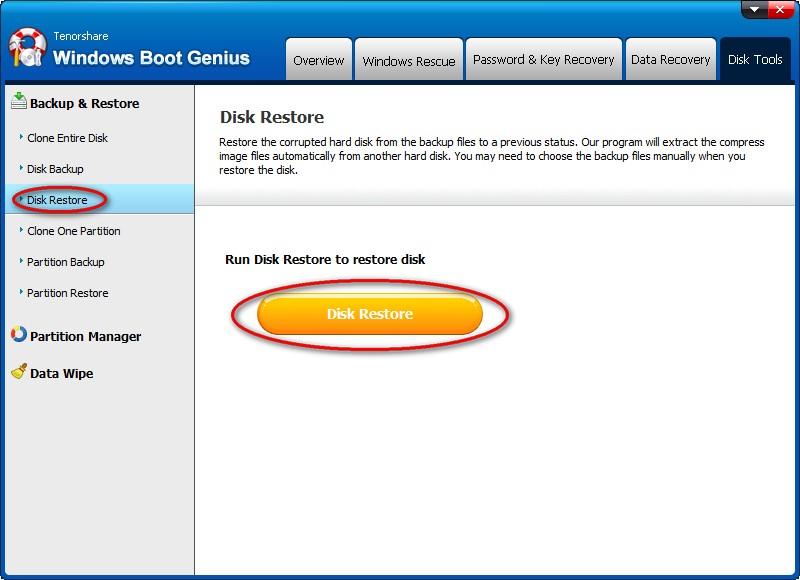
Step 1: Select the Windows Restore Mode
Insert the external hard drive which contains the backup file you created before onto the computer you need to restore. Select "Disk Restore", or select "Partition Restore" if you select to backup a specific partition before.
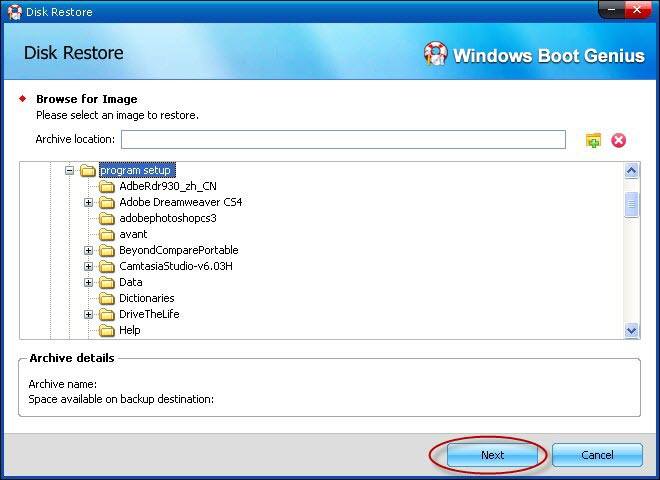
Step 2: Select the Image File
On file tree in the next window, navigate the folder which contains your image file. Select it and click "Next".
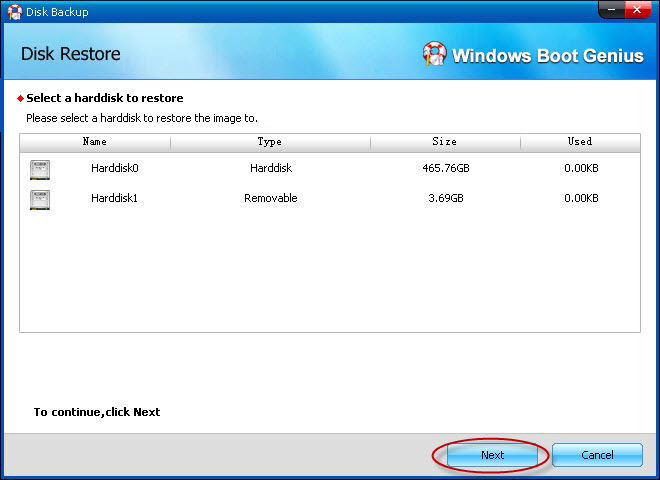
Step 3: Select the Drive or Partition You Need to Restore
Choose the drive or partition you're going to restore. Hit "Next" to start to restore OS.
Scheduling regular Windows backup is a smart choice for anyone that uses their computer for their job. Why not try to backup system image now?