Overwhelming majority of Dell computers are set up the internal hard disk drive or SSD as the first boot drive today, but sometimes you may need to boot from CD in Dell laptop, or a DVD/USB flash drive, to troubleshoot your computer, run offline programs or upgrade Windows operating system. Before you do that, it’s essential to change the boot order to CD/USB on Dell first, so here we will show you how to set boot priority in Dell Inspiron, Latitude, OptiPlex, XPS and others.
The BIOS setup utility is where you can manage Dell boot sequences. The access to BIOS varies from Legacy BIOS and UEFI BIOS or both on your PC. To check the BIOS mode you are using in Dell computer, a quick tip is to press Win + R and type msinfo32 to open System Summary.
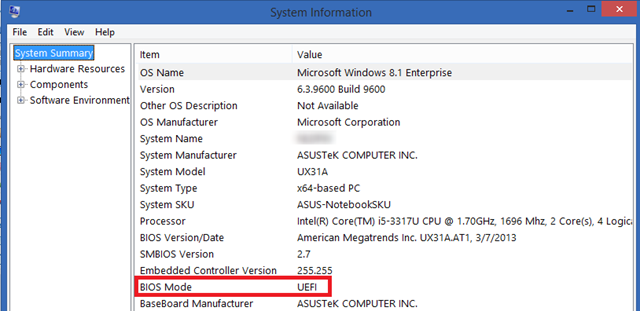
Part 1: How to Change Dell Boot Order with Legacy BIOS on Windows 7/8/8.1/10
Part 2: How to Set Boot Order in Dell Laptop with UEFI BIOS on Preinstalled Windows 8/8.1/10
Part 1: How to Change Dell Boot Order with Legacy BIOS on Windows 7/8/8.1/10
This method applies to all Windows 7 and Windows 8/8.1/10 upgraded from Windows 7.
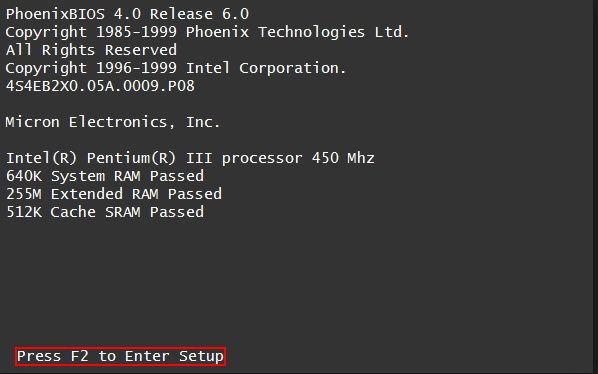
1. Restart your Dell computer and press the setup key to run BIOS setup as soon as manufacturer logo appearing. Do it quickly or you will miss the chance to change boot sequences in Dell laptop/desktop. The common keys are F2, F12, Del, ESC, but you may expect a slight difference between Dell series. Just follow the on-screen instructions.
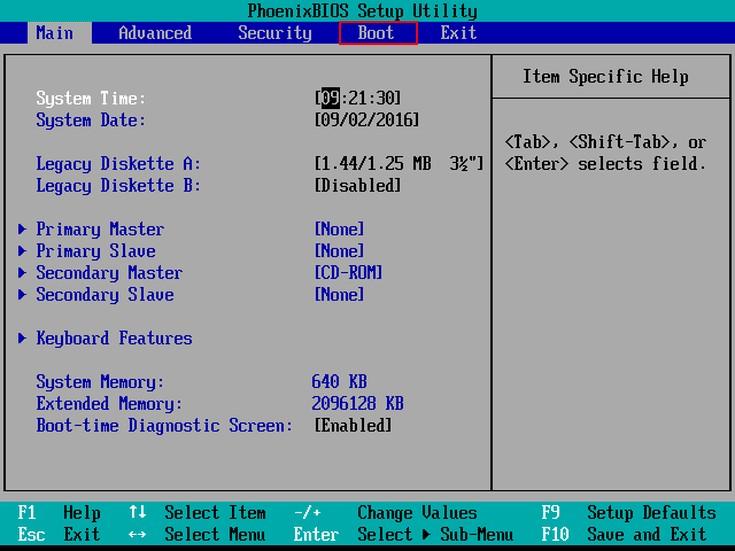
2. Wait for a while to enter Legacy BIOS setup utility. Similarly, the layout differs from Dell Inspiron, Latitude, XPS, etc., but the operations are much the same. Use the Arrow key to select Boot from the menu bar and hit Enter to open sub-menu.
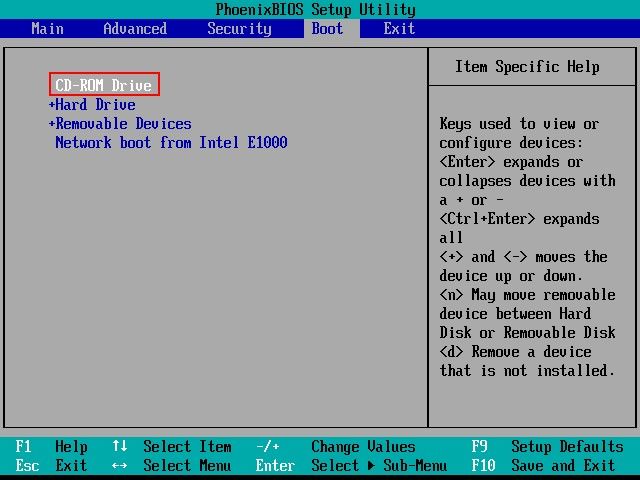
3. All bootable devices supported by you Dell computer will be listed when scrolling down Boot Device Priority. Check the specific deice you want boot Dell from and use +/- to stick it to the first place.
4. Press F10 to save and exit BISO setup utility. Restart your Dell and it will automatically choose to boot up from the device you selected.
Part 2: How to Set Boot Order in Dell Laptop with UEFI BIOS on Preinstalled Windows 8/8.1/10
With Windows 8 and later, Dell and other computers are gradually replacing the traditional BIOS with advanced UEFI firmware. Unlike the method in part 1, UEFI BIOS can’t be accessed by pressing key. You have to restart Windows 8/8.1/10 Dell in a special way. Here is what you need to do to enable boot from USB option with UEFI Boot Mode on Dell.
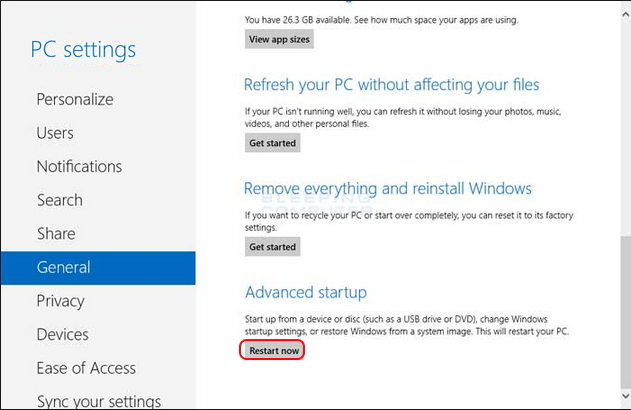
1. Go to Settings > General on your Windows 8/8.1/10 Dell computer. Select Restart now under Advanced startup.
2. Choose Troubleshoot on advanced recovery options screen. Then hit UEFI Firmware Settings.
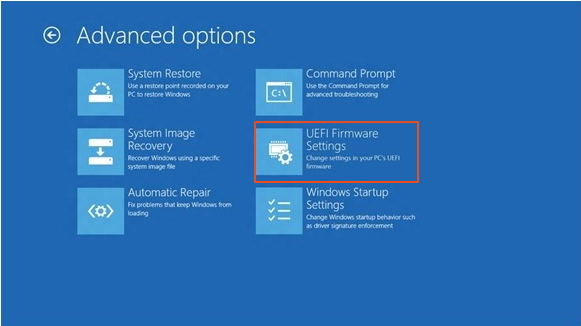
3. Click Restart to get into UEFI Setup Utility.
4. Disable Secure Boot in the Boot Options screen and change UEFI boot order on Dell Motherboard.
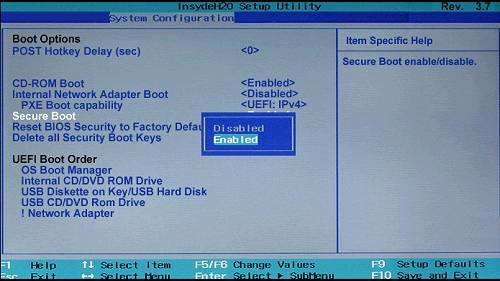
5. Press F10 to save and exit.
6. Shut down your computer and start it again to boot Dell from CD/DVD/USB drive.
Tip: 1. You can hold the Shift button and click Restart to quickly enter Advanced Options.
2. If your boot mode is set to Legacy and UEFI BIOS at the same time, you will be given Legacy Options and UEFI Options. Just pick one to change Dell laptop BIOS boot order as you like.
The Bottom Line
Wrongly changing the boot order in Dell may lead to malfunction of your computer, such as Dell can’t boot with blue/black screen of death, computer keeps restarting process and can’t find the bootable device you just selected. You won’t worry too much if you have Windows Boot Genius on hand. With it you can easily repair Dell computer crashes by yourself even if you have zero knowledge about computers. Go to check how to rescue computer blue/black screen, freeze, and crashes now.