By default, your computer will boot from its main hard drive to load the operating system. However, in some cases you may need to change the boot order in Windows 7 so that you can boot your computer from a USB drive, CD or DVD drive, or another hard drive to run a system repair or test out a new operating system, etc.
In the article we will show you how to change the boot order in Windows 7 on popular PC brands like Lenovo, HP, Dell, Asus, Acer, and Sony. Read on, please.
Part 1: Basic Steps to Change the Boot Order in BIOS for Windows 7
Part 1: Basic Steps to Change the Boot Order in BIOS for Windows 7
The BIOS setup utility, which controls how information is passed to various devices in the computer system, is where you change boot order settings. Thus, it is impossible to change the boot order in Windows 7 without BIOS. Now follow steps below:
- Turn on or restart your computer and keep pressing one of the keys on the keyboard continually while the computer is booting up to enter the BIOS setup on your PC.
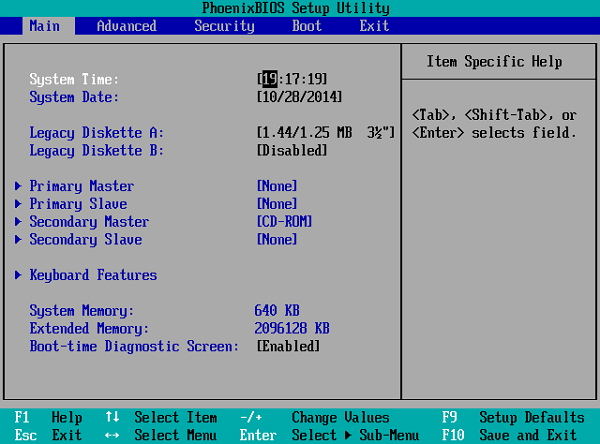
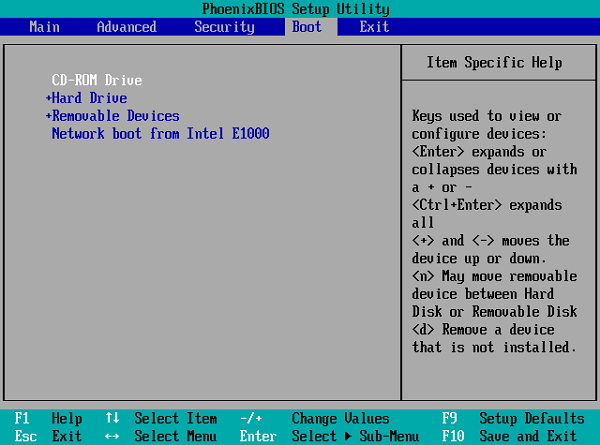
- When the BIOS setup utility page appears, use the arrow keys to select the BOOT tab. System devices appear in order of priority.
- Follow the directions on the BIOS setup utility screen to change the boot order. In this example BIOS, the boot order can be changed using the + and - keys. Note that your BIOS may have different instructions.
- Using F10: Save and Exit all of your actions or navigate to the Exit tab and save changes.
Note: Usually you will see a message quickly appear at the bottom telling you which keys to press. If you cannot see the message, please refer to Part 2 to find the key to access the BIOS Setup.

Note: Depending on your computer, the menu option or configuration item might be called Boot Options, Boot, Boot Order, etc. or even be located within a general menu option like Advanced Options, Advanced BIOS Features, or Other Options.


Now your computer will restart and boot from the first device in the boot order you changed. If the first device is not bootable, it will try to boot from the second device in the boot order, and so on.
Part 2: BIOS Setup Utility Access Keys for Popular Computer Brands
Changing the Boot Order in Windows 7 is easy following steps above. The key part is how to enter your computer BIOS since many people don’t the key to access the BIOS setup. Below we list the BIOS keys for common computer brands.
| Acer(Apire, Power, Veriton, Extensa, Ferrari, TravelMate, Altos) | Press Del or F2 immediately after powering on. |
| Acer Veriton L480G : F12 | |
| Acer Altos 600 server :Press Ctrl+Alt+Esc key and the F1 key for advanced options | |
| Older Acer computers :Press F1 or Ctrl+Alt+Esc keys to access BIOS. | |
| HP(Pavilion, ENVY, Probook) |
Press F1 or F10 after turning on the computer. |
| Dell(XPS, Dimension, Inspiron, Latitude. OptiPlex, Precision, Vostro) | Press F2 when the Dell logo appears. Press every few seconds until the message Entering Setup appears. |
| Older Dell desktops and laptops may instead use Ctrl+Alt+Enter or Del to enter BIOS. Or use Fn+Esc or Fn+F1. | |
| Lenovo (ThinkPad, IdeaPad, 3000 Series, ThinkCentre, ThinkStation) | Press F1 or F2 after powering on the computer. |
| Older Lenovo products use Ctrl+Alt+F3, Ctrl+Alt+Ins, or Fn+F1 to access to BIOS | |
| Sony(VAIO, PCG-Series, VGN-Series) | Press F1, F2 or F3 after turning on the computer. |
| Toshiba(Portégé, Satellite, Tecra, Equium) | Press F1 or Esc after powering on to access BIOS. |
| Press F12 on a Toshiba Equium. |
That’s all for how to modify boot order in Windows 7. If you need to boot your Windows 7 from CD/DVD/USB to run a system recovery program, Windows Boot Genius is a highly recommended program that can fix variety of booting issues including computer crashes, blue/black screen, random restarts, can't boot, and other Windows booting problems.