Reset A GateWay Computer to Factory Settings
As computers have continued to evolve, they have become a part of everyday life for many people. For one side, they do make life much easier, but they also have become more prone to issues such as viruses and corrupted files. Fortunately, most problems are simple to fix with a factory reset. To reset a Gateway computer to factory settings, users can resolve common computer issues, including viruses, corrupted files, and other software problems.
Restoring the computer to its factory settings is to put the system back to the settings which it had when it came out from the factory. With factory settings, unnecessary files will also not appear as the computer will be returned to its default state. The installation of the Gateway Computers Management software will enable the computer to return to its original settings. Keep reading on, we'd like to show you how to factory restore a Gateway computer to default settings.
Instructions to restore Gateway laptop to factory default settings without CD
Take the detailed tutorial below step by step to learn Gateway computer factory settings. This option completely erases the C: partition and reinstalls factory-shipped files from the recovery partition.
1. Remove all CDs or DVDs from the optical drives.
2. Turn off the computer, using the normal Windows shut down process.
3. After the computer is turned off, disconnect all USB devices except the keyboard and mouse. This includes USB devices such as a printer, scanner, removable storage, or camera.
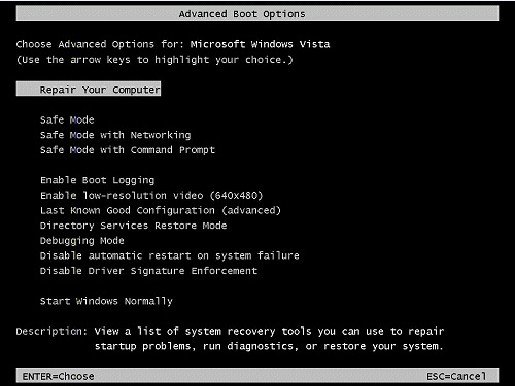
4. Turn on the computer. After the Gateway BIOS logo appears, repeatedly press the F8 key. The Advanced Boot Options menu opens.
5. On the Advanced Boot Options screen, use the arrow keys to select Repair your Computer, and then press the ENTER key.
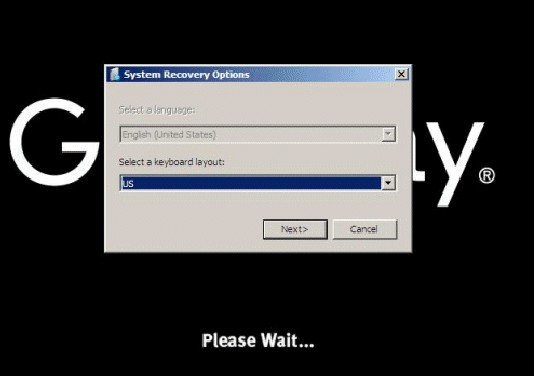
6. In the System Recovery Options dialog box, select the appropriate keyboard layout, and then click Next.
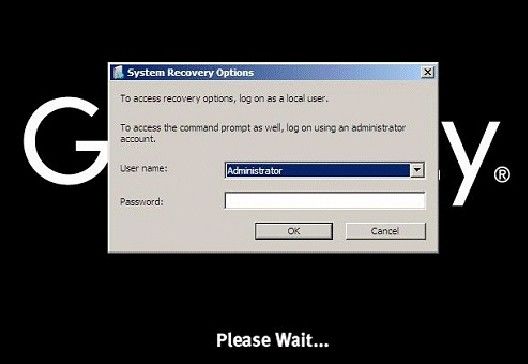
7. In the System Recovery Options dialog box, click the down arrow to select a user account that has Administrator rights, then click OK.
8. In the System Recovery Options window, select Recovery Manager.
9. In the Gateway Recovery Center window, click Next.
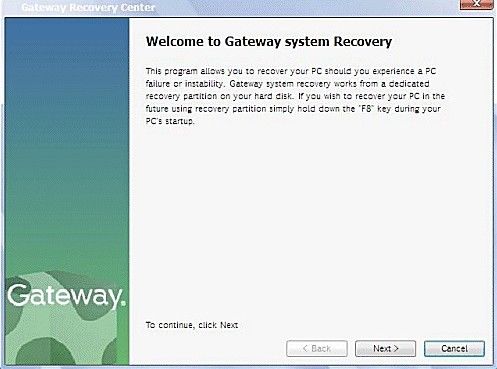
10. In the Gateway system recovery window, select Full factory recovery.
11. In the All data will be lost window, select Yes, and then click Next.
12. The Windows partition is formatted and Windows is installed.
13. In the Recovery is complete window, click Finish.
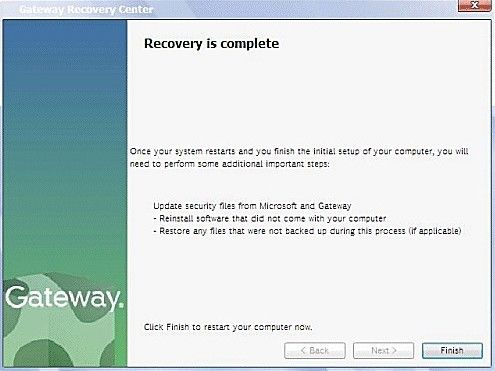
14. In the System Recovery Options window, select Restart.

15. The computer restarts.
16. Windows prepares to start for the first time. This may take a few minutes.
17. Drivers and applications are installed. This process will take several minutes. The more drivers and applications that need to be installed, the longer the process will take.
18. In the Set Up Windows screen, select the appropriate options and then click Next.
19. In the Please read the license terms screen, check I accept the license terms, and then click Next.
20. In the Choose a user name and picture screen, enter the appropriate information and then click Next.
21. In the Type a computer name and choose a desktop background screen, enter the appropriate information, and then click Next.
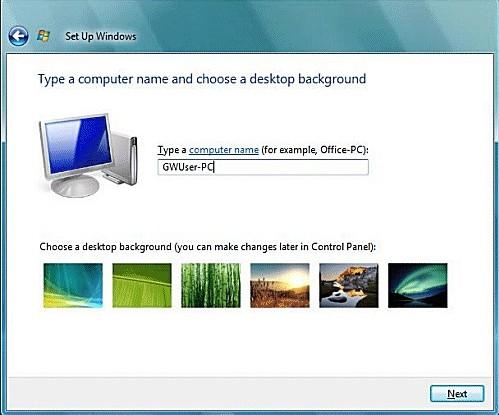
22. In the Help protect Windows automatically screen, select Use recommended settings.
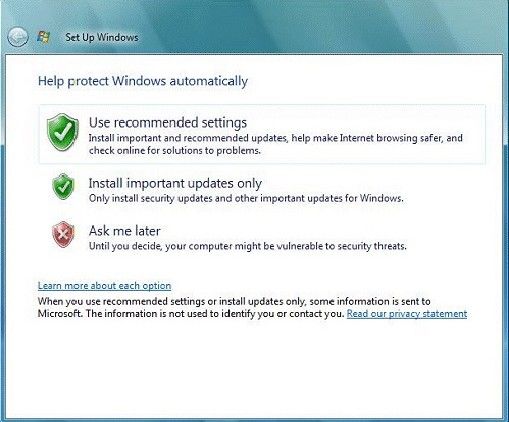
23. In the Review your time and date settings screen, enter the appropriate information and then click Next.
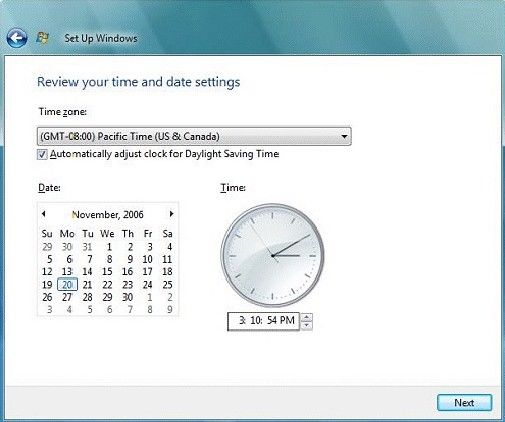
24. In the Thank You screen, click Start.
25. Windows checks the computer's performance. Depending on hardware, this process could take from 3 to 15 minutes to complete.
26. Windows prepares the desktop.
27. Installation is complete. Any application that shipped on a separate CD can now be installed. It is recommended to update the antivirus definitions and perform Windows Updates.
Till now, the steps to restore Gateway laptop/PC back to factory settings are fully finished. For other computer tips and Windows tips, like black screen of death, blue screen of death, Windows users profile service failed to login error, just feel free to resort to help at: https://www.windowspasswordsrecovery.com/.