What is Partition Hard Drive?
After installing a hard drive, you must partition it (and then format it). To partition hard drive means to divide the hard drive into parts and make those parts available to the operating system. Multiple partitions on a hard drive appears separate drives to the operating system. The ability to partition hard drive can provide a handful of benefits: keep your files well organized, provide Windows a more efficient way to index files, enhance your computer performance and secure sensitive information.
How to Repartition Hard Drive?
If there is a single partition that takes up the entire hard disk and you want to repartition the hard disk into two or more smaller partitions, you need to repartition hard drive. However, partitioning your drive after installing an OS is typically a destructive proposition -- one that usually involves backing up your data, formatting, and starting clean.
Fortunately, you can repartition your existing hard disk any way you want if you utilize a useful software application. Windows Boot Genius with a Partition Editor option can be used to resize partition (including shrink partition and extend partition), create partition, delete partition, split partition, merge partitions, hide partition and format partition without putting your data in jeopardy.
In this guide, we'll look at resizing an existing volume, as well as creating and deleting partitions, and other repartitioning without losing existing data.
Part I: Preparation for Repartitioning
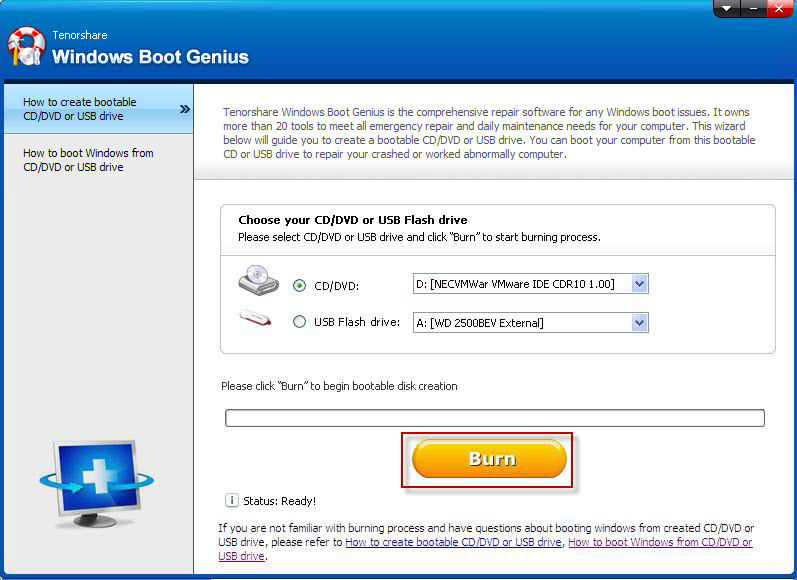
- Step 1: To begin, we must burn a bootable disk. Insert a blank CD or USB flash drive to your computer, then launch Windows Boot Genius. Click "Burn" to burn a boot disk.

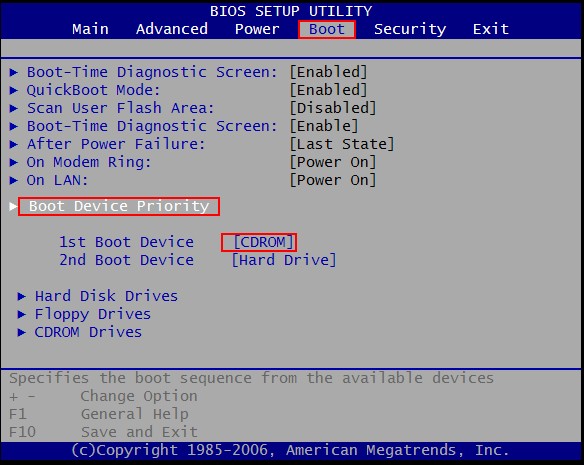
- Step 2: Set CD or USB as your first boot device in BIOS. And let your computer boot from the newly burned CD/USB.

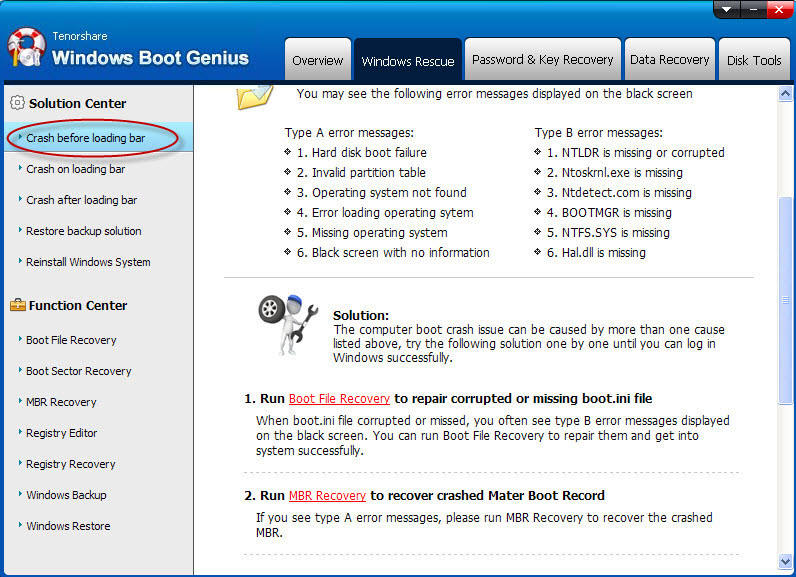
- Step 3: After the system fully loads, launch Windows Boot Genius. Select "Disk Tools" –> "Partition Manager".

Part II: How to Repartition Hard Drive?
Section 1: How to Resize Partition (including shrink partition and extend partition)?
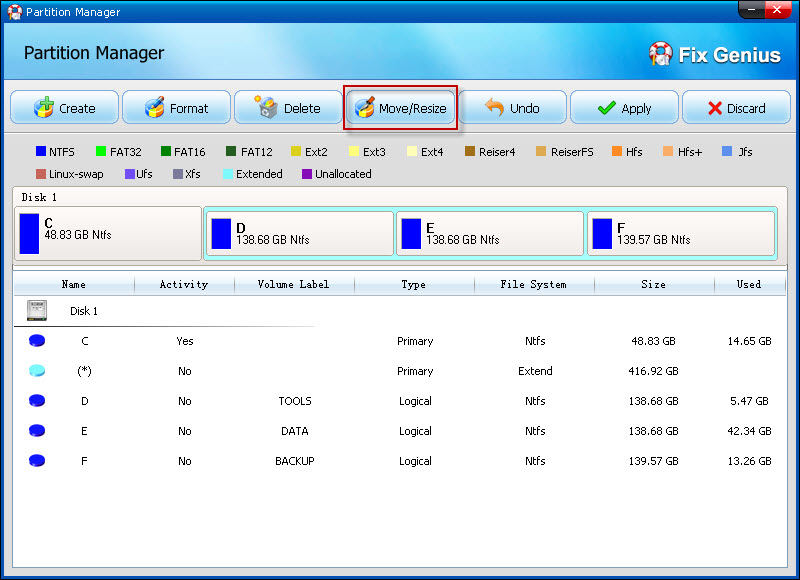
To manage hard disk better and maximize the performance of your computer, you can resize partition like extend partition or shrink partition as you like.
- Step 1: Select the partition you need to shrink or extend. For extending partition, please make sure there is unallocated space and it is next to the partition you need to operate.
- Step 2: Drag the slide bar to set partition size, or directly enter the number. Click "OK".
- Step 3: click "Apply".
Section 2: How to Create Partition?
You can create a new partition to help you efficiently organize files on your computer and reduce the chance of accidental data loss.
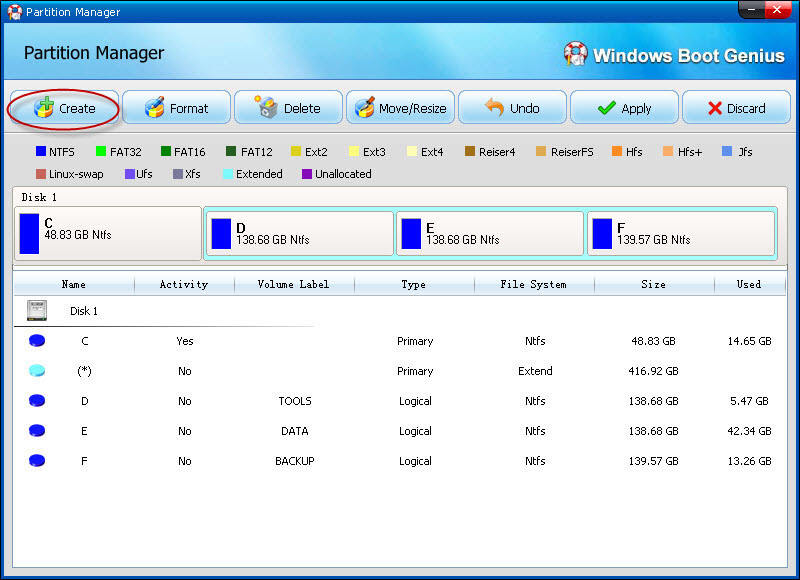
- Step 1: Select the unallocated space in the partition list, and click "Create" button on the top menu.
- Step 2: Enter or select Partition Type (Primary or Logical Partition), partition size, file system for this partition, volume label, drive letter, and specify the drive active or not. And then click "Yes".
- Step 3: Click "Apply".
Section 3: How to Delete Partition?
To free up disk space for use elsewhere, you can delete partition that is unnecessary any more.
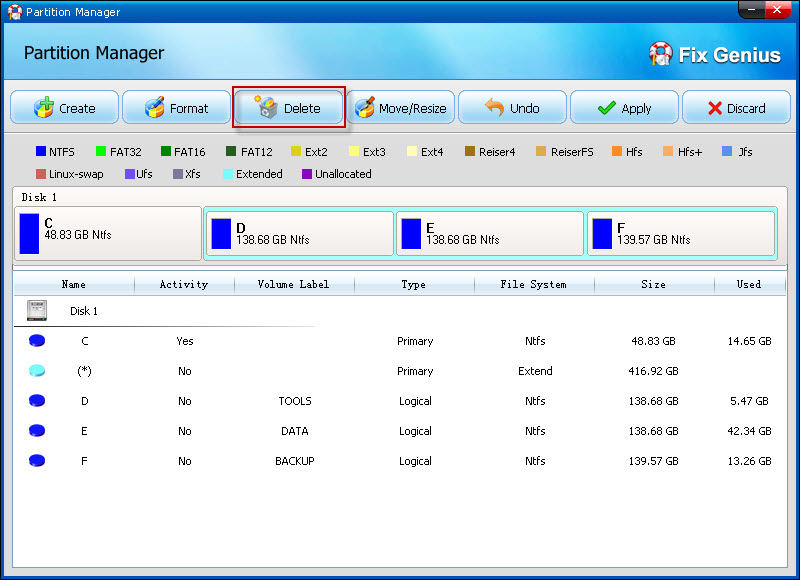
- Step 1: Select the one you need to delete in the partition list, and choose "Delete".
- Step 2: Click "Yes" and "Apply" respectively in the next two popups.
Section 4: How to Split Partition?
If you are considering setting up dual-boot OS on your computer or need more than one partition to save system program and personal data separately, to split partition becomes very valuable.
You can shrink a partition, and then create a new partition on the unallocated space you just released. In this way you can split a partition into two ones.
Section 5: How to Merge Partitions?
Merge partitions to undo a previous split, or decrease the number of partitions if you already reached the maximum number of partitions.
To merge two partitions, firstly delete one partition, and then extend the other one to take up all the space of the former one occupied just now.
Section 6: How to Format Partition?
When you need to upgrade your file system for a new operating system or just want to erase a drive or a partition, you can format partition.
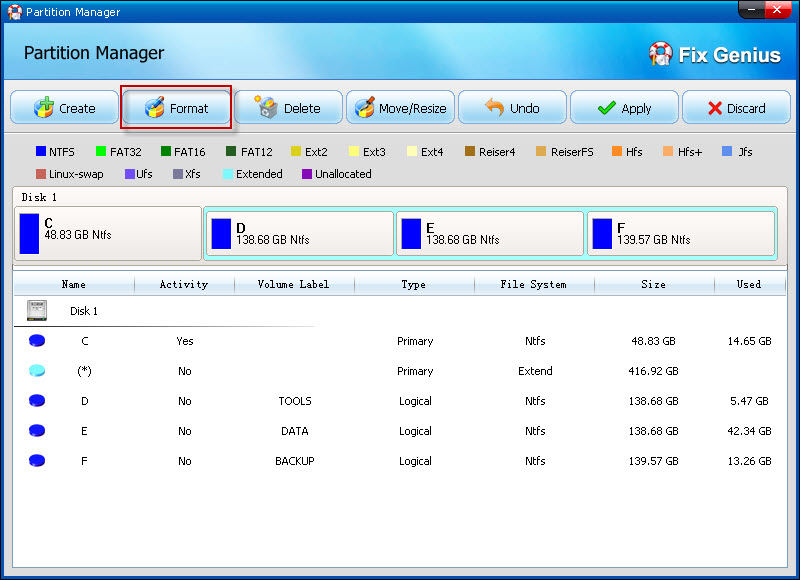
- Step 1: Select the one you need to format, and choose "Format".
- Step 2: Specify some information of this partition, like file system, drive letter, and allocation unit size.
- Step 3: Choose "Apply".
Section 7: How to Change File System?
Each file system has its advantages, as well as disadvantages. FAT 32 can be recognized by all versions of Windows after Windows 95 and most non-Windows operating systems, however, NTFS which is not supported in some earlier version Windows features more powerful functions than FAT or FAT 32, such as Active Directory and domain–based security, etc. You can convert FAT 32 to NTFS with this partition hard drive software.
- Step 1: Highlight a FAT partition, and right click and select "Change File System".
- Step 2: Select "NTFS" from the drop-down list.
- Step 3: Click "OK" and "apply".
