UltData (iPhone Data Recovery for Mac) allows you to recover lost or deleted data (including call history, contacts, messages, SMS attachments, notes, safari, calendar, reminders, voice memos, camera roll, photos, and videos) from your iPhone without backup or restore files from iTunes backup. It also helps you repair your system with simple clicks. Now it is available for iPhone7, red iPhone 7Plus, iPhone 6, iPhone 6 Plus, iPhone 5s, iPhone 5c, iPhone 5, iPhone 4s on Mac.
Here are step-by-step user guide of this Mac iPhone data restore software. Select appropriate recovery mode for you. Before using it, you have to download UltData (iPhone Data Recovery for Mac) at first.
Part 1. Recover Lost iPhone Data without Backup
If you accidently lost data from iPhone but have no iTunes or iCloud backup file. "Recover Data from iOS Devices" is the perfect solution for you. You can recover lost or deleted iPhone data with just one click by using this mode..
Step 1.Connect your iPhone to Mac
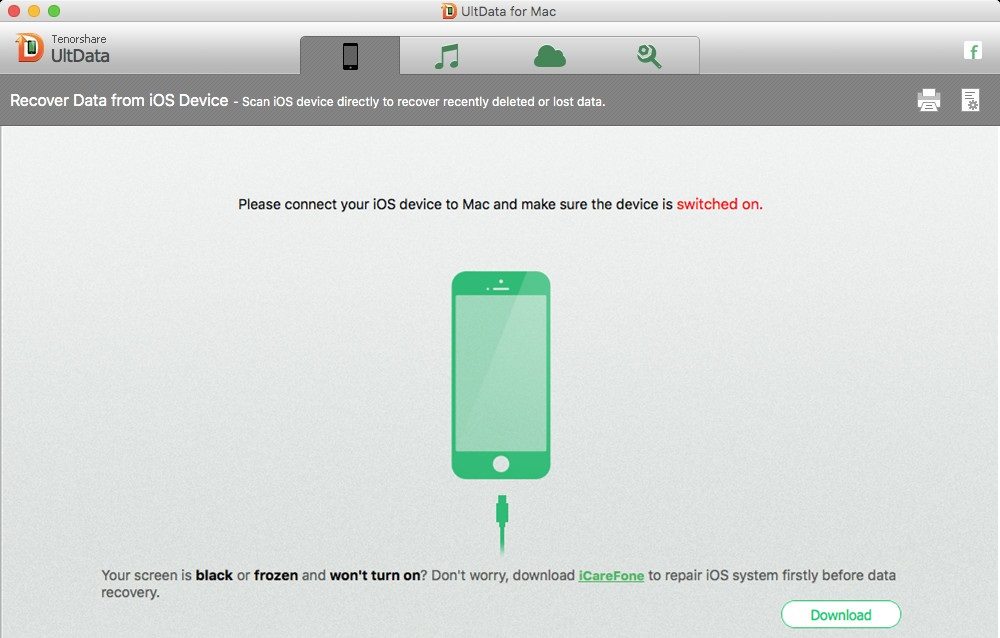
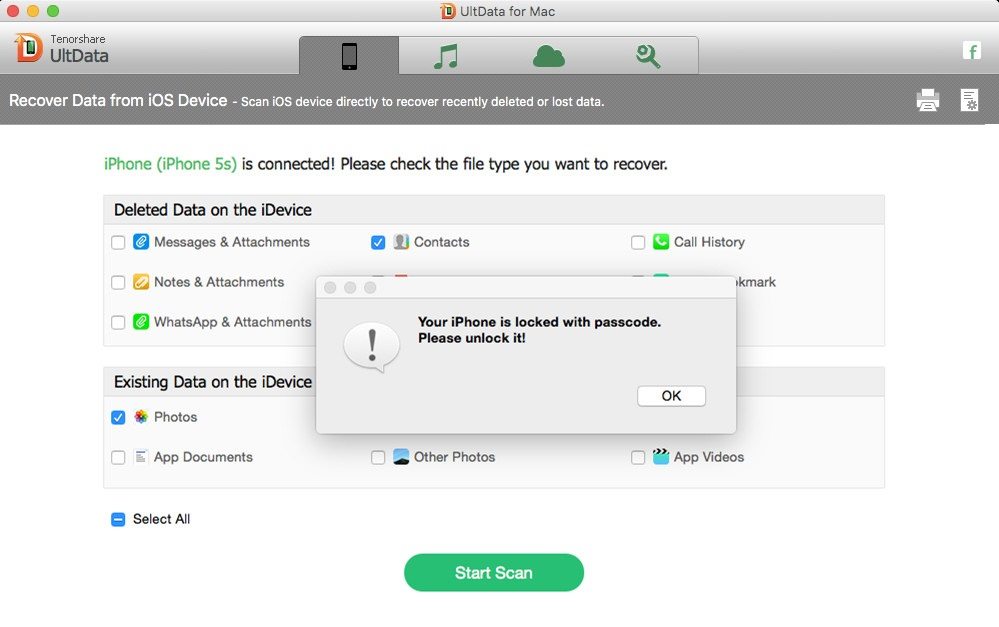
Launch UltData (iPhone Data Recovery for Mac) and connect iPhone to Mac. The application will default select "Recover Data from iOS Device" mode for you.
Note:
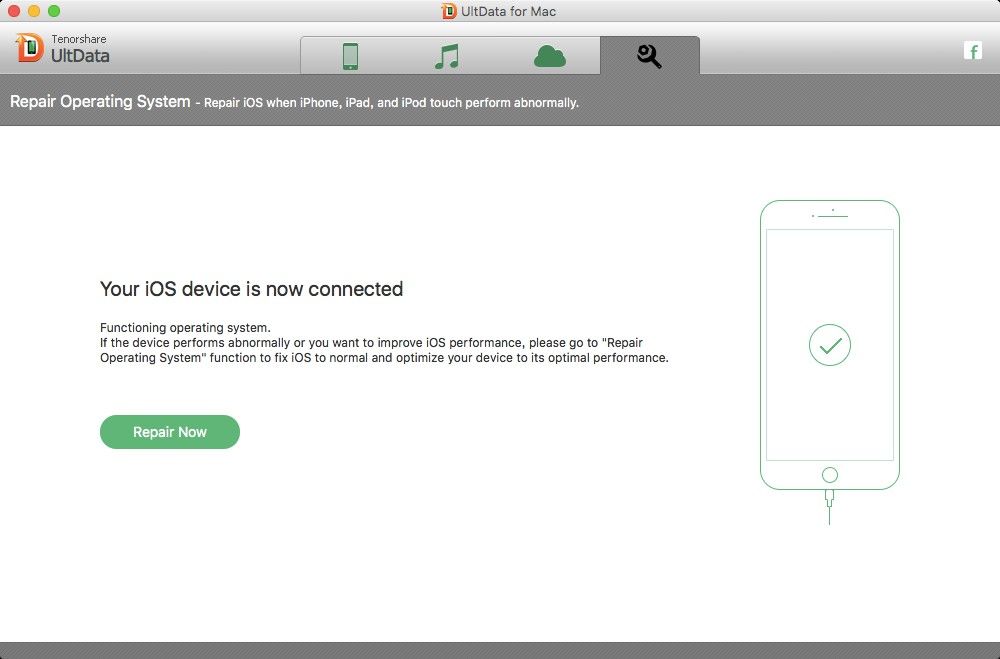
If your iPhone screen is black or frozen and won't turn on, you can click “Repair Operating System” to fix the stuck issues.
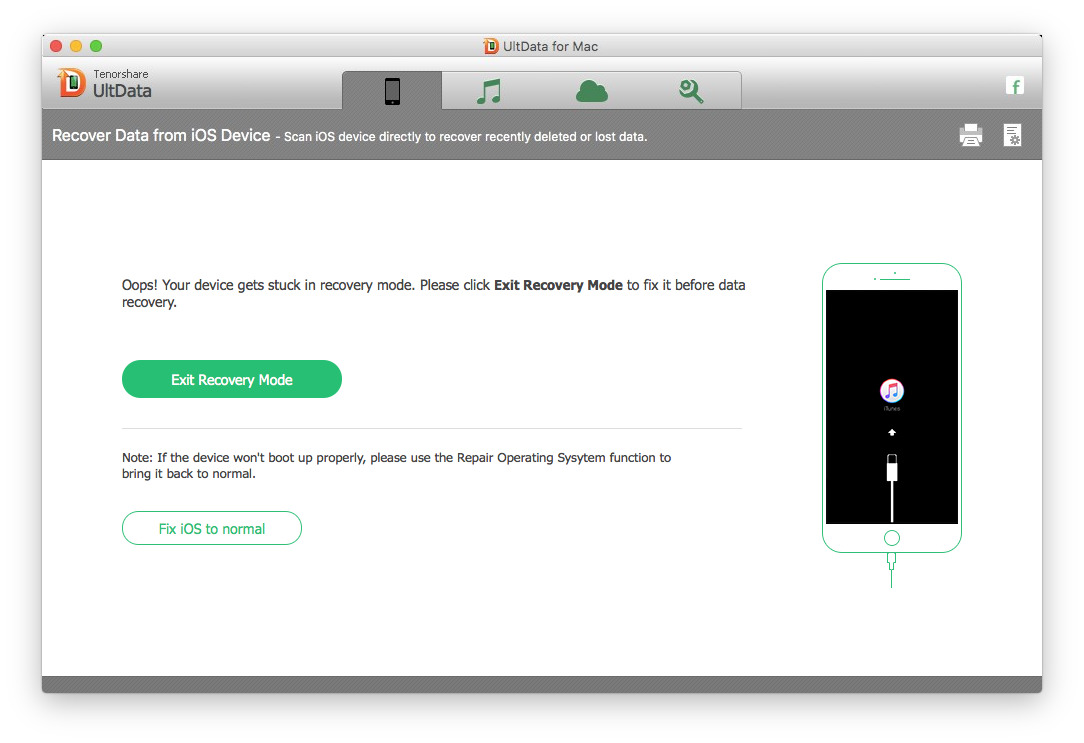
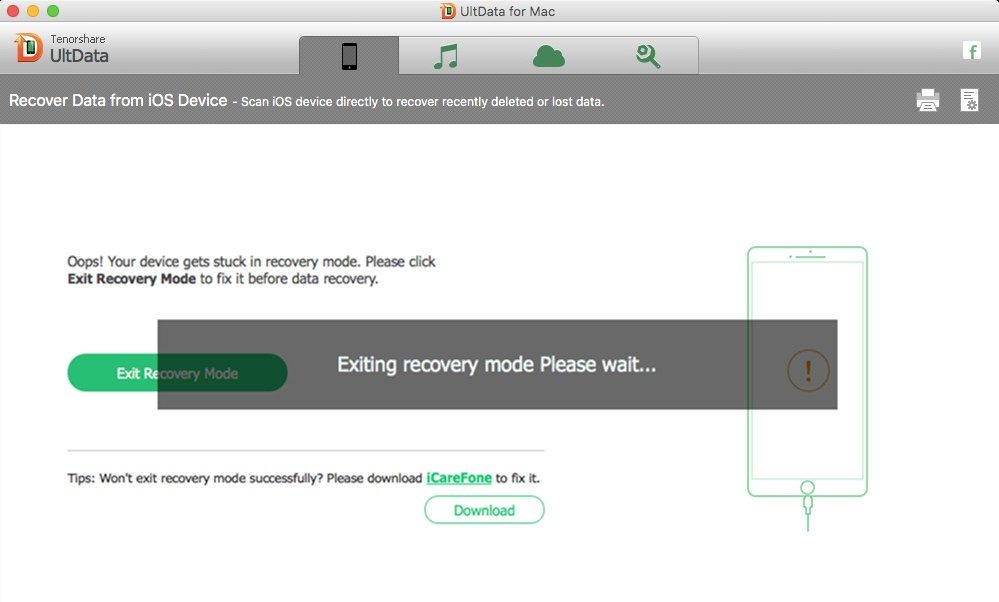
If your iPhone get stuck in recovery mode, you can click the "Exit Recovery Mode" button to fix it before data recovery. And then connect iPhone to the data recovery tool again.
After that, you have to wait until your iPhone exit recovery mode successfully. And then connect iPhone to the data recovery tool again.
Step 2.Start to Scan iPhone in alternative
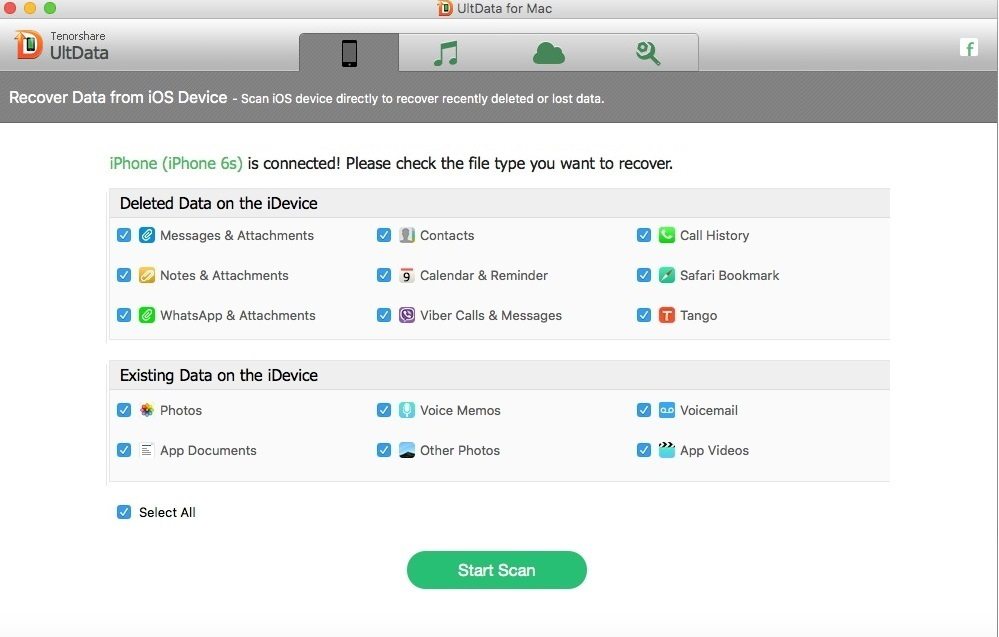
After your iPhone connect to the software normally, you can see all the data type in your iPhone. Choose the target data type that you want to recover and then click "Start Scan" on the main interface. You can also check "Select All" to directly start scanning your all the files on your iPhone including existing ones and deleted ones.
Note:
The program needs some time to recognize your device, thus if you plug your device but the software crashes or "Start scan" Button grays out, simply restart the program.
Remember that if your iPhone is locked with passcode, you need to unlock iPhone passcode first of all.
Step 3. Preview and Recover Lost Data on iPhone
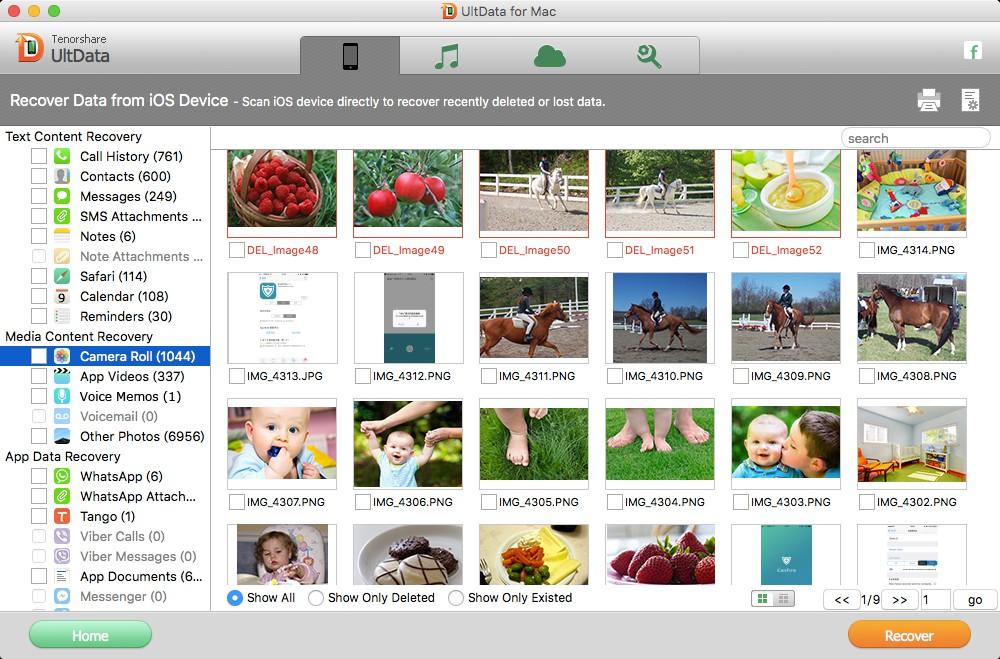
The program scans your file automatically and lists all your selected files in categories such as call history, contacts, messages etc. after scanning. Click on category and preview all of them. Select the wanted ones and click "recover" to restore them.
Step 4. Save the Recovered Data on Mac
Select a location to save your recovered data. Text files such as contacts, text message, call history etc. will be saved as .xlsm/.xls/.txt etc. file. Media files such as photos will be saved as its original formats.
Part 2. Extract iPhone Photos, Messages, Contacts from iTunes Backup
If you have synced your iPhone 5s, iPhone 5, iPhone 4s with iTunes before, you can select "Recover Data from iTunes backup file". It will recover previous data by extracting iTunes backup files in only three steps. So even you lost or broke your iPhone, you can still restore lost data previously stored on it.
Note: Don't sync your iPhone with iTunes after losing data because iTunes will update the backup file when you sync with it automatically.
Step 1. Choose iTunes Backup File
Select the iTunes backup file you want to recover. All iTunes backup files of your iPhone synced with iTunes on this Mac will be listed here. Click "Start Scan" to extract iTunes backup file. (Note: If your iTunes backup is locked, please refer to how to unlock iPhone backup password on Mac).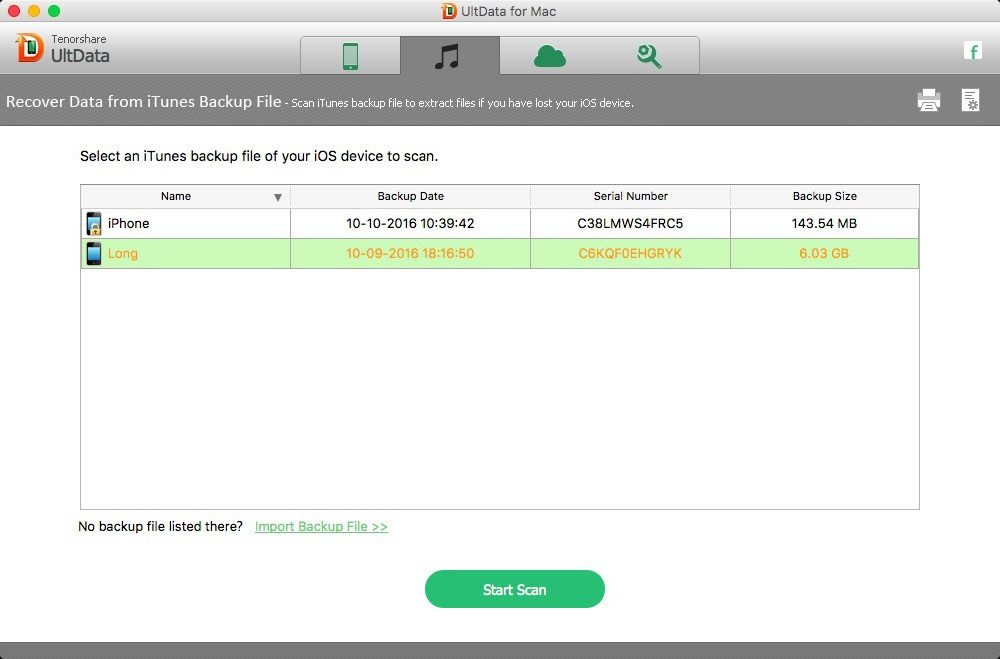
Step 2. Preview and Restore Lost Data on iPhone
After the scanning, all your data will be listed in categories such as call history, contacts etc. Click the category to preview them. Then check the wanted ones and recover them by clicking "Recover".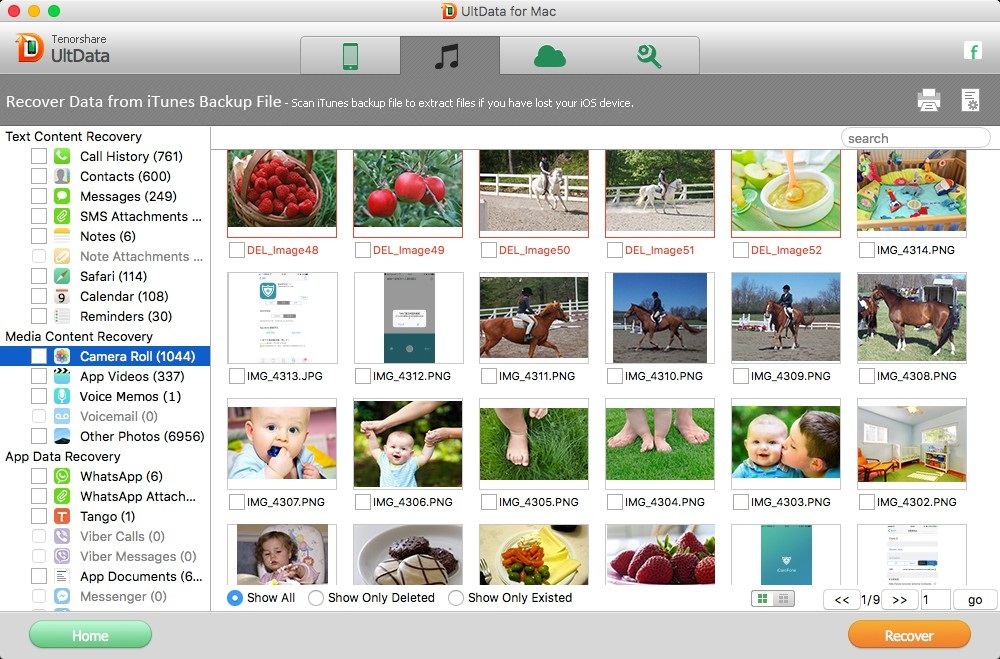
Step 3. Save Recovered Data on Mac
Specify a location to save your recovered data on your Mac. Text files such as contacts, notes will be saved as .xlsx /.xls/.txt etc. file. Media files such as photos will be saved as its original formats.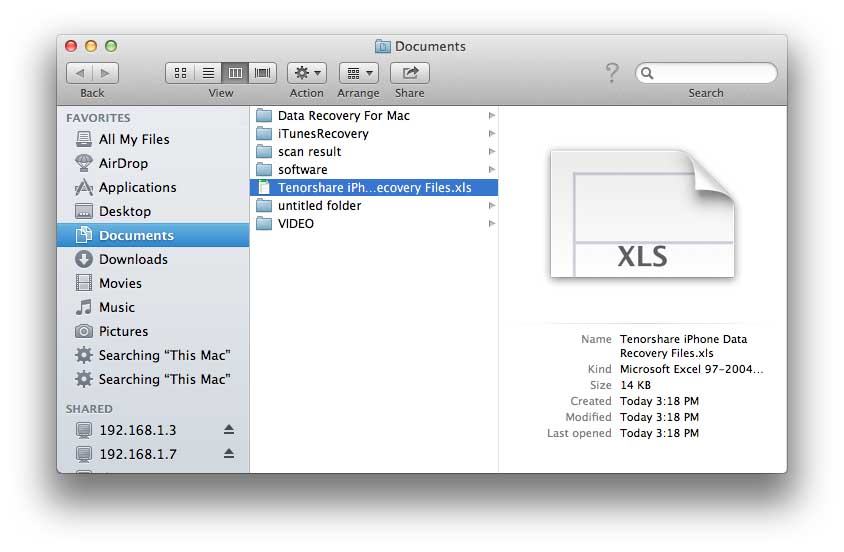
Part 3. How to Restore iPhone Data from iCloud Backup
If you have backed up your iPhone data with iCloud, you can restore iPhone data from iCloud backup as well. This mode allows you to recover files from iCloud selectively.
Step 1. Login in iCloud Account
Then you will get the interface like below. Enter your Apple ID and password to login into iCloud account.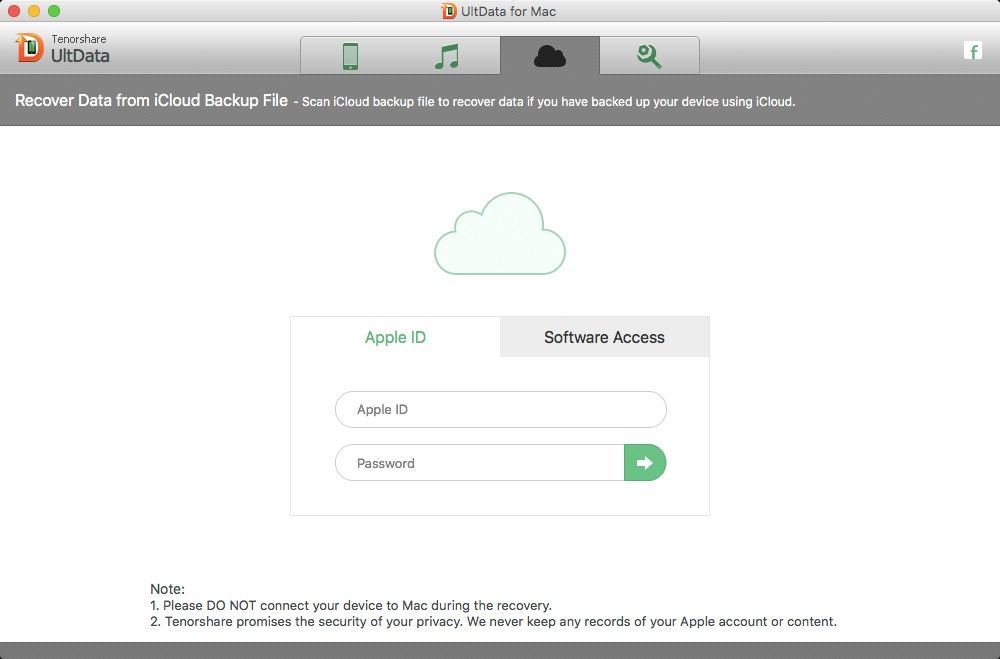
Step 2: Download and Scan iCloud backup
All individual iCloud backups are listed here. According to backup name, date, size, select the one you need and click "Next". 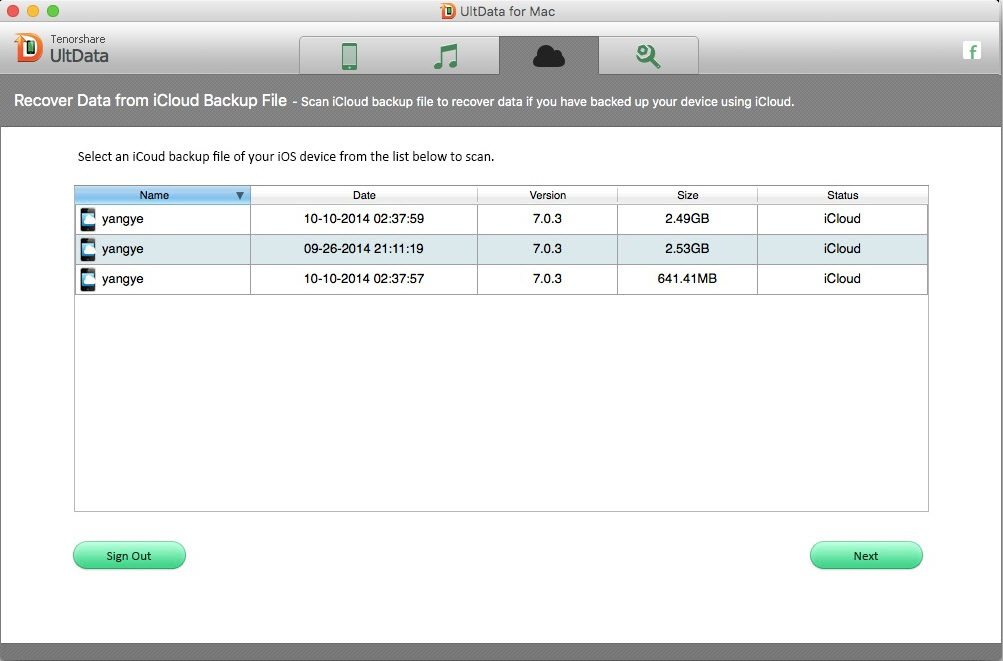
Select the file types you want to restore and click "Next", and then start the downloading. The downloading time varies based on the size of the backup file. Click "OK" when it completes. 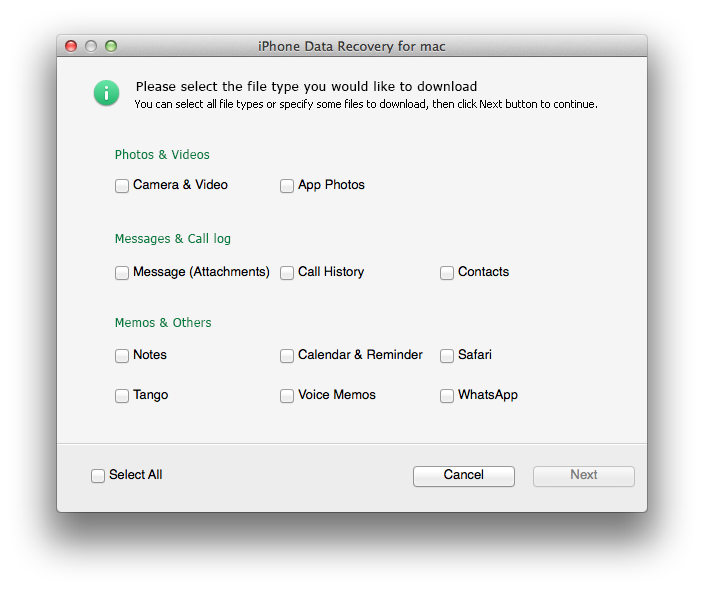
Step 3: Preview and Recover Lost iPhone Data
After a while, all the recoverable data are displayed by category. Select one file type on the left, and then preview and select the files you need to recover. Click "Recover" to save the recovered files on your Mac. Again, for text content like contacts, text messages, call history, they are saved in .xls, .xml, .txt file (contacts can be saved as VCF/Vcard files as well). For media file (photos, videos, audios), they are saved in their original formats.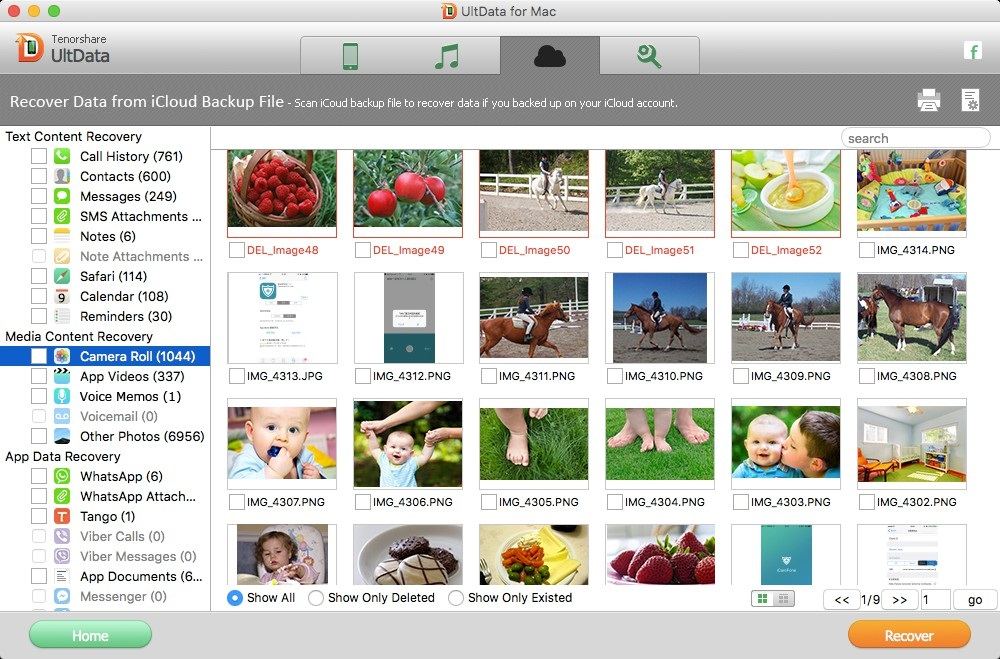
All above are 3 modes of UltData (iPhone Data Recovery for Mac). Just choose one according to your condition. But we are sure that all of them are security and efficient.
Part 4: Repair Operating System
The latest version of UltData (iPhone Data Recovery for Mac) can help users to fix iOS crash, stuck screen and other iOS system problems after jailbreak or restore without losing current data. Here are the detailed steps of repairing operating system:
Step 1: Connect iPhone to computer and you will enter into the standard repairing mode. Select “Repair Operating System” on the main interface. Then click “Repair Now” to start the process.
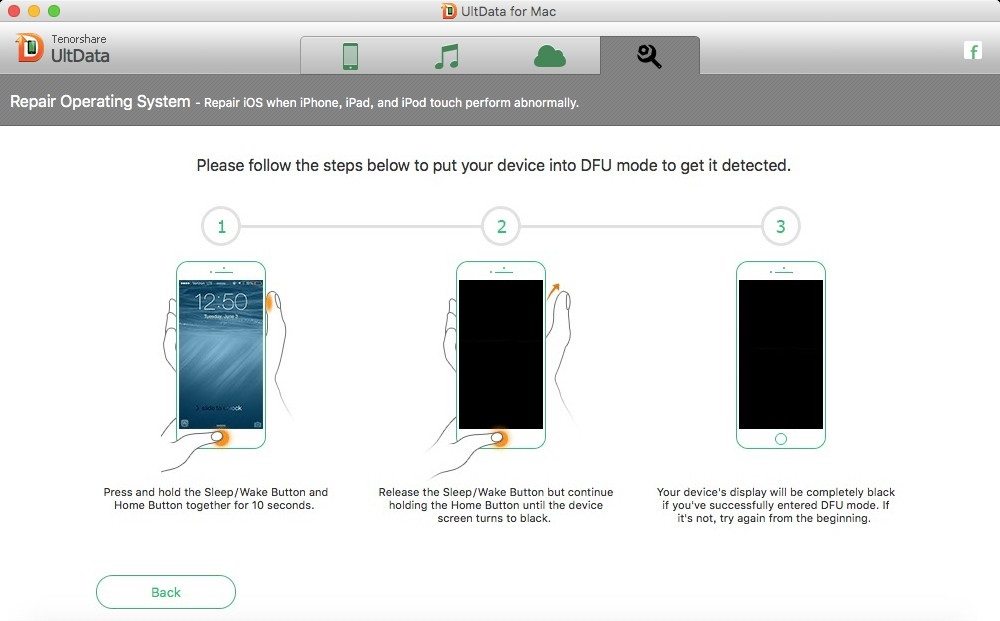
If your device cannot be detected, you need to put your iPhone into recovery mode or DFU mode. Press “Start” and the software will show you the detailed steps to enter recovery mode. If you failed that, you could get your device into DFU mode to get it detected. Just click “enter DFU mode” to get the steps.
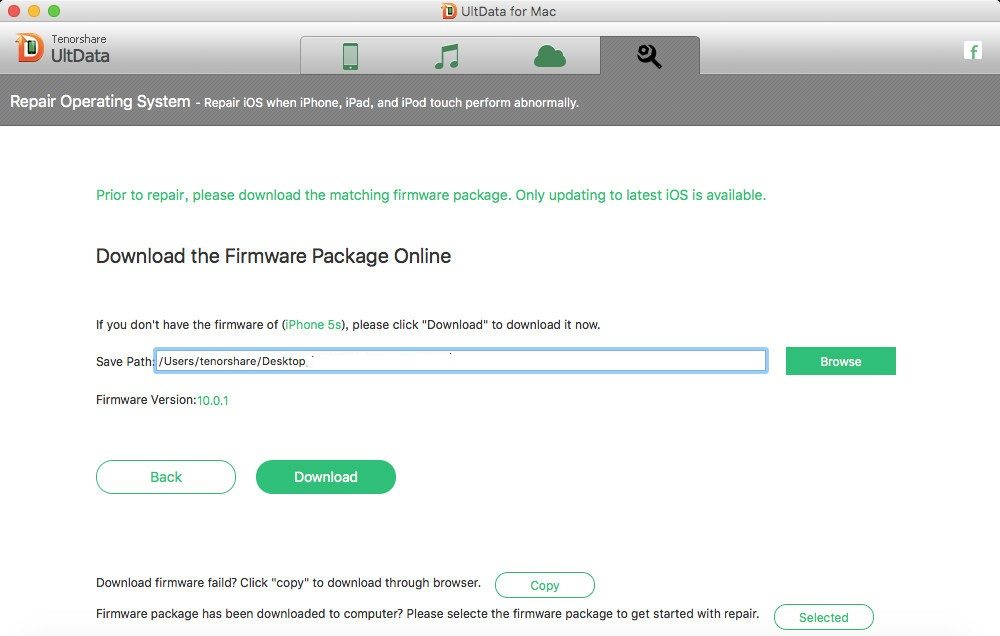
Step 2: After entering DFU mode, you are allowed to select a path to save the firmware package before downloading. Click “Download” to start downloading.
Note:
1. If the download failed, you can press “Copy” on the bottom to download package from browser.
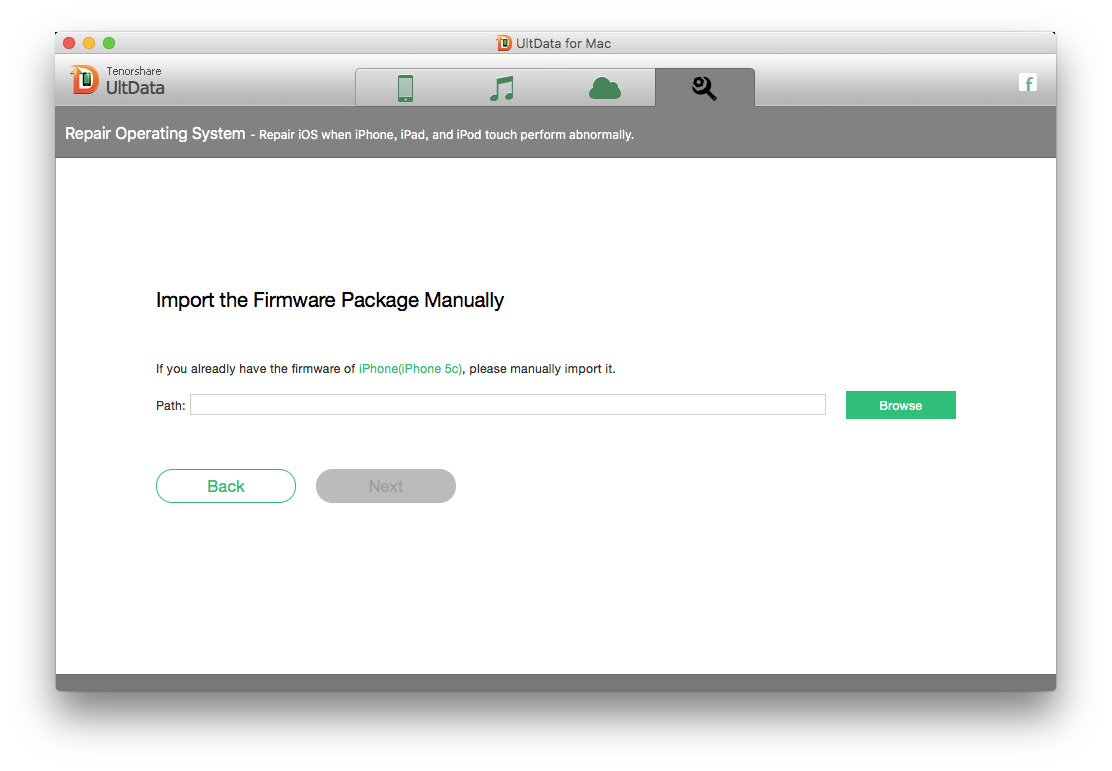
2. If you have already downloaded firmware package in your computer, click “Select” and import it manually.
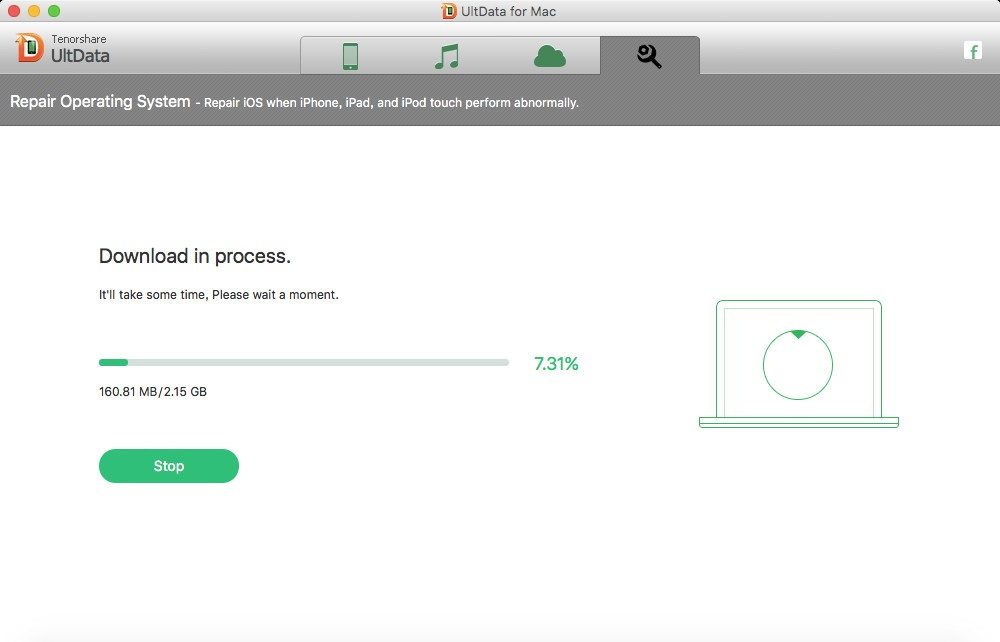
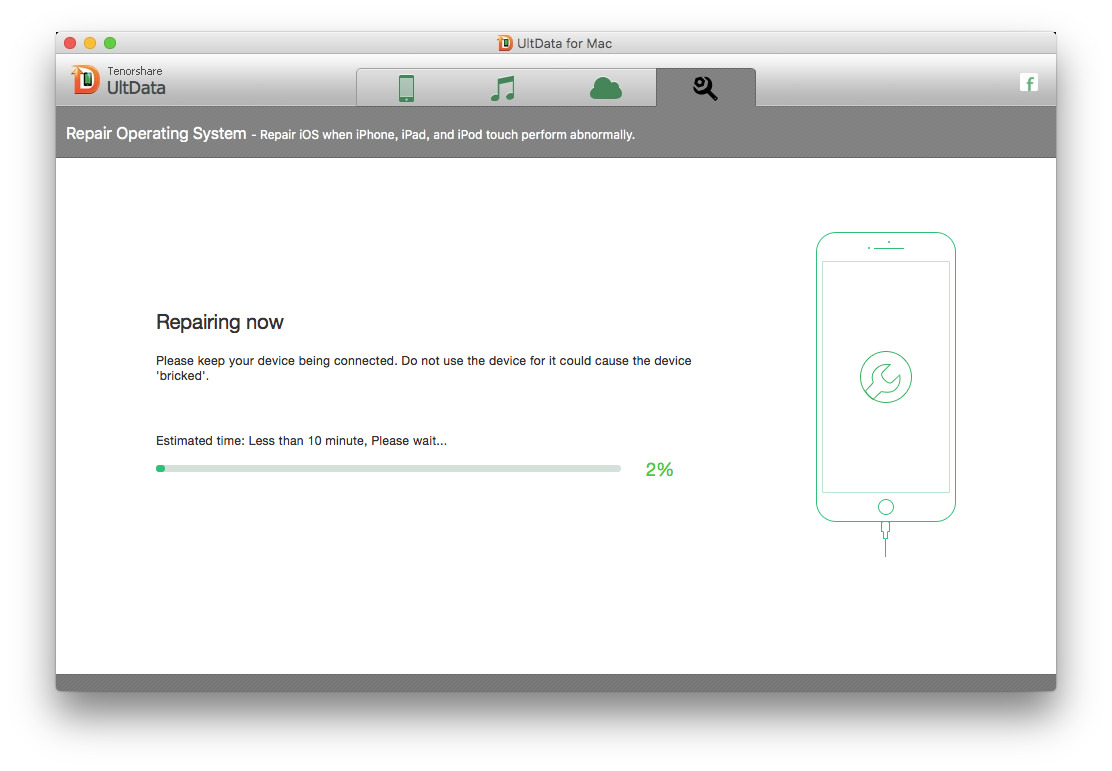
Step 3: When the download process is finished, the software will start repairing automatically. After a while, you can see a notice telling you the repair is done.
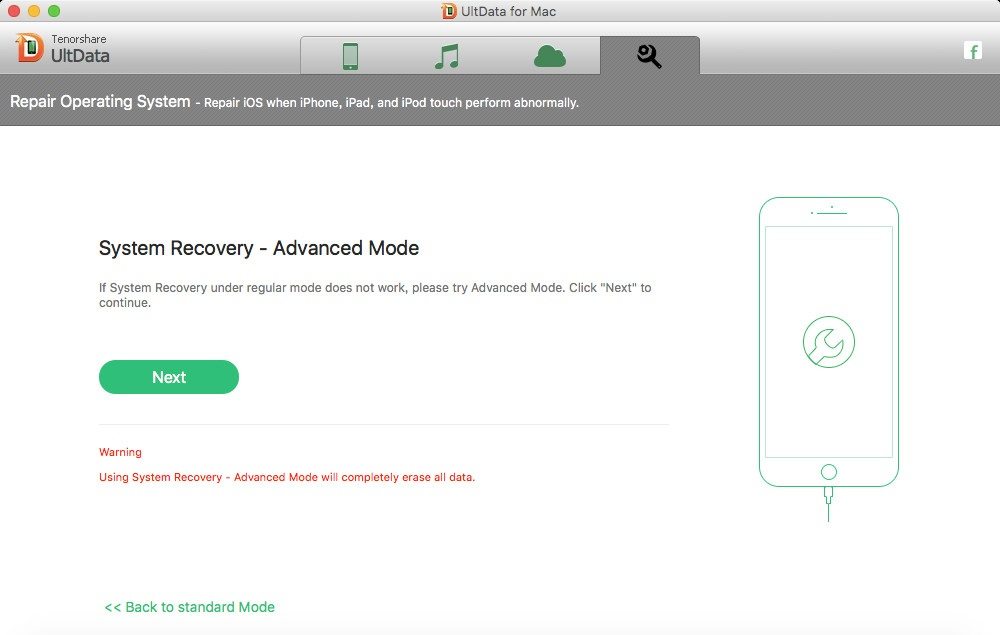
If the repairing is not successful, you can repair it again or choose the advanced mode for repairing. But you need to back up your device as this method will erase all your data.
UltData offers you three ways to recover lost data and helps you repair operating system with ease. Free download this amazing tool to have comprehensive understanding.
Sounds Good? Get " UltData (iPhone Data Recovery for Mac) " Now!
If you have any questions about this program, please contact us, We provide lifelong technical support and upgrade service.
