UltData (iPhone Data Recovery) recovers up to 20 types of files (including contacts, text messages, photos and videos) from red iPhone 7/7Plus/SE/6s/6s Plus/6/6 Plus/5s/5c/5/4S.The iPhone Data Recovery software offers you 3 methods for recovery: recover directly from your iOS devices, restore from iTunes backup and recover from iCloud backup. It also allows you to repair operating systems with ease.
Download UltData (iPhone Data Recovery) to your computer and the following guide will take iPhone as an example to show you how to recover lost or deleted data from iPhone and repair iPhone systems.
Part 1. Recover Data from iPhone, iPad and iPod without Backup
Lost data after iTunes update, iOS upgrade, factory settings, etc.? UltData (iPhone Data Recovery) allows you to scan iOS device and directly retrieve lost photos, voice memos, SMS, etc from your device.
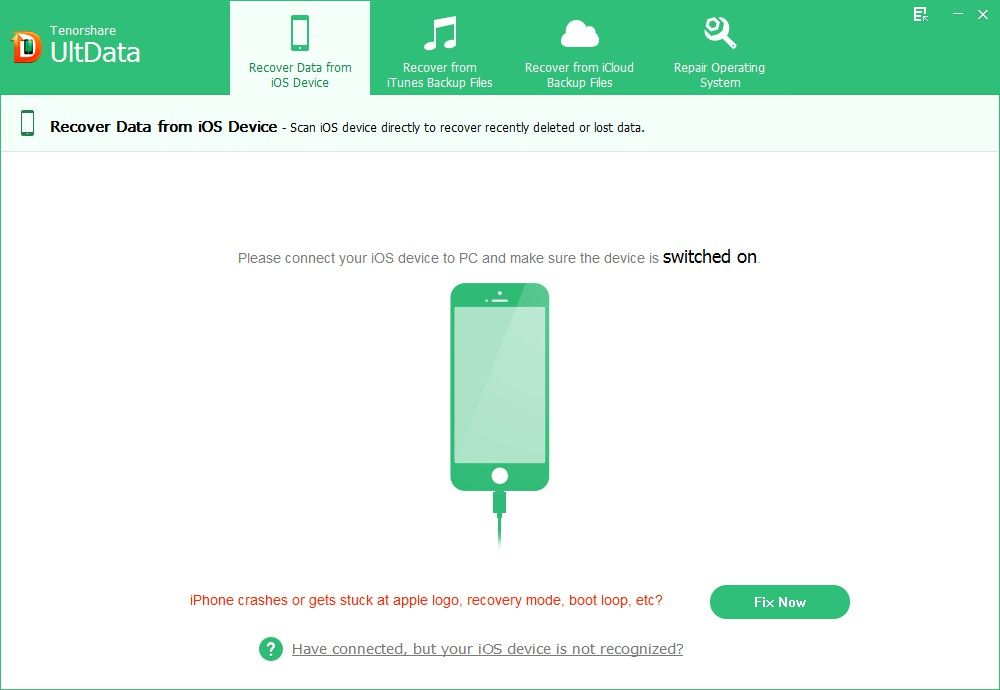
Step 1. Connect iPhone to Computer
Run UltData (iPhone Data Recovery) on your Windows computer and connect iPhone to this computer via a USB cable.
Important Note:
1. If the iPhone won't turn on, won't boot up, appear like Black screen or stuck at Apple logo, you can click “Repair Operating System” on the main interface to repair your device.
2. If the iPhone isn't in normal mode, just click "Restart the device" button to restart it. And then there will be a prompt that your device is restarting. Wait until your iPhone restarts successfully and connect it to computer and UltData (iPhone Data Recovery) again.
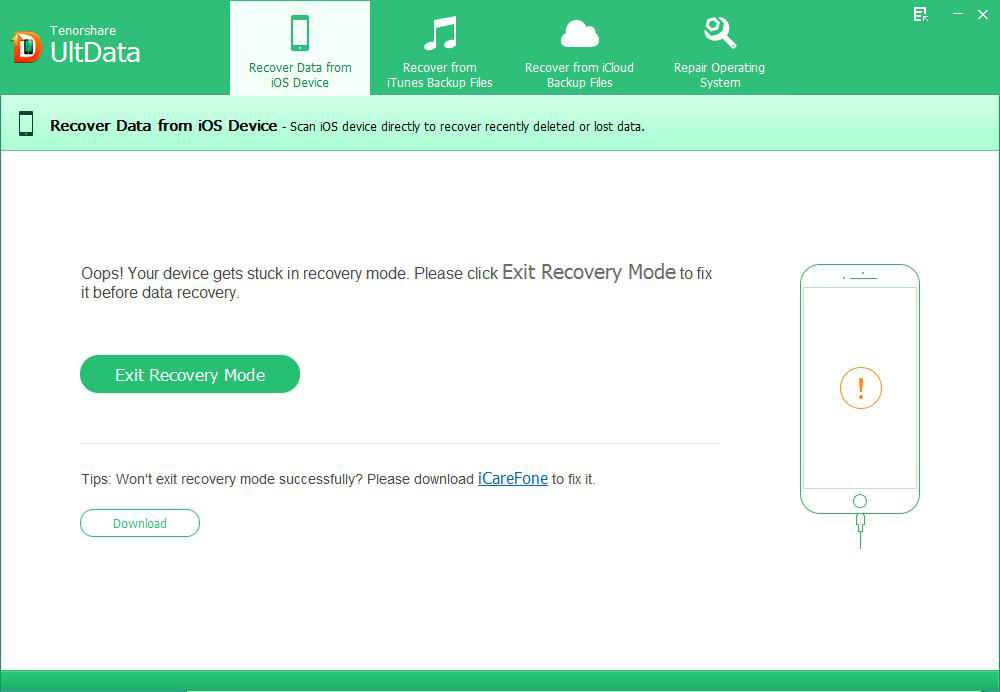
3. If the iPhone stuck at recovery mode, please click "Exit Recovery Mode" button showing in the software to exit recovery mode and then get the device back to normal mode.
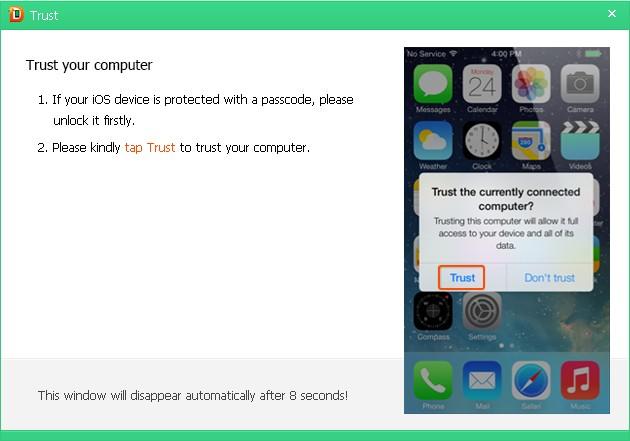
After connecting iPhone to computer normally, a window will pop up and ask you to unlock your device if it is passcode protected and trust currently connected computer. Simply move your fingers to unlock your iPhone and tap "Trust" on your device to trust the currently connected computer.
Step 2. Scan iPhone Data Selectively
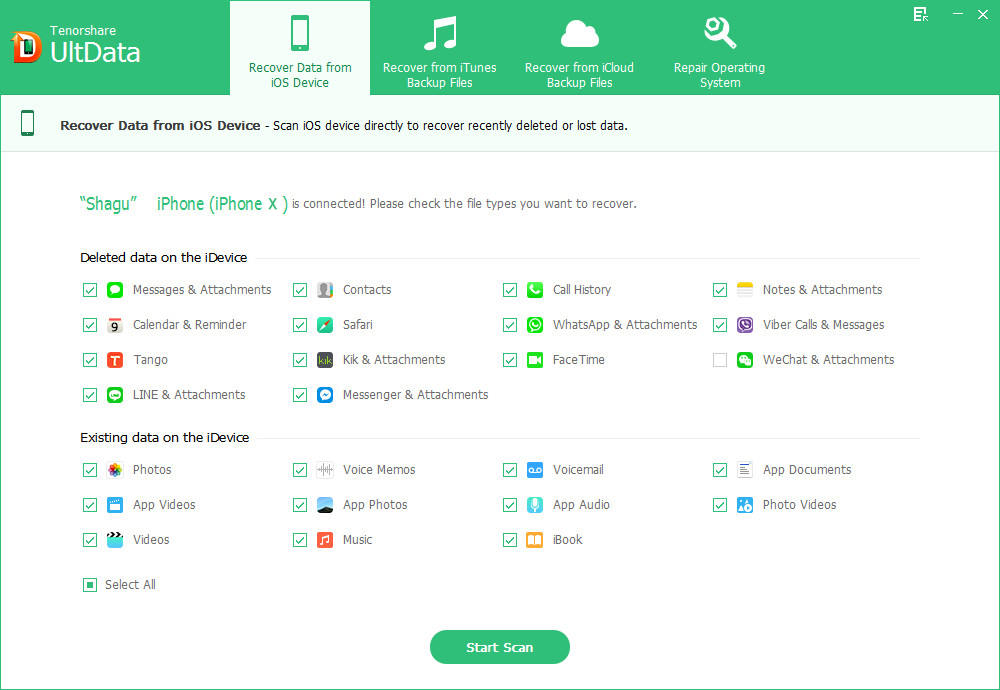
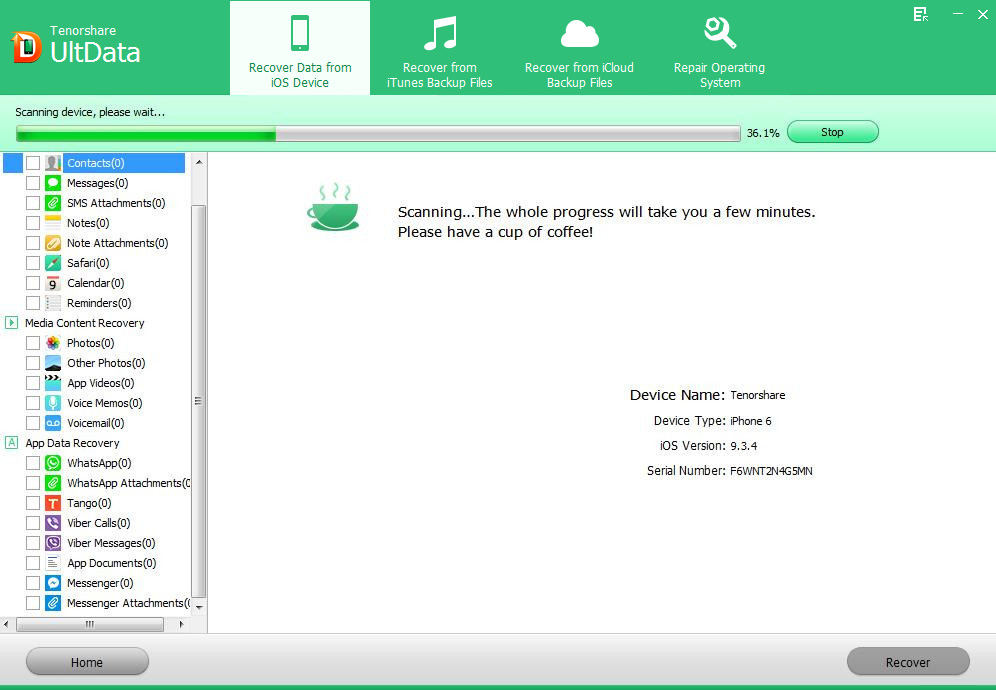
After that, you will see the deleted and existing data item list. Just choose your target type of data that you would like to recover. Then click "Start Scan" and the program will start to scan your iPhone for lost data.
Step 3. Preview iPhone Data before recovery
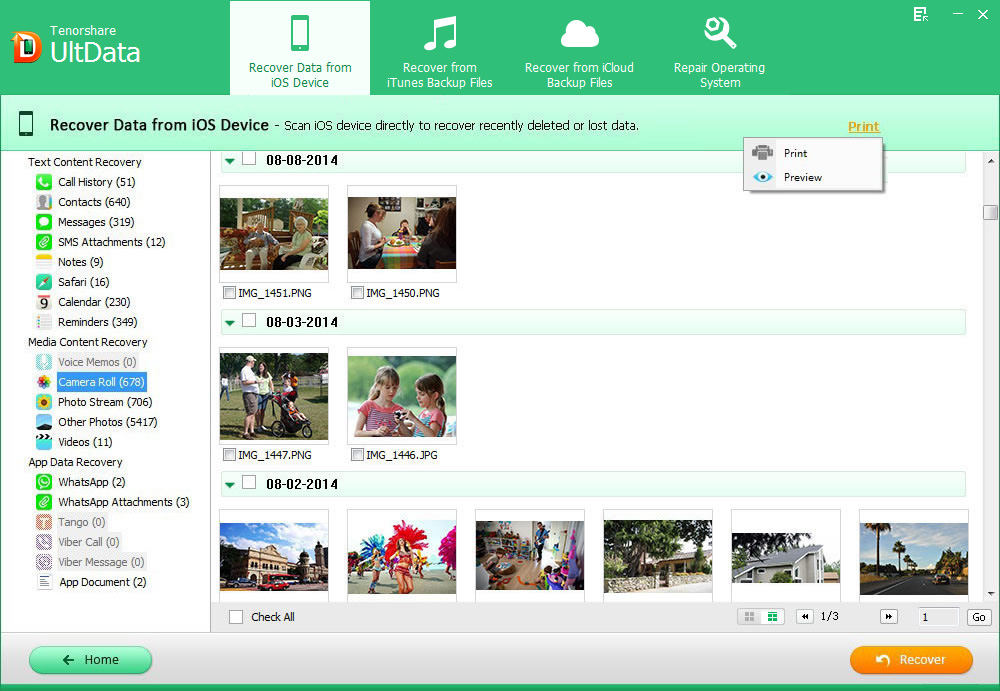
When the scanning is completed, all the recoverable data that you select will be listed here by category: Call History, Contacts, Messages, Calendar, etc. Just select a category to preview details.
Important Note: The previewable data include data on your iPhone and data that are already deleted. If you only need to restore deleted data, you can check the target item. This will save you the effort of searching all the files one by one.
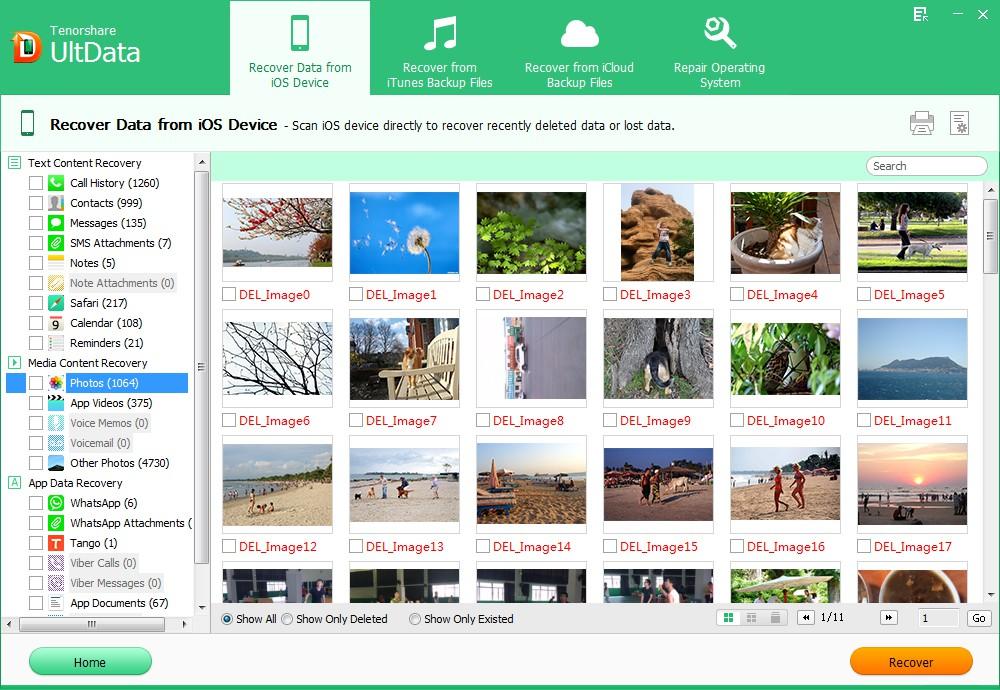
You can print photos, text messages, contacts and other files on your devices. Make sure your computer is connected to a printer, choose files you want to print and press the “Print” link on right of the top menu.
Click "Preview" to preview before printing.
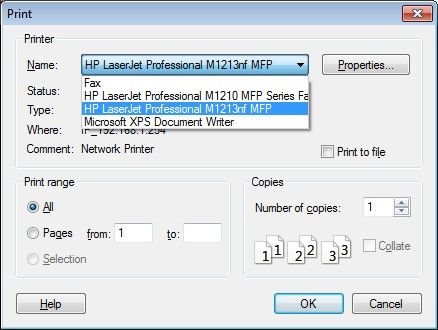
Click "Print" to to select printer name to print your files and start printing.
Step 4. Recover lost iPhone files
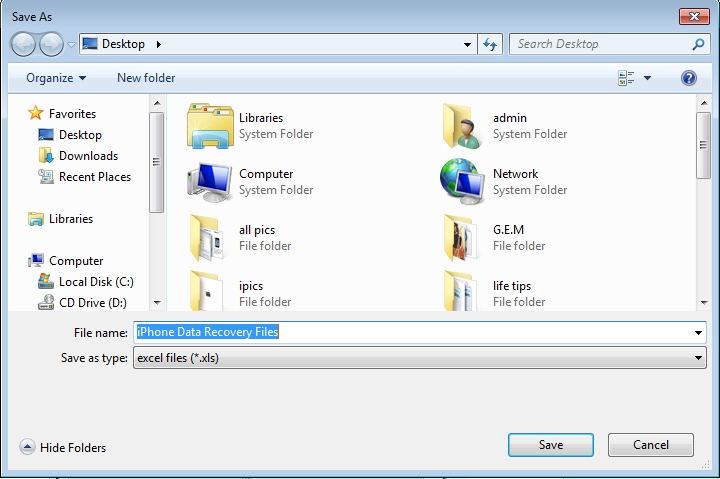
Check files you would like to recover and click "Recover" button at the bottom of the program interface. In the pop up window, specify a save path for the recovered files and click "Save". The recovered iPhone files will be saved in your computer as formats like .xls, .txt, or .xml, etc.
Part 2. Restore lost data by extracting iTunes backup
If you have backed up your iOS devices with iTunes before your data get lost, this mode is a great choice. This mode allows you to extract data from iTunes backup without needing your device. Even your device is lost or damaged; you can still use this mode to retrieve lost data.
Important Note: Make sure you do not sync your device with iTunes after you find your data is lost. Or the newly generated iTunes backup will overwrite the previous backup which contains the lost files.
Step 1. Load and choose iPhone backup files
Run UltData (iPhone Data Recovery) and select "Recover Data from iTunes Backup File". This tool will load all the iTunes backup files saved on your PC automatically. You need to select the backup file you need according to the name and backup date of the backup file. Then click "Start" to scan this iTunes backup file.
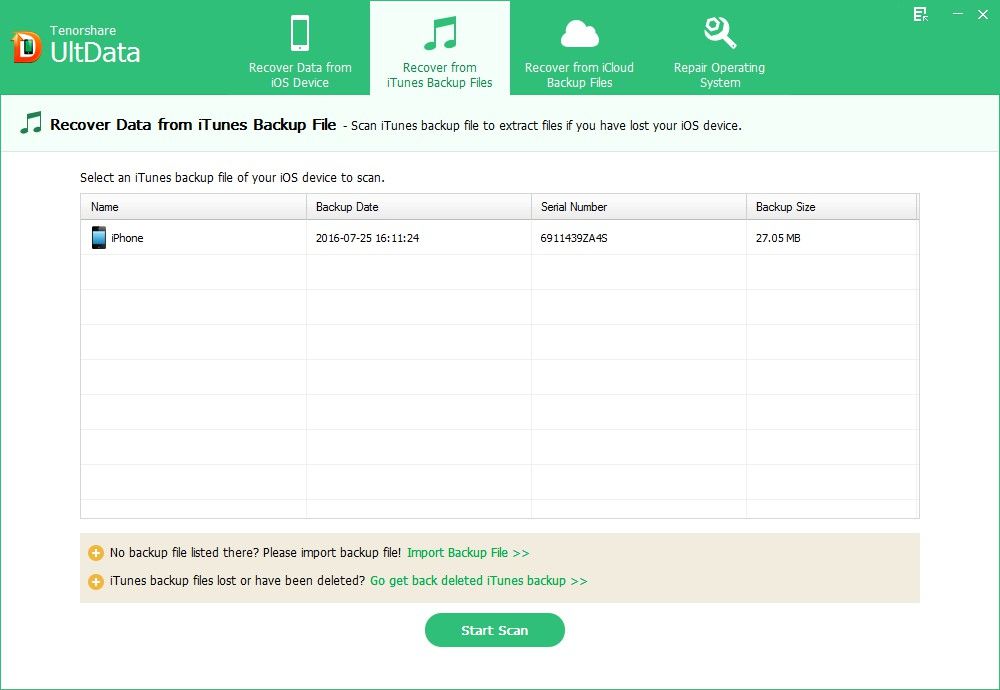
Important Note: UltData (iPhone Data Recovery) can't recover data from encrypted iTunes backup files. If your backup file is encrypted, please use iPhone Backup Unlocker to unlock the backup file first.
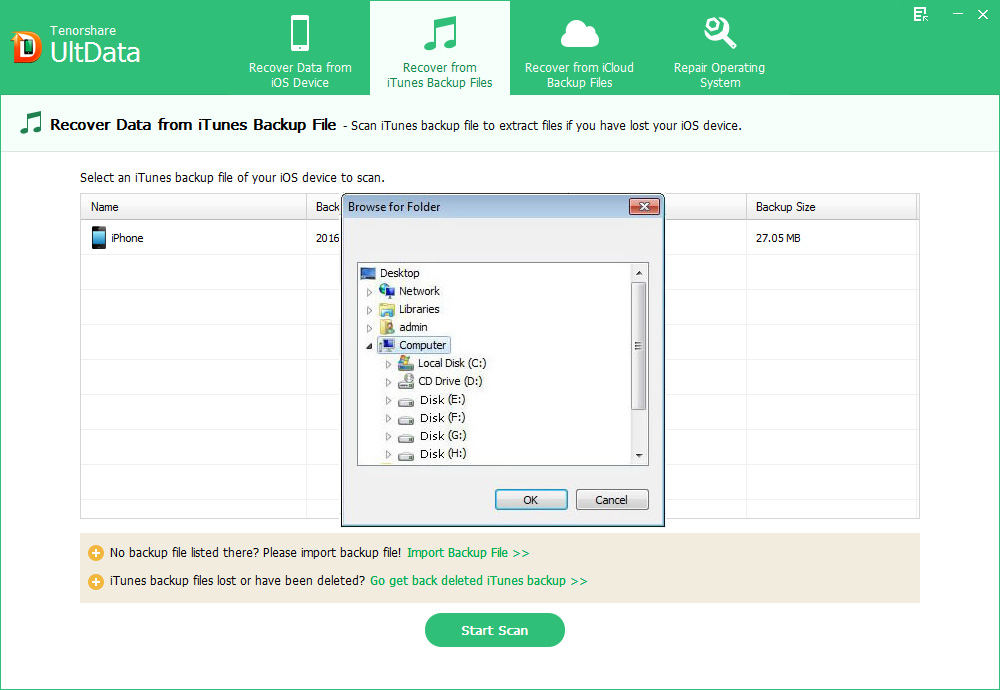
Manually import iTunes backup to extract: If your iTunes backup is not saved in the default path on your computer, this software won’t list the backup file here. However, UltData (iPhone Data Recovery) enables you to manually import the iTunes backup file from the location where the backup file is saved by clicking “Import Backup File”.
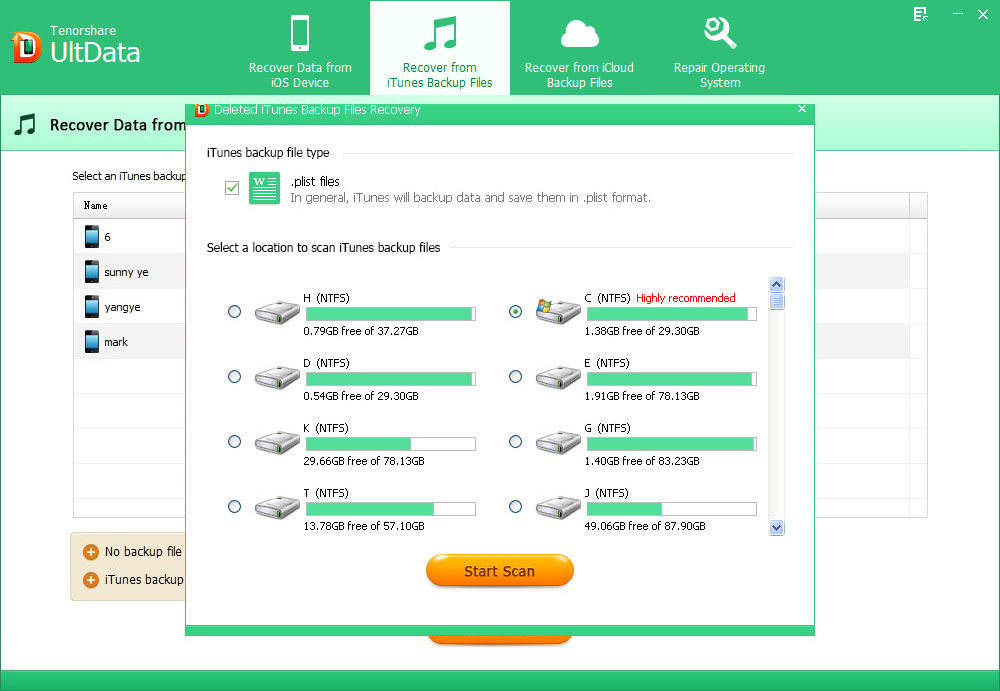
Restore deleted iTunes backup: Deleted or lost your iTunes backup and need to restore data from it? Just click on “Go get back deleted iTunes backup”. And select a disk and click “Start Scan” to scan. We advise you to select Disk C since iTunes backup file is saved in Disk C by default.
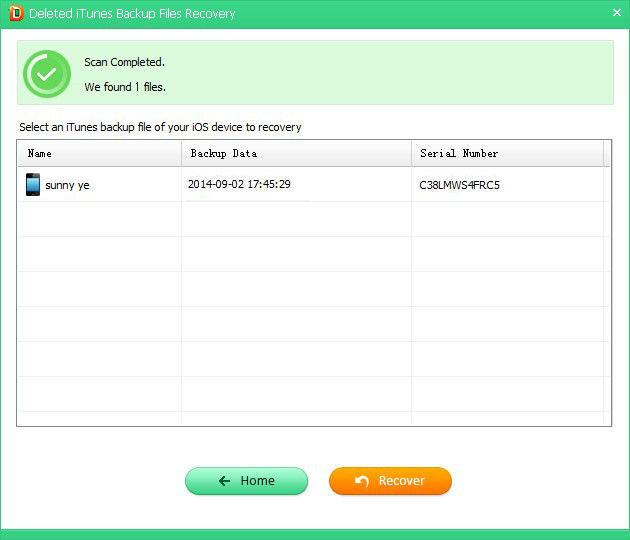
After a while the backup you deleted will appear on the list. Select the backup file you need and click on “Recover”. Then select this backup file for scanning lost iPhone data.
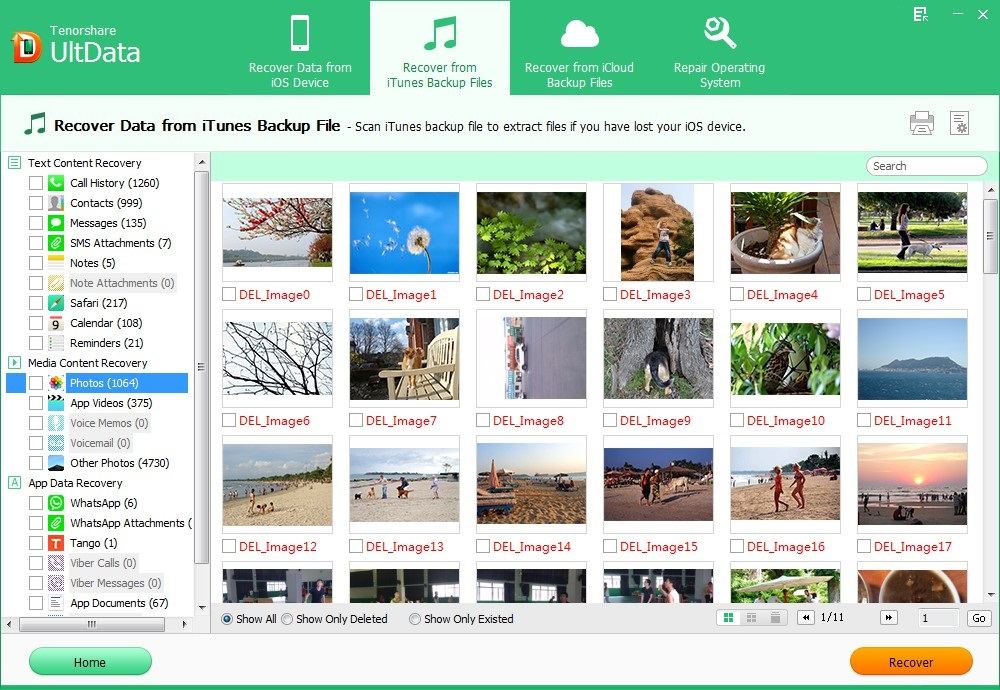
Step 2. Preview Lost iPhone Data
You can see all lost data are listed here by category: Call History, Contacts, Messages, Calendar, etc. Just select a catalog to preview photos, messages, contact and other information in detail.
Step 3. Recover lost iPhone data
Check files you would like to recover and click "Recover" button. Then you'll get a pop-up window that requires you to specify a save path for the recovered files and click "Save". The recovered iPhone files will be saved in your computer as formats like .xls, .txt, or .xml, etc.
Part 3. Retrieve data from iCloud backup
Besides iTunes backup, if you have backed up your iPhone data with iCloud, you can restore iPhone data from iCloud backup as well.
Step 1. Set recovery mode and sign in to iCloud
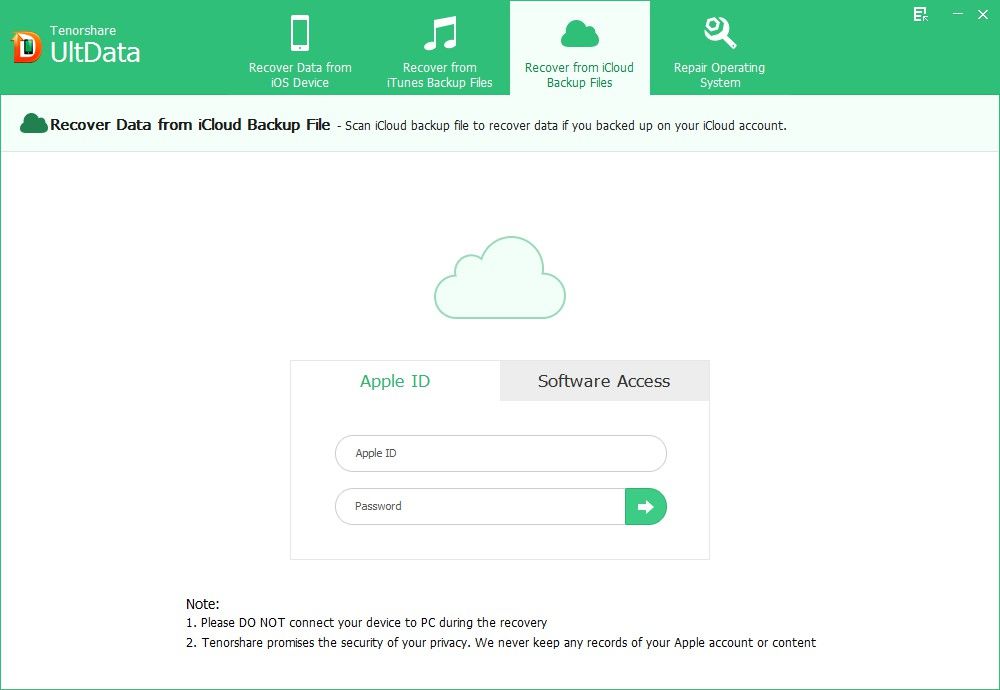
Switch to "Recover Data from iCloud Backup File" from the top menu. When the following interface appeared, enter your iCloud account and password (Apple ID) and click "Sign in". If you logined your iCloud account with iCloud for Windows on this computer before, select "Software Access" to login it automatically.
Step 2. Scan iCloud backup
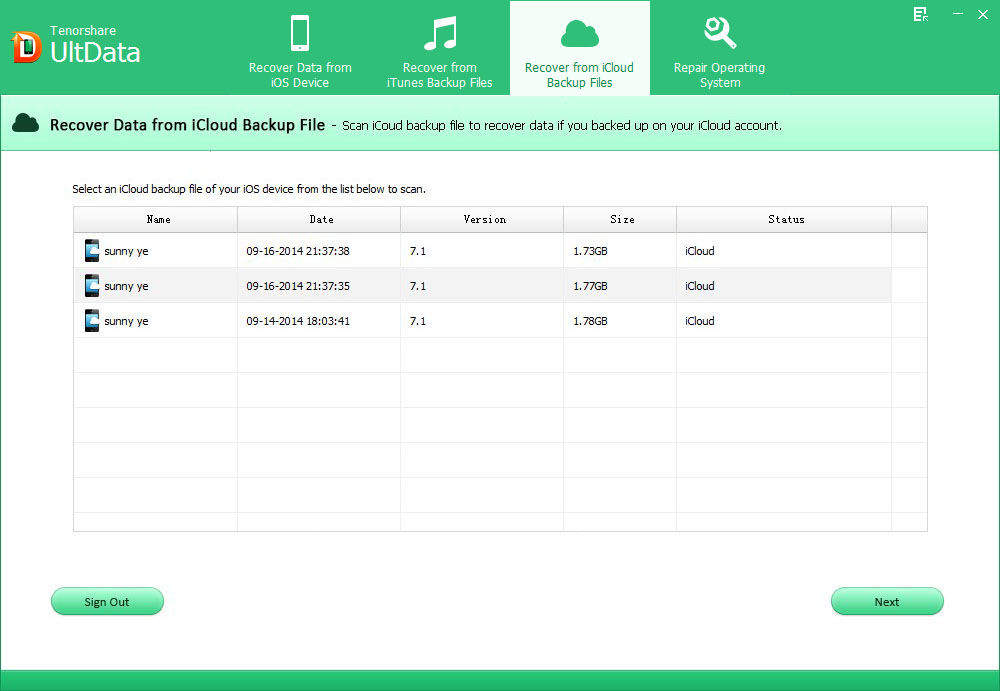
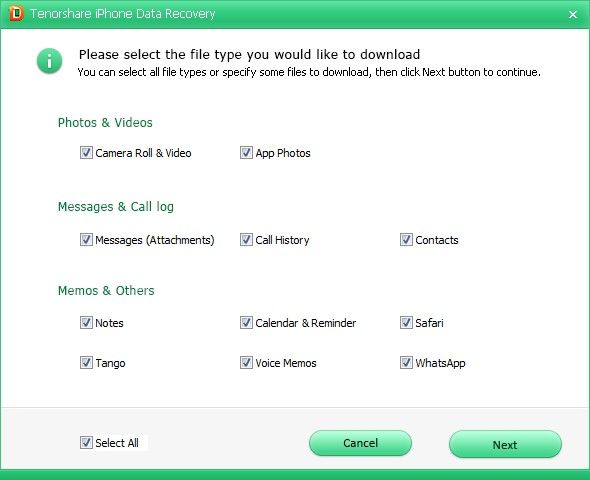
After you log into your iCloud account, the program will list all the backup of devices which have been backed up with iCloud. Then a window will pop up for you to choose file types. According to backup name, backup date, backup size and iOS version, select you backup file and click "Next" to download this backup file. The downloading time varies based on the size of the backup file. Click "OK" when it completes.
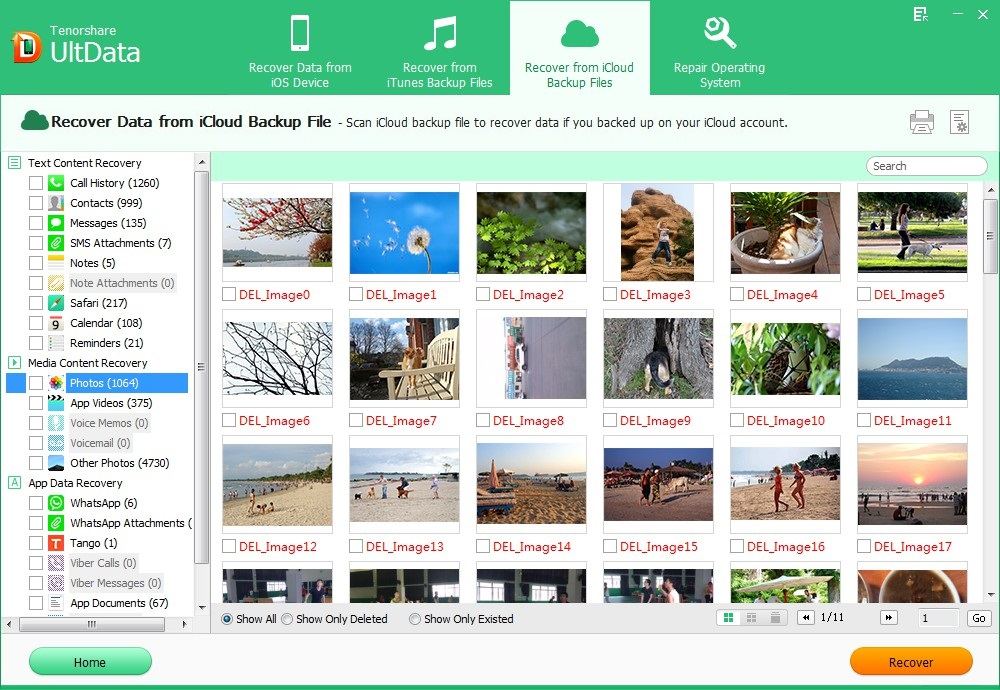
Step 3. Preview and recover files from iCloud backup
The scanning will take a while. When scanning finishes, select the files you need to recover and click "Recover" to save them on your computer. Again, text file will be saved in .xls, .txt and .xlm (contacts can be saved as .vcf/vCard as well); media files in their original formats.
You can choose any of the 3 methods to recover lost, deleted files from your iPhone, iPad and iPod. Lastly we highly recommend you back up your iOS data on a regularly basis either with iTunes or iCloud, which will no doubt improve the chance of data recovery.
Part 4. Repair Operating System
When your iPhone, iPad or iPod gets stuck and can't boot properly after upgrade/ jailbreak, you need to repair operating system to fix all the iOS crash, screen freeze and stuck issues on your iPhone. UltData (iPhone Data Recovery) can help you quickly fix operating system without data loss.
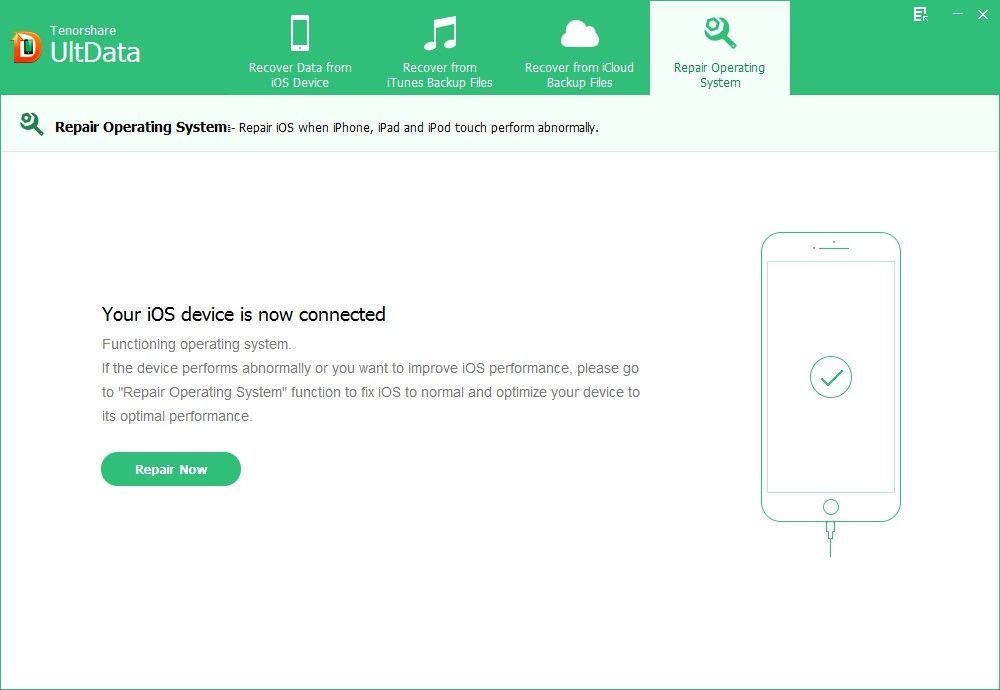
Step 1: Connect iPhone to computer and choose “Repair Operating System” on the main interface, click “Repair Now” button.
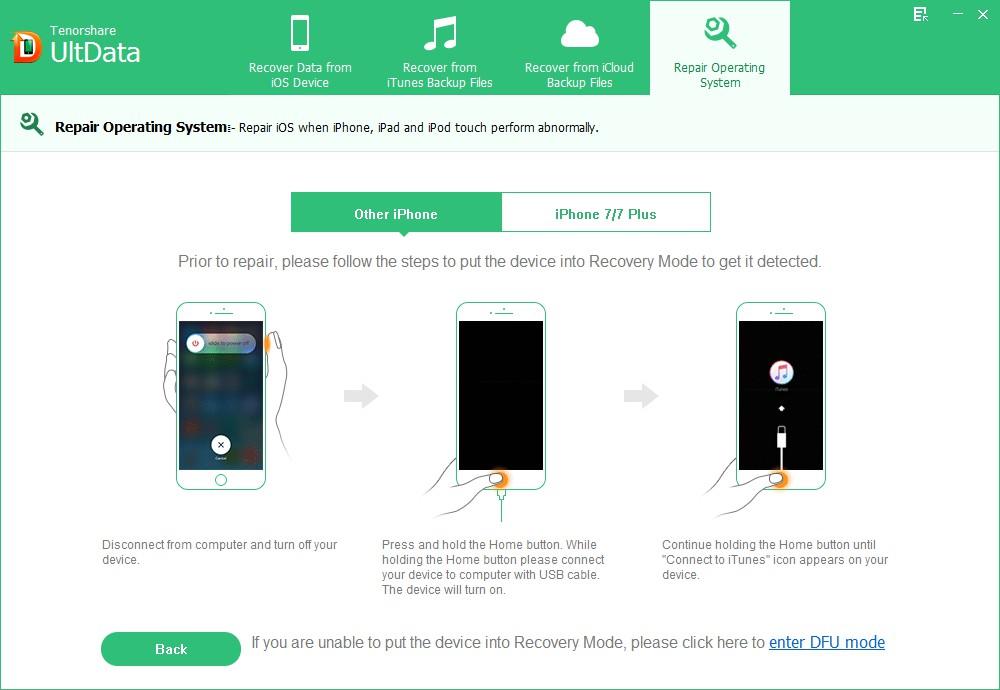
If your device cannot be detected by computer, click “Start” and you enter a new page. You can see a window ask you to put your device into recovery mode and shows you the steps of getting into recovery mode. If you failed, you can click “enter DFU mode” and you will enter a new window showing the steps of getting into DFU mode.
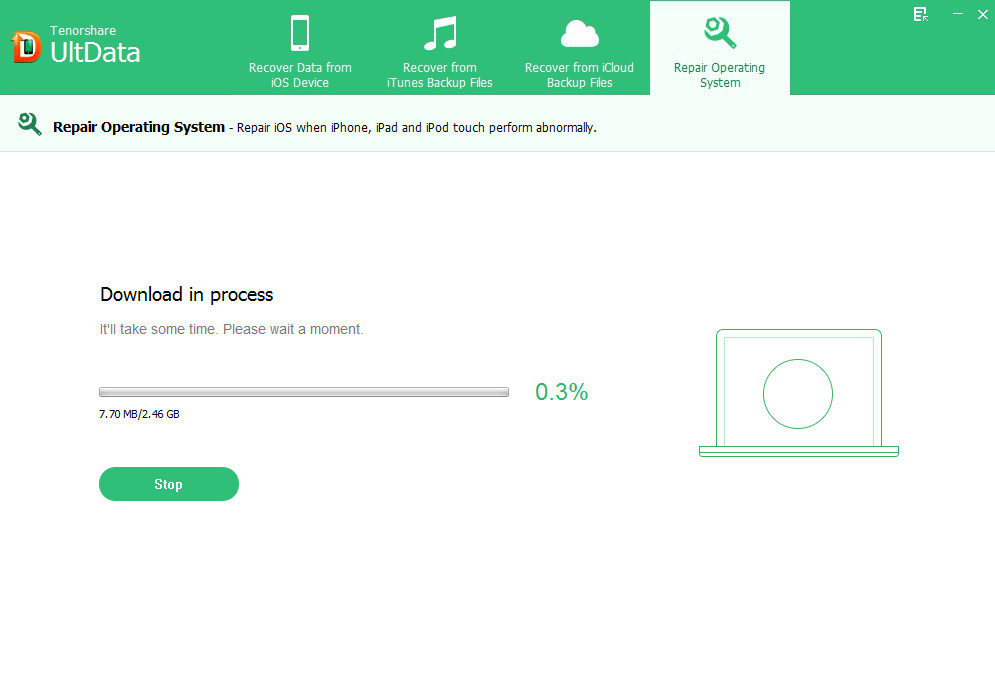
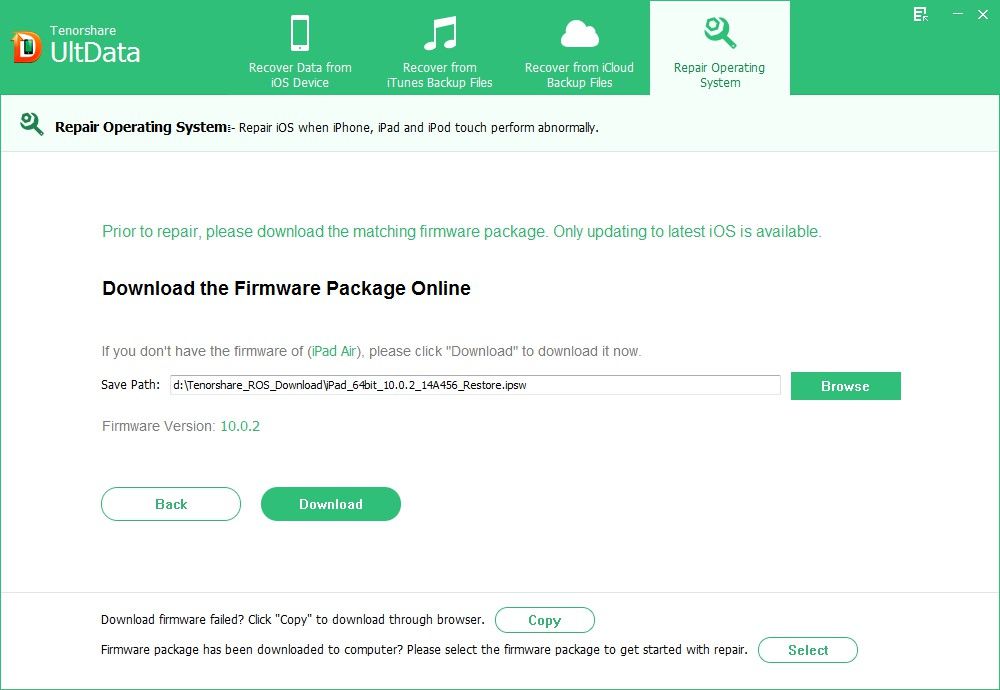
Step 2: when your device is detected, the software will ask you to download firmware package online, and you have to select a disk on your computer to save it. You can click “Download” button to download the package. The downloading process will take a while.
Note:
1. If you failed to download, you can click “Copy” button on the bottom, and the firmware package can be downloaded from browser.
2. If the firmware package has been downloaded to computer, you can press “Select” to manually import it.
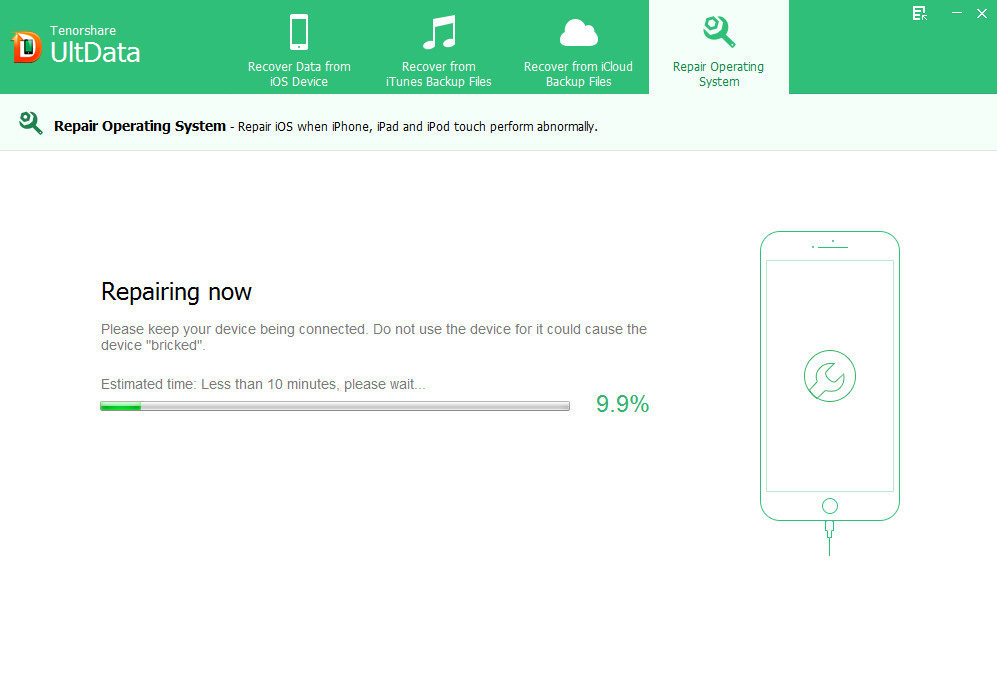
Step 3: After downloading, the software will start repairing your device automatically. Please keep your device connected to computer and do not use it during the repairing process.
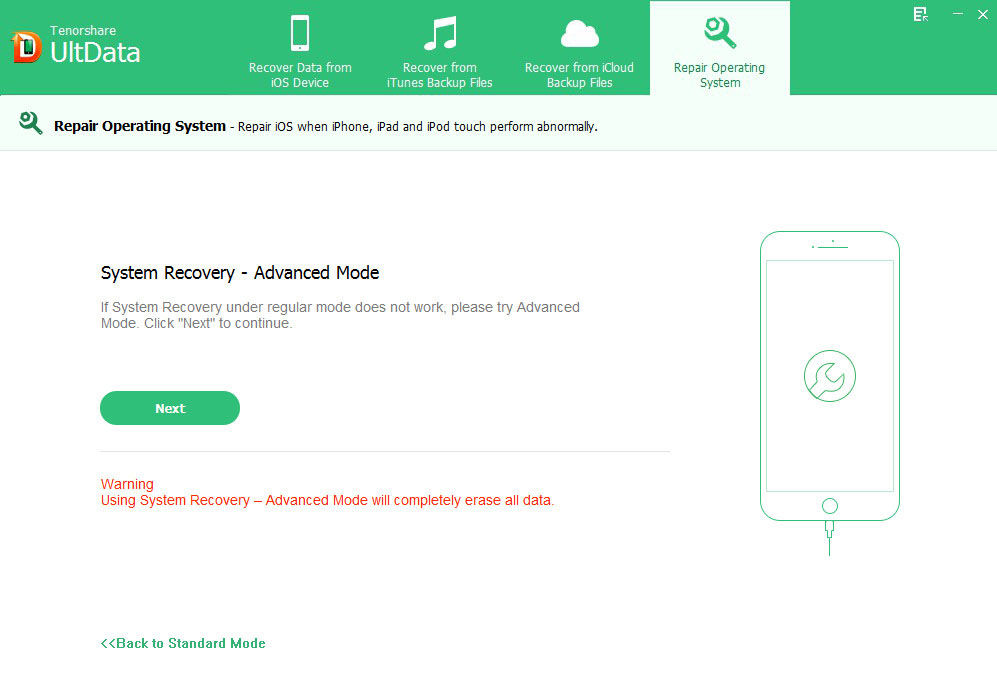
If you failed in repairing, the software will inform you to repair system again or feedback your problem. You can also select advanced mode to repair iOS system, but you need to notice this repairing mode will erase all the data.
Sounds Good? Get " UltData (iPhone Data Recovery) " Now!
If you have any questions about this program, please contact us, We provide lifelong technical support and upgrade service.
