Part 1: Turn off BitLocker on Windows 10
Switching off BitLocker can circumvent drive encryption problems and allow access to previously locked data. Here are two methods on how to disable BitLocker on Windows 10.
Disable from Control Panel
If you can remember your BitLocker password, you can disable it from the Control Panel. Follow these steps.
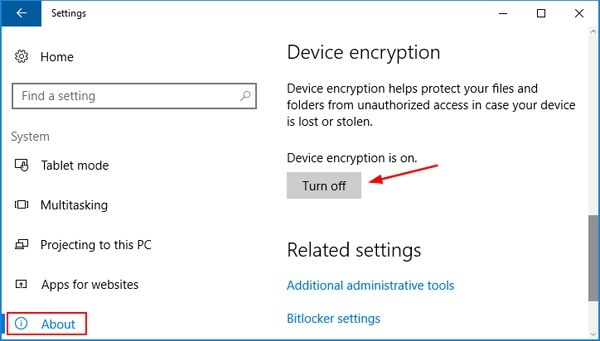
- 1. Open the Start menu. In the Cortana search box, enter Manage BitLocker and click Manage BitLocker to open the program.
- 2. On the BitLocker window, the hard drive partitions are displayed with the option to disable or suspend the feature.
Unlock using Command Prompt
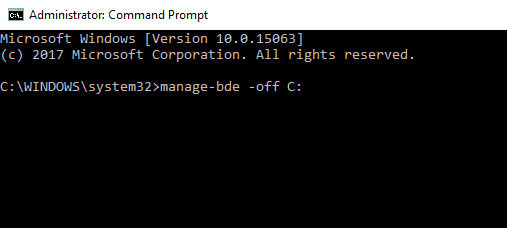
It is possible to remove BitLocker encryption in Windows 10 using command prompt. Here are the steps;
- 1. Press Windows key + X and select Command Prompt (Admin) from the menu.
- 2. Once in the Command Prompt window, enter the text manage-bde –off X: and hit Enter to run the command.
- 3. Wait for the process to finish.
Part 2: Disable BitLocker on Windows 8 and 8.1
Are you stuck on how to turn off BitLocker drive encryption on Windows 8/ 8.1? The processes described for Windows 10 are very similar to those for Windows 8.
Disable from Control Panel
- 1. Click the Start icon on the bottom-left side of the desktop or hit the Windows key.
- 2. Search for Control Panel and launch it.
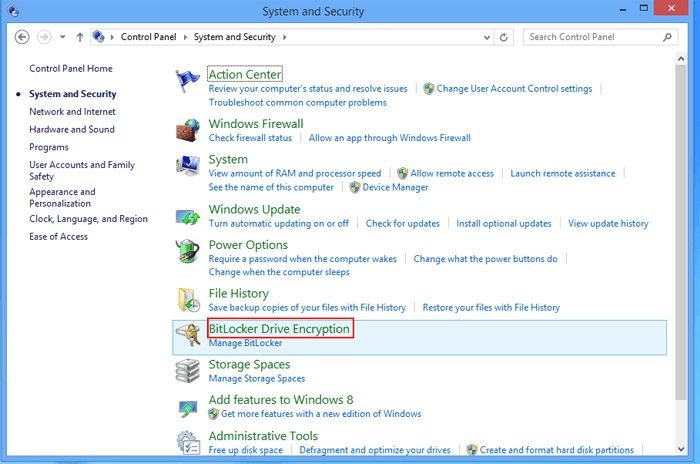
- 3. In the Control Panel, select System and Security.
- 4. Open BitLocker Drive Encryption or click the Manage BitLocker option under it.
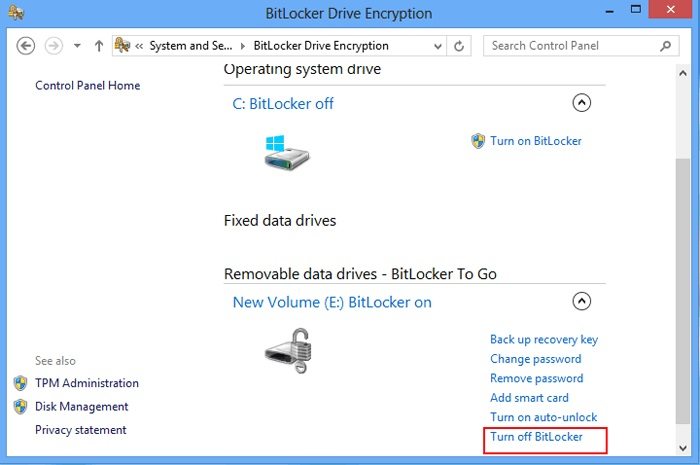
- 5. Click the Unlock drive option and enter the password to unlock the encrypted drive.
- 6. After unlocking the drive, select the Turn off BitLocker option.
- 7. Confirm the action and close the window after the process is complete.
Use Windows PowerShell
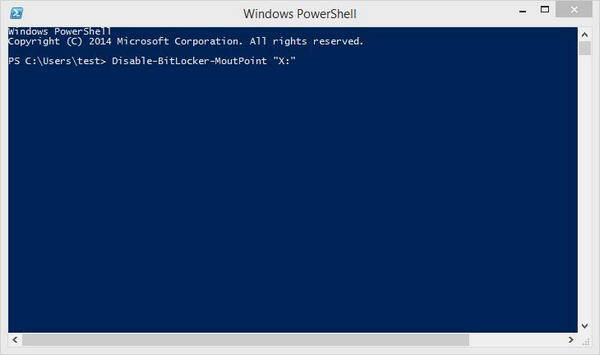
- 1. From the Start menu, search for power shell or press Windows key + S. Right-click and choose Run as administrator.
- 2. In the Windows PowerShell window, type the following command: Disable-BitLocker –MountPoint “X:” and press Enter to run the command.
- 3. Wait a few minutes for the process to complete.
Part 3: BitLocker Deactivation on Windows 7
You can disable Bitlocker on your Windows 7 drive before moving it to a Windows 8 PC or for any other reason. Follow these steps to disable BitLocker drive encryption service on Window 7 and access a locked drive.
Control Panel Method
- 1. Tap the Start button and select Control Panel from the menu.
- 2. Open the BitLocker Drive Encryption or locate it under System and Security.
- 3. All the hard disk drives will be listed. Choose the one that has BitLocker enabled and select Turn Off Bitlocker.
- 4. Click Decrypt Drive on the pop-up window and wait for the process to finish.
Disable BitLocker Service
- 1. Use the Windows + R shortcut to open the Run window.
- 2. Type in services.msc and click OK to run.
- 3. On the services window, look for BitLocker Drive Encryption Service and double click.
- 4. On the next window, click the drop-down menu and set Startup Type as disabled.
- 5. Click OK and apply the changes and completely remove BitLocker on Windows 7.
Dealing with Lost Windows Password
Now you should be able to turn off BitLocker by using one of mentioned solutions. In terms of password protection, if losing your Windows login password and become unable to access the computer, majority of users will reset their PC or use a recovery disc at this point. However, there is another option. Windows Password Recovery Tool is a remarkable tool used to reset or recover forgotten Windows 10/8/7 password.
Here to check how to remove password from Windows PC.
World's 1st Windows Password Recovery Software to Reset Windows Administrator & User Password.
Free Download Free Download