Download PDF Password Remover and install it on your Windows PC. The following guide will show you how to remove owner password from PDF documents.
Free Trial PDF Password Remover:
| Win Version | Mac Version |
 |
 |
Step 1. Import password protected PDF files
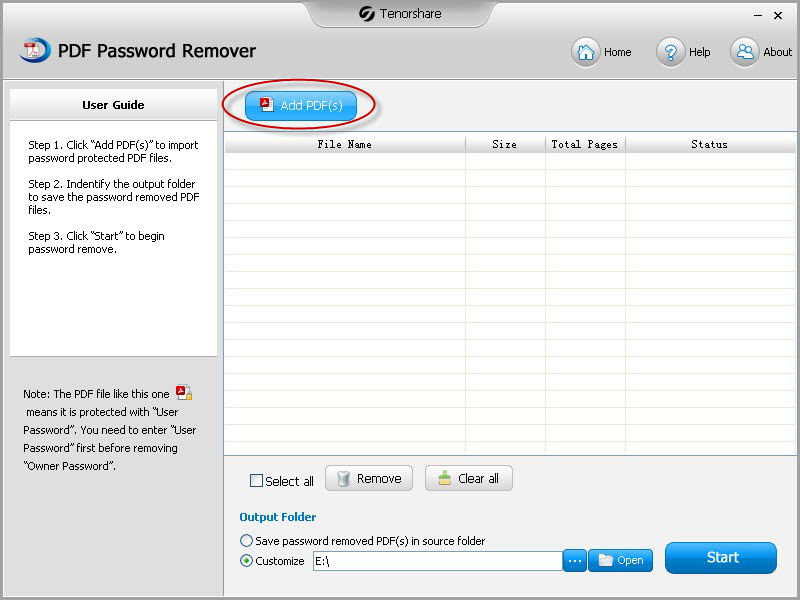
Launch the program. In the main interface, click "Add PDFs" to import PDF files you would like to remove restriction for.


Tips: You can click "Remove" to delete files respectively if they are not the ones you prefer to remove password for. Or click "Remove All" to clear the task list at one time.
Step 2. Specify output path for PDF files
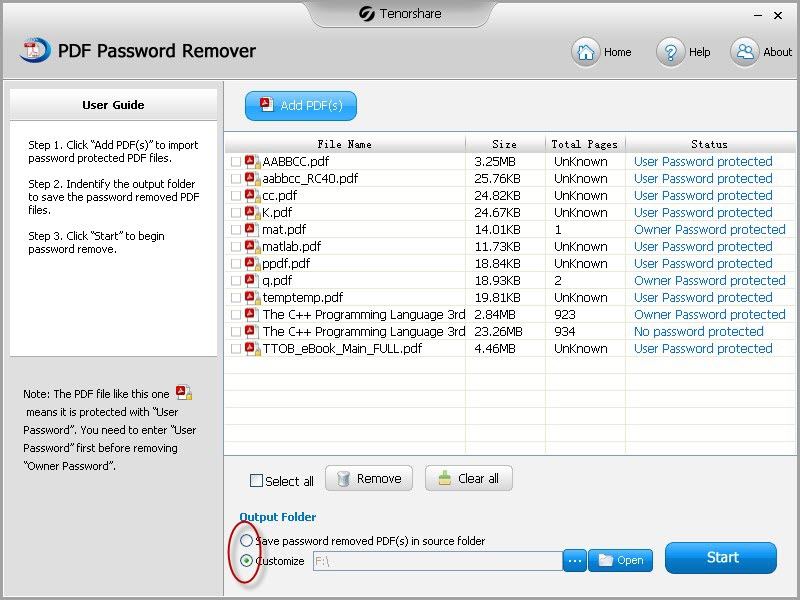
You can save the password removed PDF files to the same folder as the original files, or customize the path. To customize the output path, click "Browse" button, and then set the target location.

Step 3. Remove PDF Password Restriction
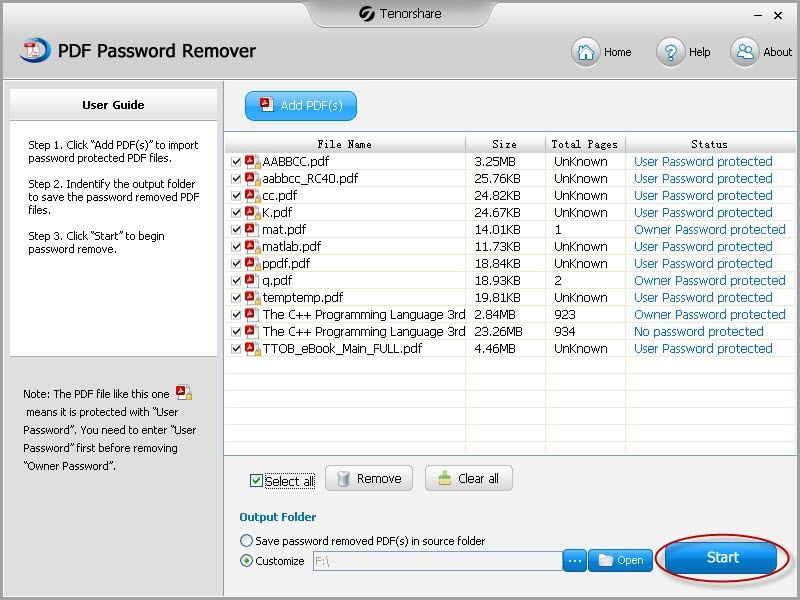
Check files whose password you want to remove first. You can select all files with "Select all" option or choose a specific file by checking the box before each file. Then click "Start" button to begin removing password. The whole process will be finished within a few minutes. When successfully removed password, click "Open" to go to the Output Folder and see the password removed PDF files. If you don't want to see the PDF files for the moment, click "Close" to end the operation.


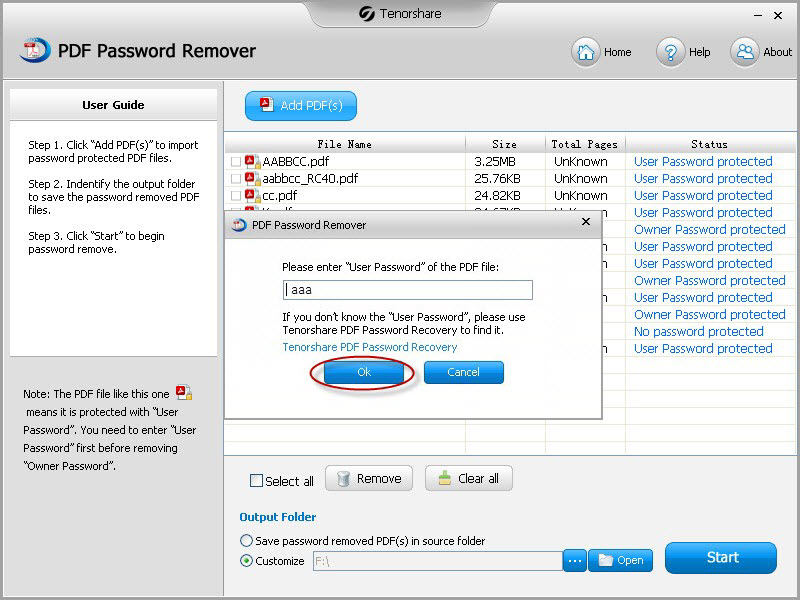
Note: Besides Owner Password, PDF files can also be protected with User Password (or what is called PDF open password), click the file and enter User Password before removing Owner Password. If you don't know the User Password, use PassFab PDF Password Recovery to find the password and open the PDF file.

With PDF Password Remover, you can easily remover PDF password and copy, print, edit PDF documents as you like. If you like this tool, just share it with your friends on Facebook, Twitter, Google Plus and other social networks.
Sounds Good? Get " PDF Password Remover " Now!
If you have any questions about this program, please contact us, We provide lifelong technical support and upgrade service.