Well, this is a very complicated procedure to disable password Windows 10 but there are several ways you can try to disable it. All these are very simple and effective ways of password disabling on any Windows 10 account, for more details read the article below.
- Part 1. Disable Windows 10 Microsoft/Local Account Password Using netplwiz
- Part 2. Disable Windows 10 Picture Password and PIN Using Local Groups Policy Editor
- Part 3. Disable Windows 10 Password after Sleep From Settings
- Part 4. The Easiest Way to Disable Password Windows 10 When You are Locked Out
Part 1. Disable Windows 10 Microsoft/Local Account Password Using netplwiz
If you want to disable password Windows 10, we have a very simple procedure for you. Using this method you will be able to disable Windows 10 Microsoft or Local Account password, very effectively. Here's how to do it;
The following is how to get into Windows 10 without password by disabling password prompt on your computer:
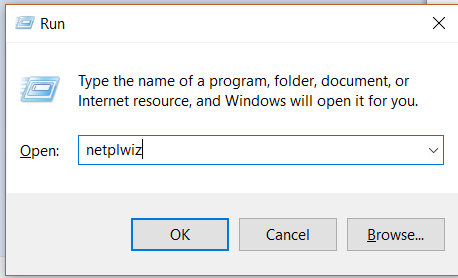
Step 1: As Windows 10 is already running, type "netplwiz" in the search box and then click "netplwiz" from the search results.
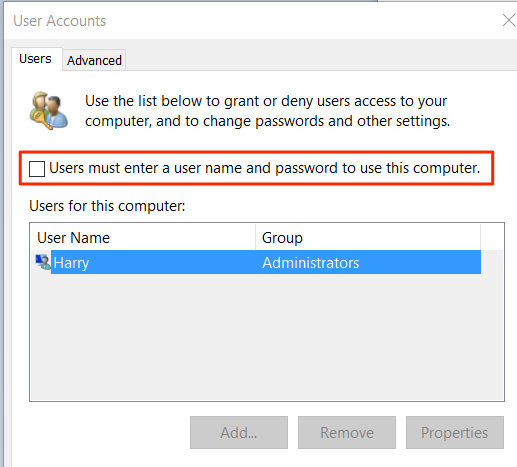
Step 2: Now, the User Account dialog appear on the screen. There you will see the option "Users Must Enter a Username and password to use this computer". Uncheck this option and click "OK" to proceed.
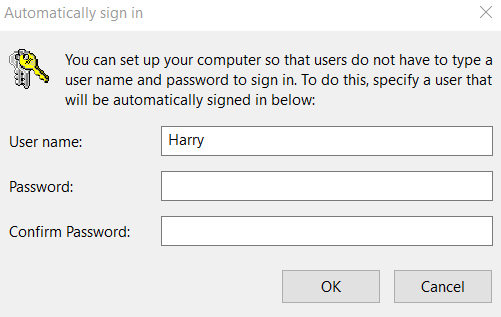
Step 3: Now, you have to make sure that this operation is authorized. You need to type your password and then confirm it and finally click "OK".
Now, just restart your PC and next time you will be able to log in without the password. This is the very simple but effective way to disable the Windows 10 password using "netplwiz".
Part 2. Disable Windows 10 Picture Password and PIN Using Local Groups Policy Editor
As you are using Windows 10, you will be able to disable password and PIN Windows 10 through Local Groups Policy Editor. This is an easy method and can be executed very easily;
Step 1: After running the Windows 10, press "Windows Key +R" and the "Run" box will pop-up.
Step 2: You need to type "gpedit.msc", there and hit "Enter" to execute.
Step 3: Now, the Local Group Policy Editor will open up. Navigate to "Computer Configuration" and then visit "Administrative Templates"; followed by "System" and "Logon".
Step 4: In the right side of the panel your will find the option called "Turn Off Picture Password Sign-in". Double-click on that option and click "Apply" and lastly "OK" to complete.
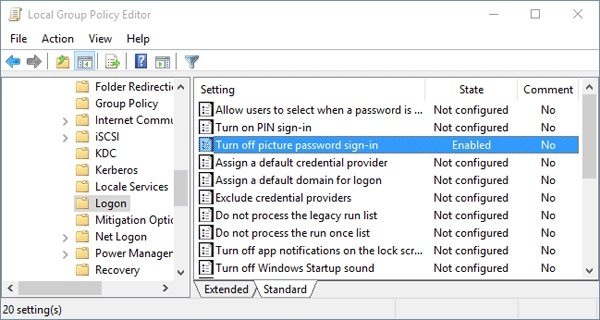
Afterward, you need to restart the computer, as only after rebooting the computer Windows 10 disable lock screen take effect.
Part 3. Disable Windows 10 Password after Sleep From Settings
Typing the password to your Windows 10 account after it comes out from the Sleep Mode is a definite way to keep the device more secure. But if you are the only one using this device at home, then you can skip the procedure. This makes thing more complicated unnecessarily.
Step 1: Go to "Settings" and click on "Accounts".
Step 2: Now, click on "Sign-in" options".
Step 3: In the right-hand side of the panel you will see "Require Sing-in". Under that choose "Never" from the drop down menu.
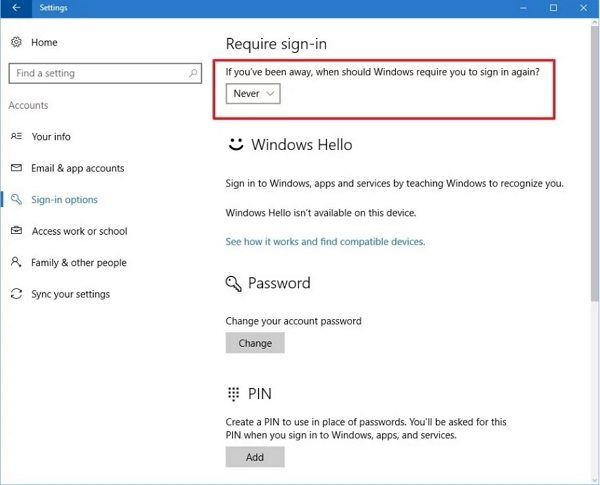
Task is complete. Now, you will never have to enter a password after Windows 10 resumes from its sleep.
Part 4. The Easiest Way to Disable Password Windows 10 When You are Locked Out
We learned of several ways to disable the password for Windows 10 account. But if you are locked out from your account, the situation gets significantly complicated. In these situations, the performance of professional Windows password recovery program are much better and effective than the conventional methods.
Several of these third-party programs are thriving at the market for the moment and we selected Windows Password Recovery Tool among them to disable the Windows 10 password. This program implements an elaborated procedure but it is very effective and very simple. So, here's how you can disable lock screen Windows 10.
Step 1: Download and install the program on a different computer, as this one is locked. Now, launch it and you will be asked to choose a boot media. Select your drive in the software, and click on Burn.
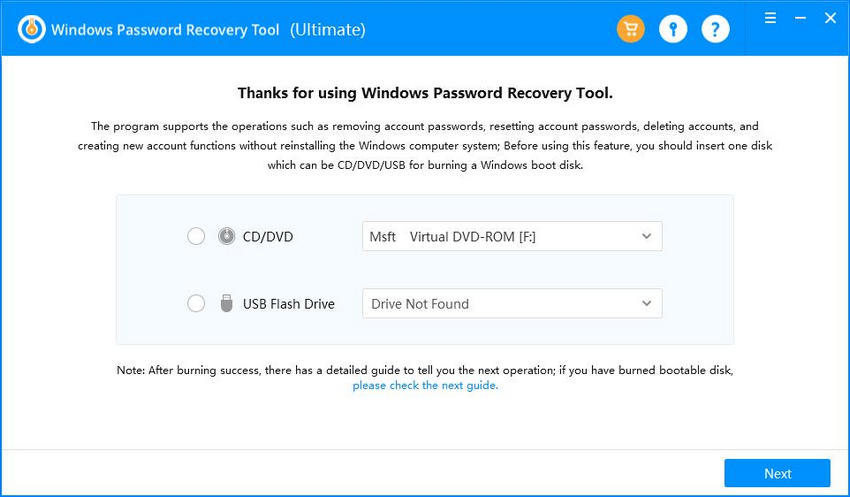
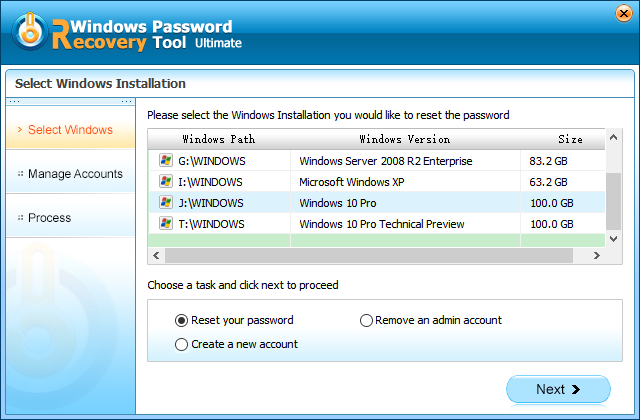
Step 2. Now, you have to connect that USB drive to the locked computer and boot your locked PC from the USB drive. Select your Windows installation on the first screen of the software.
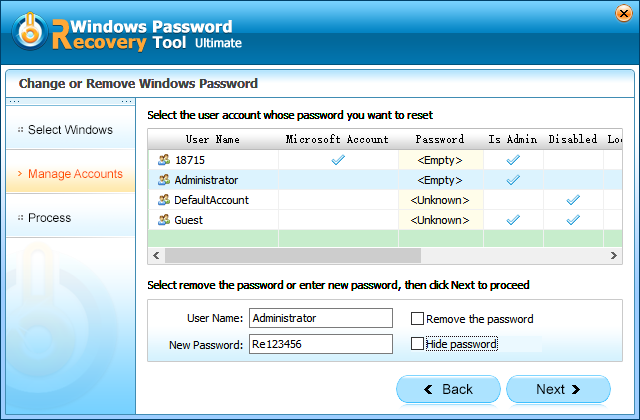
Step 3. Now, select the locked user account, the account detail will be displayed. Now, you have to choose "Remove the Password" and click "Next".
Finally, after completing the procedure, click "Reboot" from the program interface to restart the computer. It is very important to reboot your computer after the completion of the said procedure. Now, you will be able to access your computer without your password.
Conclusion
Therefore, all 4 of them are the most effective procedure to disable password on Windows 10. But when it comes to disable the password from a locked Windows 10 account, the conventional methods fails to work due to the numerous security measures implemented on the OS by the developer. So, it will be safest and very effective to use a professional program like Windows Password Recovery Tool to disable the password of a locked Windows 10 account.
World's 1st Windows Password Recovery Software to Reset Windows Administrator & User Password.
Free Download Free Download