How to Create a Windows 10 Repair Disc (Detailed Steps)
If your Windows 10 PC is suffering a crash and can't boot up normally, making use of a Windows 10 repair disk creator, namely Windows Boot Genius, is your best choice. To get started, please prepare a workable Windows computer and a blank CD/DVD or USB drive.
Step 1: Download and install this Windows repair disk creator on the computer you have prepared.
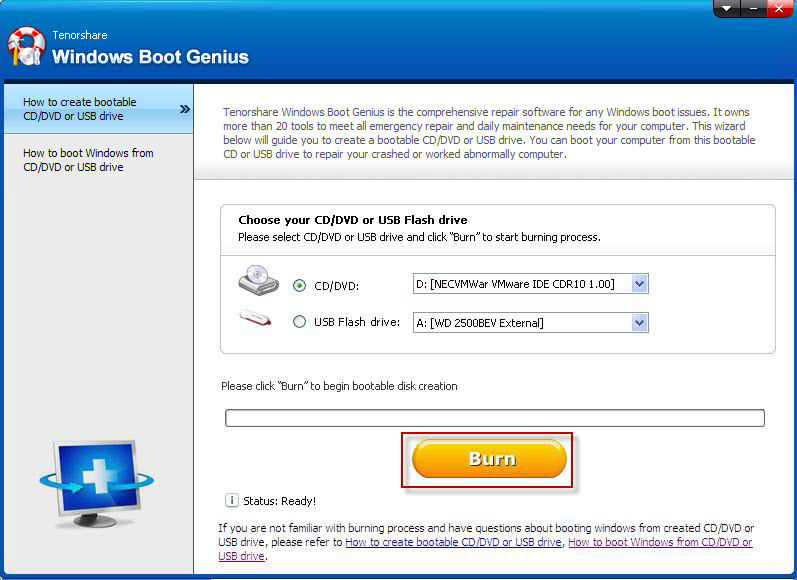
Step 2: Launch the program and insert the prepared CD/DVD/USB drive into the computer.
Step 3: Then the program will locate the ISO file and check your CD/DVD-writer or USB automatically. Just click "Burn" to create a system repair CD/DVD or USB for Windows 10.

When the burning completes, you can use this burnt bootable disk to start fix Windows 10 crashes. Do as the following shows.
Insert the Windows 10 repair CD/DVD or USB flash drive into the computer which has an error. Go to its BIOS and set it to boot from the repair disk.
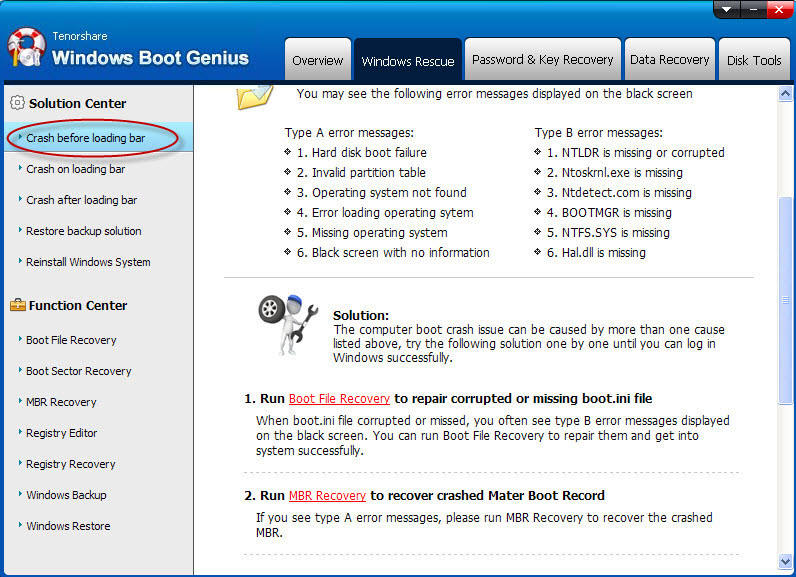
When you get into the system successfully, you will see the main interface of Windows Boot Genius. In the home screen, select the Windows Rescue module. Here you will see various repair tools. Choose the one suitable according to your situation. then fix your computer under the guide step by step.

Add-on: What a Windows 10 Repair Disk can Do for You
The recovery disk, namely repair disc for Windows 10 can fix a variety of system errors. The following chart shows some examples:
| Operating system not found | Boot failure (Windows 10 boot loop) | Missing operating system |
| NTLDR is missing or corrupted | Ntoskml.exe is missing | BOOTMGR is missing |
| Black screen of death | Invalid partition table | NTFS.SYS is missing |
| Hal.dll is missing | Error loading operating system | Ntdetect.com is missing |
So next time when your Windows 10 PC suffers some serious issues or crashes, you can feel free to use this system repair disk for Windows 10 to fix it soon.