If the netplwiz not working on your Windows computer, you will have trouble setting up automatic logins on your machine. It is because the option that allows you to bypass your login screen is located in this utility on your computer. If you are going through this situation and you have not been able to find a solution yet, the following guide will help you out.
There are actually multiple ways to fix the netplwiz not working Windows 10 issue and be able to use it again like you did before. While some methods let you fix the utility so you can launch it and do the task you need to do, other methods provide you with an alternate option to setup the login screen bypass feature.
- Method 1. Fix Netplwiz Auto Login is Not Working in Registry
- Method 2. Turn on Automatic Sign-in using the Autologon Tool
- Method 3. Disable or Remove Windows Login Password If Netplwiz Not Working
Method 1. Fix Netplwiz Auto Login is Not Working in Registry
Windows Registry is one of the really cool utilities on your Windows PC that allows you to change a ton of options on your computer. With this utility, you can change logins, enable admin accounts, and perform a number of other actions on your computer.
You can also fix the auto-login feature when netplwiz does not work using Windows Registry and the following should teach you how remove login password Windows 10 "netplwiz" not working:
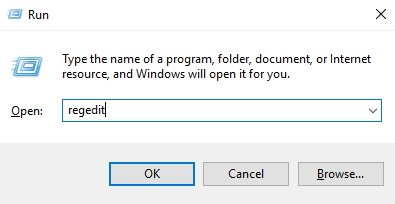
Step 1: Press the Windows + R keys to open Run dialog box. When it opens, type in regedit and hit Enter to open the Registry Editor on your computer.
Step 2: When the Editor opens, head to the following path by clicking on the directories in the left-hand side pane.
HKEY_LOCAL_MACHINE\SOFTWARE\Microsoft\Windows NT\CurrentVersion\Winlogon
Step 3: Once you are at the given path, find the following three items and change their values as described below.
AutoAdminLogon - this must be set to 1.
DefaultPassword - this should have your account's password.
DefaultUserName - this should have the username of your account.
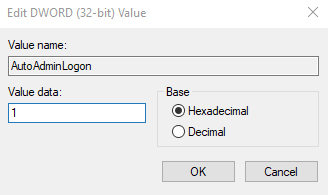
Step 4: Save the values and close the Registry Editor.
You have successfully set up auto-login without using netplwiz on your Windows computer. That should fix the netplwiz Windows 10 not working issue.
Method 2. Turn on Automatic Sign-in using the Autologon Tool
While the Registry method gets the job done for you and lets you easily log-in to your machine without the need of a password, those of you who have never touched the Registry might prefer a more simpler option.
Fortunately, you do have a tool that allows you to setup auto-login when netplwiz does not work on your computer. This tool is extremely easy to use and configure and gets the job done in no time.
If you would like to use it, here is how to turn off password in Windows 10 netplwiz not working using the Autologon tool:
Step 1: Download and install the Autologon tool on your Windows computer.
Step 2: Launch the tool and configure the options as the following. Then, click on the button that says Enable to save the changes.
Username - enter in the your account username.
Domain - enter the default domain for your computer.
Password - enter your account password here.
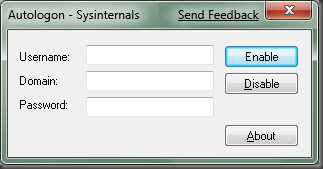
From now on, your computer will automatically log-in to the specified account when you boot-up your machine.
Method 3. Disable or Remove Windows Login Password If Netplwiz Not Working
If you have still not been able to figure out a way to fix the netplwiz utility on your computer, you might want to use a third-party software to remove the password from your account. This will then let you enter your computer without the need of any password.
The software that you are going to use is called Windows Password Recovery Tool , and as the name implies, it allows you to recover and reset passwords for your Windows accounts. It runs off of an independent bootable drive.
World's 1st Windows Password Recovery Software to Reset Windows Administrator & User Password.
Free Download Free DownloadStep 1. Download and install the software on your spare computer. Insert a bootable CD/DVD/USB flash drive, select it in the software, and click on the Burn button.
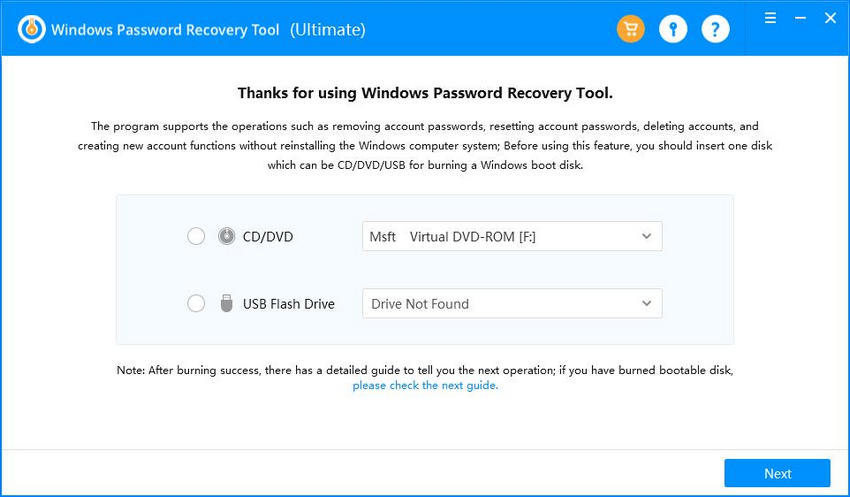
Step 2. Boot your locked computer from the newly created bootable drive. Select your Windows installation, choose Reset your password, and click on Next.
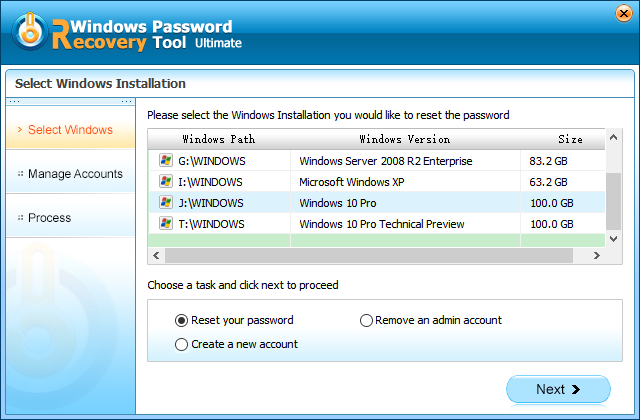
Step 3. Select your user account in the list, choose Remove the password, and click on Next.
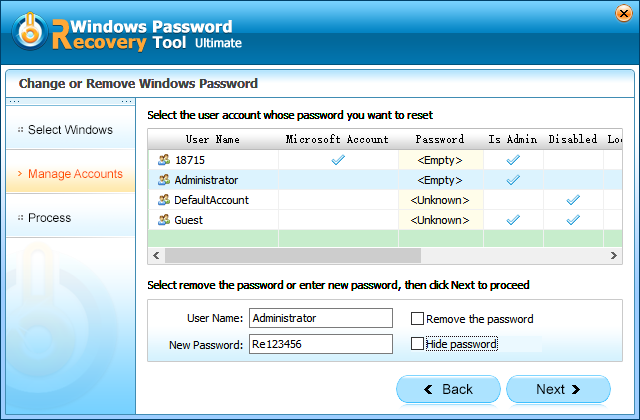
The software will get the password removed from your account in no time. Now that the password is removed, you can easily log-in to your computer and make any changes you want to make to the netplwiz utility.
If you ever find that netplwiz has stopped working on your Windows computer, you do not need to panic as there are various ways to get around the issue on your computer.
World's 1st Windows Password Recovery Software to Reset Windows Administrator & User Password.
Free Download Free Download