But what if you found that you are unable to run the Windows 10 defragmenter utility or you get error prompt like Disk defragmenter could not start or Failed to initialize or
Disk defragmenter service is missing in Windows 10? No worries, we have solutions for that issue covered in this post.
Part 1: Possible Reasons for Windows 10 Defrag Not Working Issue
This issue appears because of the corrupted installation of third party defragmenter, or the defragmenter is incompatible with Windows 10. To have this issue solved, you can try some of the following solutions.
Part 2: How to Fix Unable to Run Windows 10 Defragmenter
Below are some solutions to fix “unable to run Windows 10 defragmenter” available for your reference, let’s take a look at it.
Solution 1: Perform sfc/scannow
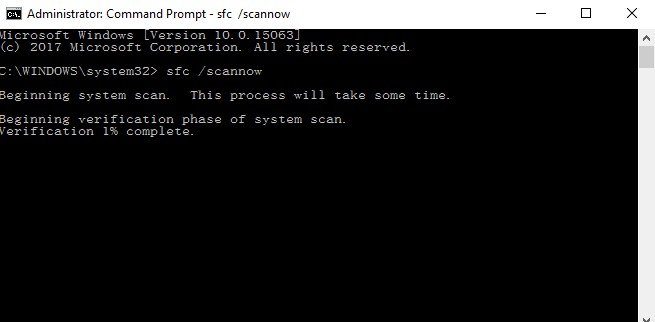
The first solution you can try to get the issue fixed is using the Sfc/scannow command. This command will scan all protected system files as well as provide solution to solve the defragmentation problem. Here’s how:
Click on Start, then go to Search menu bar, type cmd in the search box. After that, right click on the result and select Run as administrator.

At the command prompt, type the following line and hit Enter: sfc/scannow, then it will start examining all your protected system files and replace corrupted files.

After the process done, if the System File Checker have found an error, it will provide solutions for you (if available). If not, you can try out other solution we listed below.
Solution 2: Check if Disk Defragmenter service is running properly
This issue can also be led to by not running properly Disk Defragmenter service. Just follow these steps to make sure that the Disk Defragmenter service is running properly:
Firstly, open Search box from the Start, then type services.msc in Start search and hit Enter button.

Please note that the Disk Defragmenter serviceon your Windows 10 computer must be enabled and set to Manual.
In the meantime, you have to make sure that 3 services listed below is running and set to Automatic:
Remote Procedure Call (RPC)
DCOM Server Process Launcher
RPC Endpoint Mapper
Part 3: Best Alternative Defrag Tool—Windows Care Genius
If nothing helps above, then you may need a third-party software to help you perform defrag on Windows 10, I believe Windows Care Genius is what you really need. It is a versatile Windows 10/8.1/8/7 system care tool offering 22 powerful features to keep things in order by constantly cleaning junk files, removing leftovers, fixing registry entries, running system defrag, and enhancing privacy. Below is how it works.
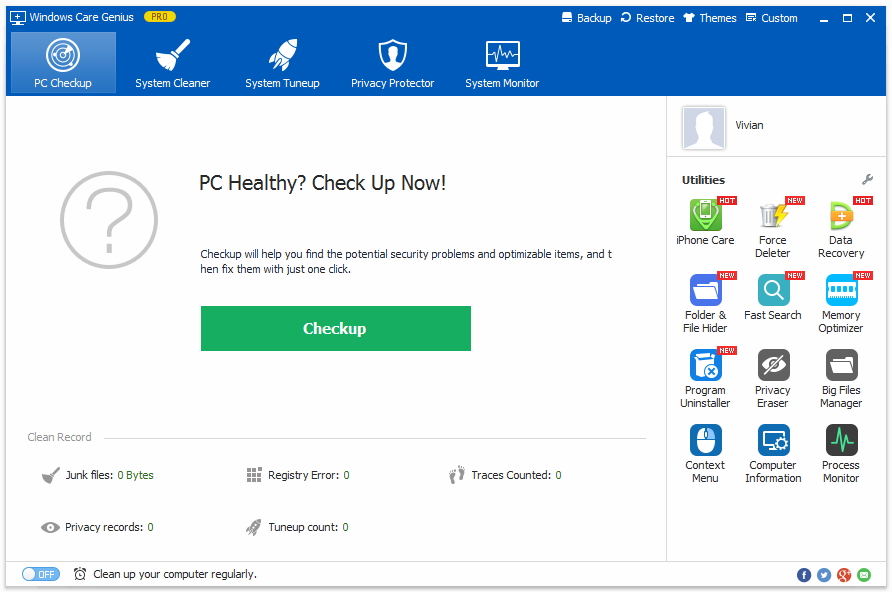
To get started, please free download Window Care Genius on your computer, then launch it.
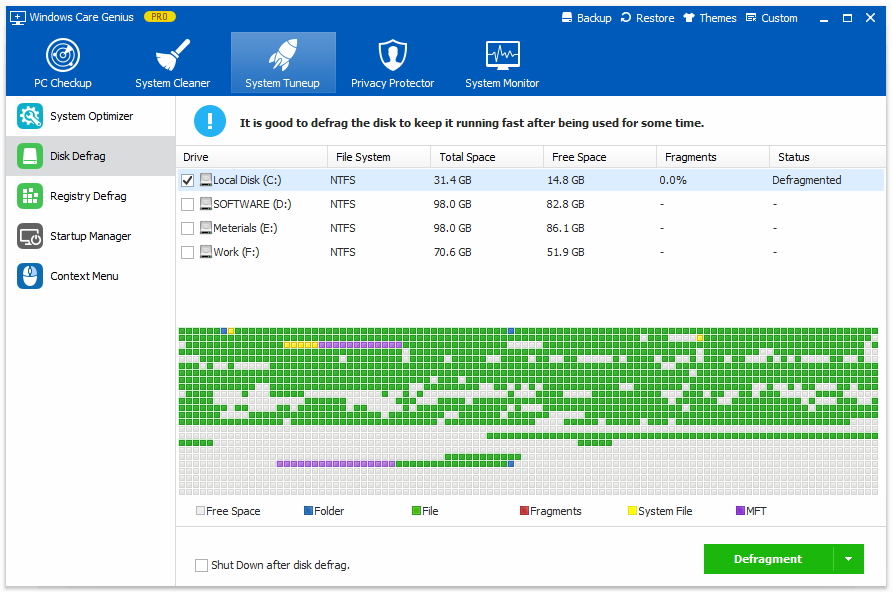
After that, we suggest you to make a checkup for your computer. Once done, select “System Tuneup” from the menu bar located at the top of the main interface.

Then choose “Disk Defrag” from the left pane.
Next, check the disk you want to perform defrag and hit “Defragment” to start defrag.

Now only 3 steps with this program, you can defragment your Windows computer to perfect instead of Windows built-in defrag tool.
I hope at least one of these solutions helped you fix Windows 10 disk defrag not working. If you have any comments suggestions, or maybe other solutions, please share it with us in the comments below.