To do this, first you need get a reliable partition wiper or eraser and Windows Boot Genius is exactly the one you need. It allows you completely erase all contents of a partition, including stubborn virus files and hidden files. What's more? The erased data can't be recovered by any data recovery tool.
Tutorial on Wiping Data on a Specific Partition Purely
Below is a detailed guide about how to delete data on your partition Windows 8.1/8. Noted that after erasing all your data will disappear forever, so making sure you have your important data backed up.
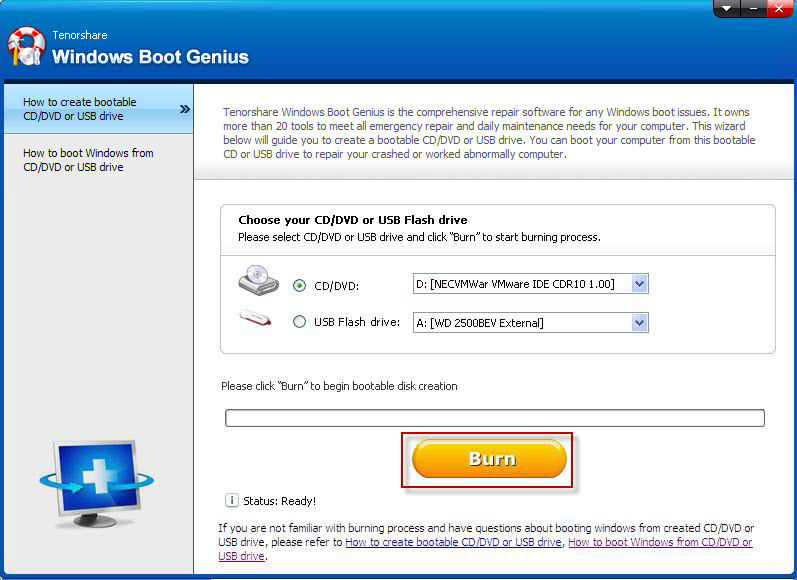
- Run Windows Boot Genius and insert a blank CD or USB into the workable computer and click "Burn" to create a bootable CD or USB. All left things will be done automatically.
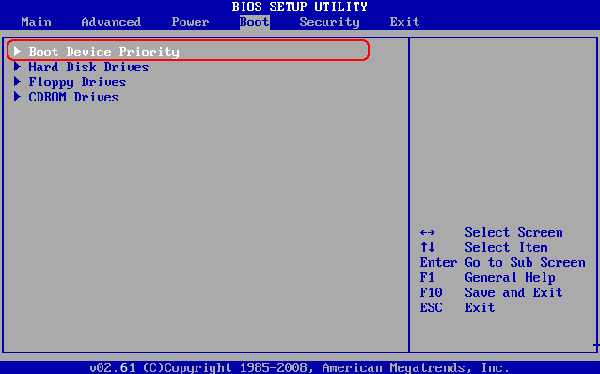
- Insert the bootable CD or USB to the computer you want to delete data and press F12 to access the Boot Menu. Select the CD or USB as the first boot device.
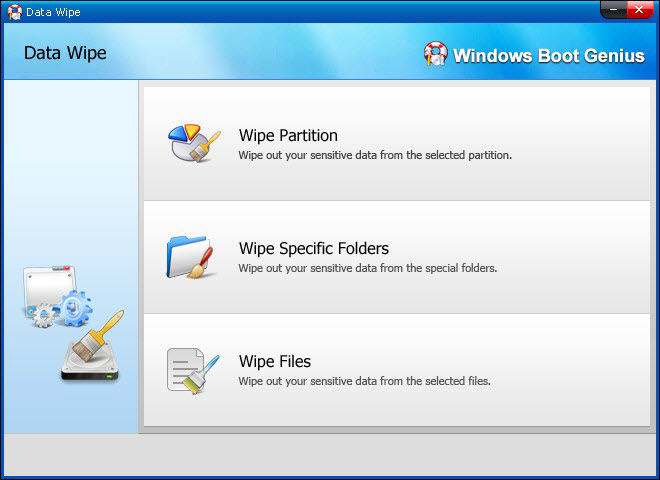
- After that, launch Windows Boot Genius. Choose "Disk Tools" and choose "Partition Wiper" under the "Wipe Data". Here you can wipe all data from a specified partition.
Note: Burn this program to a bootable disk will help you prevent any virus affecting the partition wiping operation.


After the wiping process, all your data on the partition will be removed permanently. And you'll get a pretty clean partition to install new system and store new data.
Additional Tips: How to Erase a Partition on Hard Drive?
Want to delete a partition on hard drive because you don't want it anymore? Here are some tips for you to wipe a specific partition on hard drive.
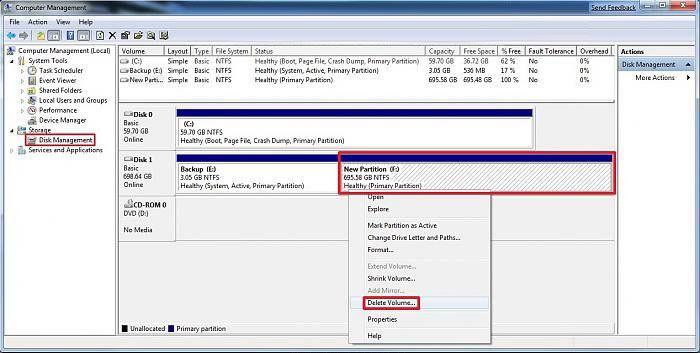
- Logged your PC with admin account and press the Windows + R to open Run dialog, type diskmgmt.msc, and press Enter.
- In the middle pane, right click on the partition of a disk that you want to delete, and click on Delete Volume.
Note: You can't delete system partition, boot partition, the Windows partition that you are currently logged in to or any partition that contains the virtual memory paging file.

So either you need to delete data on a partition fully or you want to remove a partition on hard drive, follow our tips in this article and have a try.