- Part 1: How to Boot from USB Flash Drive on a Microsoft Windows 10/8.1/8 Preloaded ThinkPad
- Part 2: How to Boot from USB Flash Drive on Older ThinkPad Systems?
Part 1: How to Boot from USB Flash Drive on a Microsoft Windows 10/8.1/8 Preloaded ThinkPad
1. When your ThinkPad cannot boot normally:
If you want to boot your ThinkPad from USB to unlock your ThinkPad with Windows password recovery tool or fix Lenovo ThinkPad booting issues like blue screen, won’t boot, etc, in this case you can't boot from USB in method above, thus you can try methods below:
- Connect a bootable USB drive to the USB port on your PC. Press and hold the Power Button for few seconds to turn off your system completely.
- Launch Windows 8/8.1/10 desktop as per usual. Restart Windows system. LCD screen/monitor may dim/turn off, but will light up again and display “ThinkPad/ThinkCentre/ThinkStation/Lenovo” logo.
Note: For PC with Windows 8/8.1/10, this step to “restart Windows” is necessary. This step (vs. a Power On action) enables you to enter BIOS by pressing F1 key when “Lenovo” logo appears.
- Power on your system. Press F12 button immediately as Thinkpad logo appears.
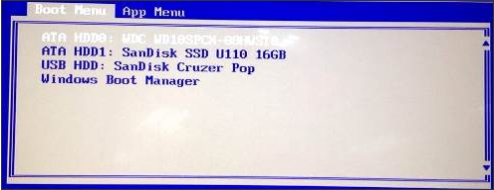
- You should see a menu pop up with a list of choices on it. Select your USB drive using arrow key and press Enter.
2. When your ThinkPad canboot normally:
If you thinkpad can boot normally or you can't press F 12 to enter the Boot Menu. Alternatively, you have to enter the Boot Menu from within Windows 8/8.1/10.
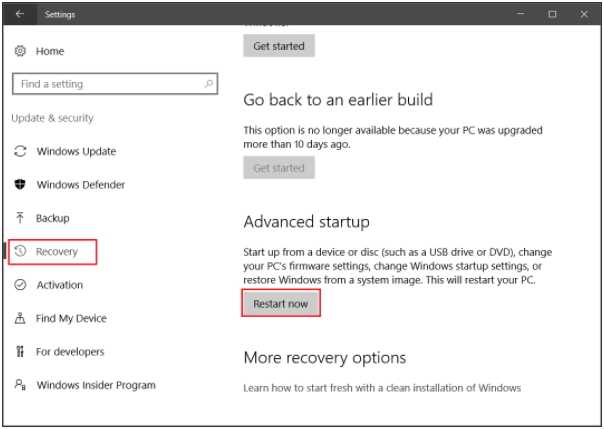
- Open Settings, and click on the Update & security icon. Click on Recovery on the left side, and then Restart now under Advanced startup on the right side.
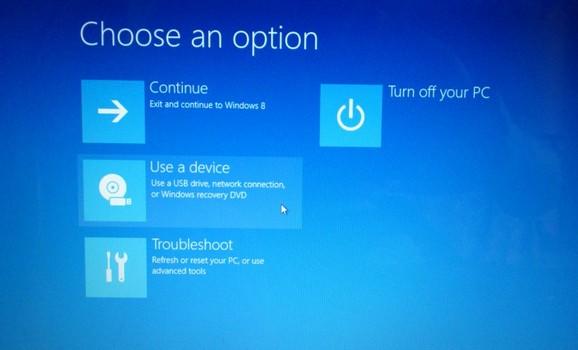
- After your PC restarts to the Choose an option screen, click on Use A Device and finally click on Boot Menu.
- Click on the USB drive that you want to use to boot from. The computer will now restart and boot from the selected USB drive.
Part 2: How to Boot from USB Flash Drive on Older ThinkPad Systems?
If you use older ThinkPad system, follow steps below to boot from USB on your ThinkPad laptop.
- Connect a bootable USB drive to the USB port on your PC. Reboot your PC.
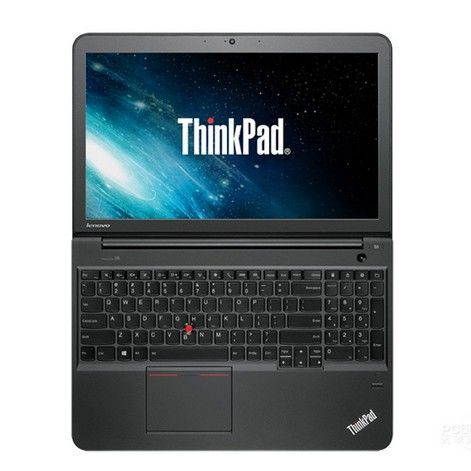
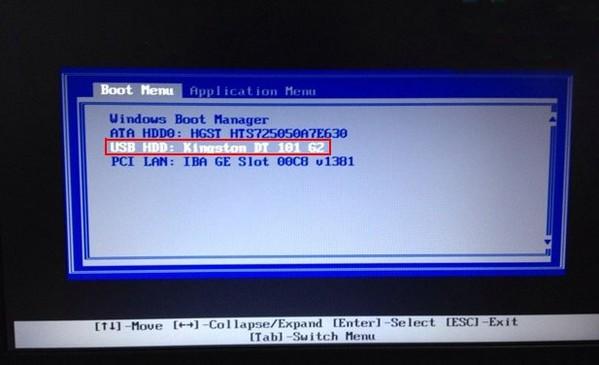
- When ThinkPad Logo appears on screen, press F12 or other Boot Option Key (click for details) to enter BOOT MENU (Boot Device Options).
- Use "↑, ↓" to choose the USB memory stick to boot from.
Boot Option Key for older ThinkPad systems (from Official Lenovo Support)
| ThinkPad model | Action |
| G40, G41, R40, R40e, R50/e/p, R51, R52, T40/p, T41/p, T42/p, T43/p, X40, X41, X41 Tablet | Press the blue Access IBM button when the message "To interrupt normal startup, press the blue Access IBM button" is displayed to enter the ThinkVantage Productivity Center, then select Start setup utility to open the BIOS Setup Utility. |
| R51e, R60/e/i, R61/e/i, T60/p, T61/p, X60/s, X61, X61 Tablet, Z60m/t, Z61e/m/p/t, Reserve Edition | Press the blue ThinkVantage button when the message "To interrupt normal startup, press the blue ThinkVantage button " is displayed to enter the ThinkVantage Productivity Center, then select Start setup utility to open the BIOS Setup Utility. |
| 240 series, 390 series, 570 series, i Series 1200/1300/1400/1500/172x, A20, A21, A22, A30, A31, R30, R31, R32,, S30, S31, T20, T21, T22, T23, T30, X20, X21, X22, X23, X24, X30, X31, TransNote | Pressing F1 during startup when the ThinkPad logo is displayed. |
| 310, 315, 310E/ED, 315ED | BIOS Utility is entered by holding F2 while the ThinkPad logo is displayed after power on. |
| 365C/CS, 365CD/CSD, 365E/ED | Enter setup by pressing CTRL+Alt+F11 from a DOS prompt (you must be in DOS mode, not a DOS session under Windows). |
| 365X/XD | With the unit powered off, hold the F1 key and power the unit on. Keep F1 held down until Easy setup appears |
| 360, 355 series, 380, 385 series, 560 series, 600 series, 701C/CS, 75x series, 76x series, 770 series | With the unit powered off, hold the F1 key and power the unit on. Keep F1 held down until Easy setup appears. Note: On the TP 701, you can also access the Configuration area on BIOS by pressing the Fn+F1 keys. |
| 500, 510 | Enter setup by pressing CTRL+Alt+F3 from a DOS prompt (you must be in DOS mode, not a DOS session under Windows). |
| 700/C, 720/C | Pressing CTRL+ALT+INS when the cursor moves over to the upper right hand side of the screen right after the memory count. |
| 710T, 730T | Hold the suspend/resume switch while powering on the computer. |
World's 1st Windows Password Recovery Software to Reset Windows Administrator & User Password.
Free Download Free Download