How do I disable driver signature enforcement in Windows 10/8.1/8/7? Driver signature enforcement error screen can't be cleared…… If you are going to turn off the driver signature enforcement feature on your PC in Windows 10, Windows 8.1, Windows 8, Windows 7 you are in the right place. This post will tell you what driver signature enforcement is, how to bypass driver signature enforcement and what should you do to enable all installed drivers work properly.
You can try the 2 best methods to disable driver signature enforcement in Windows 10/8.1/8/7. All apply to laptops, notebooks, and desktop PCs, including Asus, Acer, Dell, HP, Sony, Lenovo, Samsung, Toshiba, IBM, Alienware, Compaq, Gateway, LG, Microsoft, MSI, etc. What need reminds is, you are required to restart your computer several times throughout the course of these instructions. We recommend you print them before you begin, or use a separate computer to follow along.
Method 1: Disable Driver Signature Enforcement through Troubleshoot
Method 2: Disable Driver Signature Enforcement Permanently and Completely
Method 1: Disable Driver Signature Enforcement through Troubleshoot
To install unsigned drivers, you need to disable the driver signature enforcement on Windows 10/8.1/8/7. This can be done as follows.
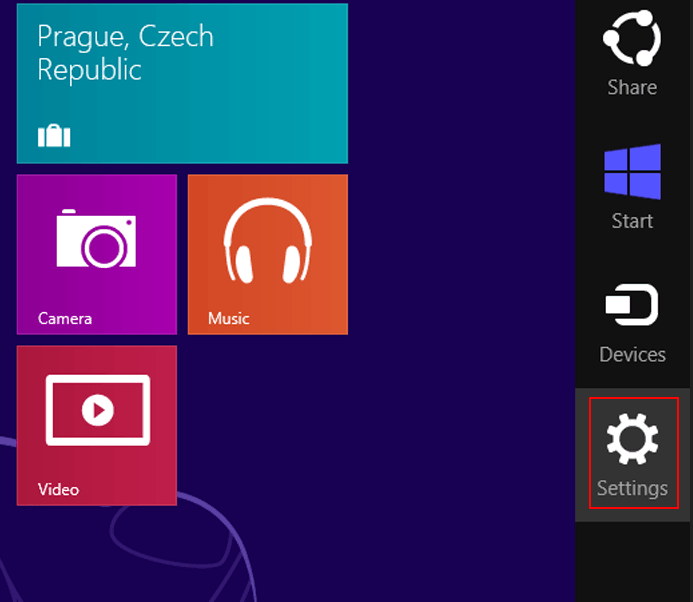
Step 1: Press the Win key (known as Windows logo key) and C key and click on PC "settings". Then switch over to the "Update & recovery" section.
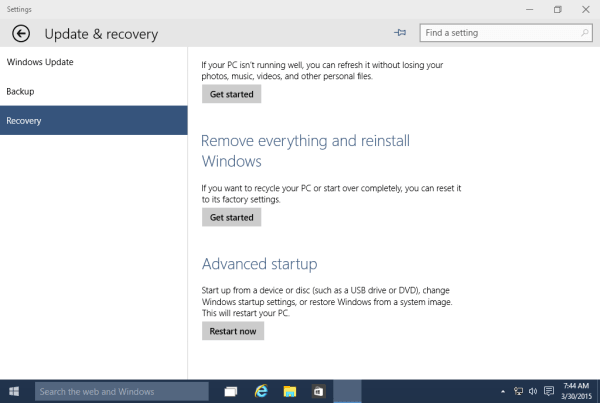
Step 2: Thereafter, click on the"Recovery" option on the left hand side. Once selected, you will see an advanced startup section appear on the right hand side. You will need to click on the "Restart now" button.
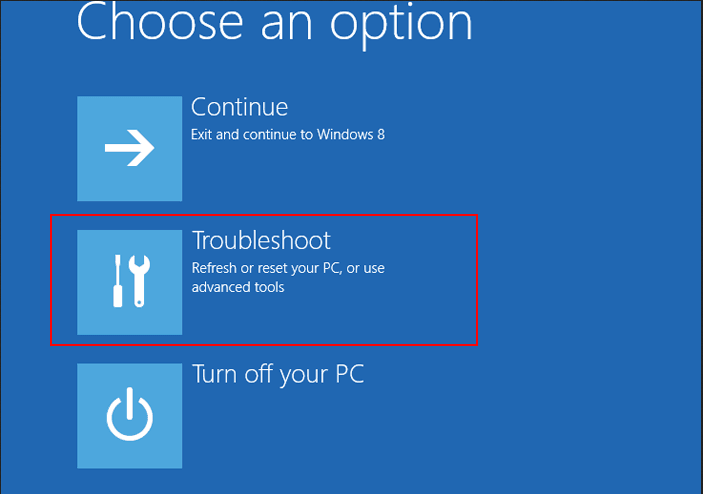
Step 3: Once your Computer rebooted you will need to choose the " Troubleshoot" option. Then head into " Advanced options". In the "Advanced Options" window, choose "Startup Settings". Click the "Restart" button on the Startup Settings screen to reboot your computer again.
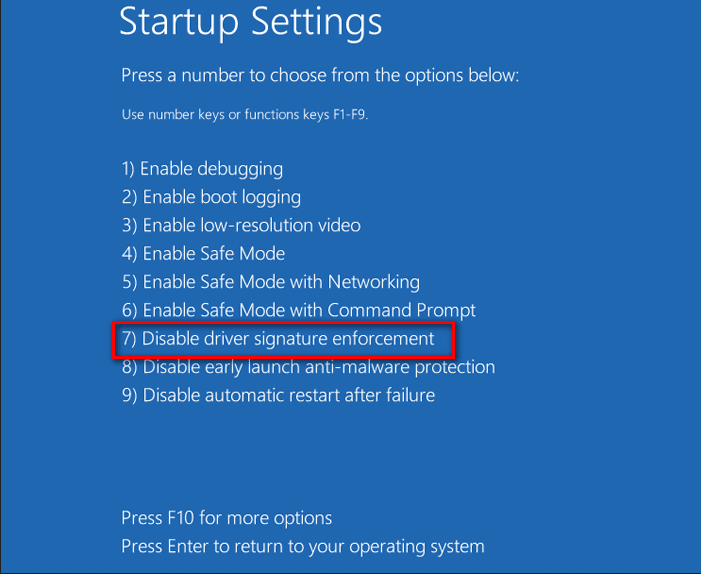
Step 4: Then you will be given a list of startup settings that you can change. The one you are looking for is "Disable driver signature enforcement". To choose the setting, you will need to press the "F7" key.
Step 5: Your PC will then reboot. Proceed to install your unsigned drivers. During the installation procedure, Windows will inform you that can't verify the publisher of this driver software. Just ignore the warning message and choose "Install this driver software anyway" to complete the installation.
Method 2: Disable Driver Signature Enforcement Permanently and Completely
You can try commands to bypass driver signature enforcement permanently and completely. Now you can follow the guide step by step.
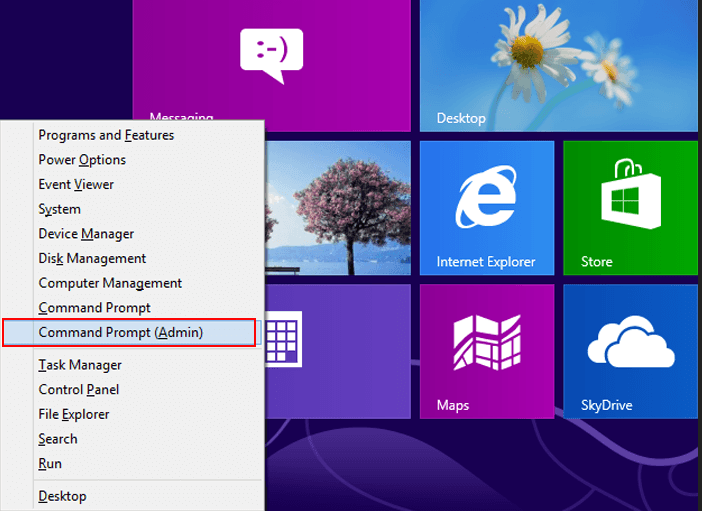
Step 1: Open a Command Prompt with admin privileges. In Windows 10/8.1/8/7, press the Windows key and X key simultaneously, then select "Command Prompt (admin)". In Windows 7, you can type "command prompt" in the Start search box, right-click on "Command Prompt" in the result and select "run as administrator".
Step 2: Run "bcdedit -set loadoptions DISABLE_INTEGRITY_CHECKS" (without the "").
You are supposed to receive the "The operation completed successfully" message.
In our test, you can also type the commands as below:
bcdedit.exe -set TESTSIGNING ON
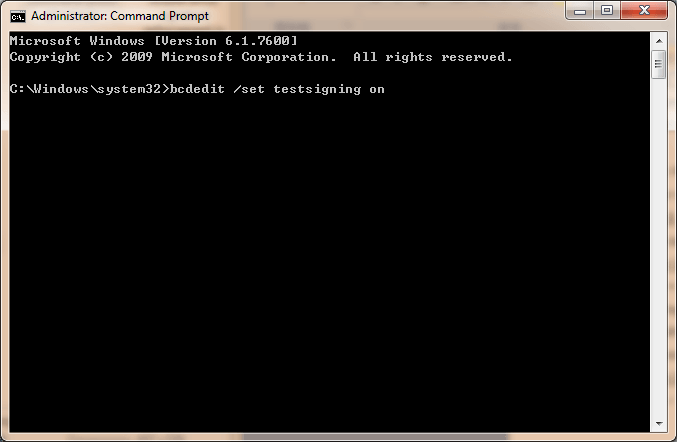
Step 3: Close the Command Prompt window and restart your computer. Now you can install any unsigned drivers without problems.
Hope this article can help you much. If you have any questions, Please feel free to leave your comments in the comment section. For more Windows 10, Windows 8, Windows 7 information, you can visit the official website: https://www.windowspasswordsrecovery.com.