Turned on your computer and Windows, for whatever reasons, can't start? What's a nightmare? Luckily, Windows is able to create a system recovery disc filled with recovery tools that will come in handy when your computer crashes. The first thing a new Windows user should do is creating a System Repair Disc. Below we will show you how to create a system repair disc for Windows 7 and Windows 8. Just follow our criminally simple guide and you'll have a Windows system repair disc.
Note: Failed to create a system repair disc before your computer crashes? Don't worry! Windows Boot Genius is here to help you boot your computer and recover your Windows OS with a series of Windows system recovery options.
How to Create a System Repair Disc for Windows 7?
With the help of the "Create a System Repair Disc" wizard in Windows 7, you can easily create a Windows 7 system repair disc.
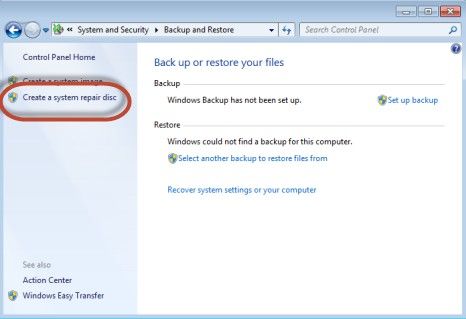
- Go to "Control Panel -> System and Security -> Backup and Restore. In the column on the left, click "Create a system repair disc".

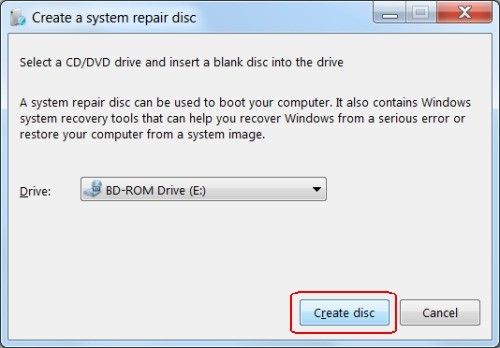
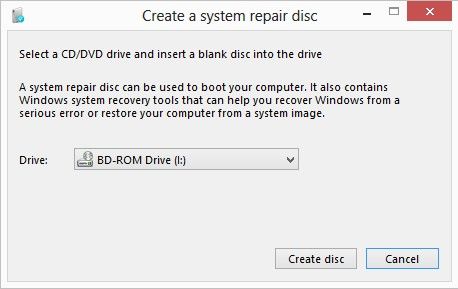
- Select a CD/DVD drive and insert a blank disc into the drive. Then click Create disc.

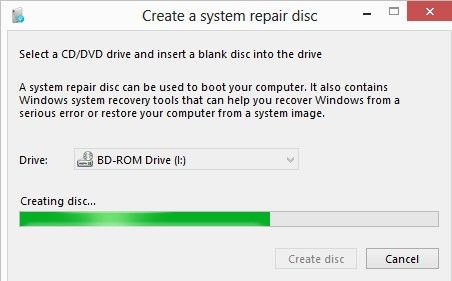
- Then Windows begins creating the repair disc.

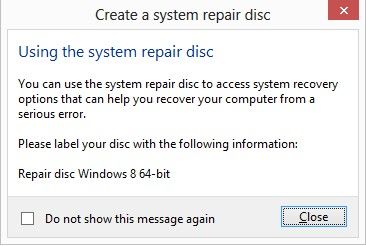
- When the repair disc is complete, click Close and store the system repair disc in a safe place.
How to Create a System Repair Disc for Windows 8?
Creating a system repair disc in Windows 8/8.1 is a little differently but still very easy, you simply follow steps below:
Note: In Windows 8.1 this tool no longer exists and cannot be used. Windows 8.1 has newer tools for creating recovery drives, which will be covered in separate tutorials.
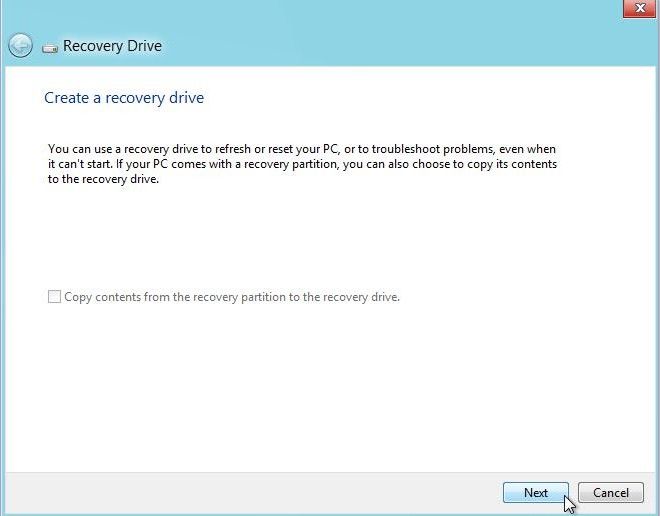
- Open Settings Search with keyboard shortcut WINDOWS KEY+W and type "recovery" into Search box. Click Create a recovery drive. If prompted by UAC, then click on Yes.
- Create a recovery drive window opens. Insert a blank, writable CD or DVD (Windows 8 only), or connect a USB drive. Then click Next.

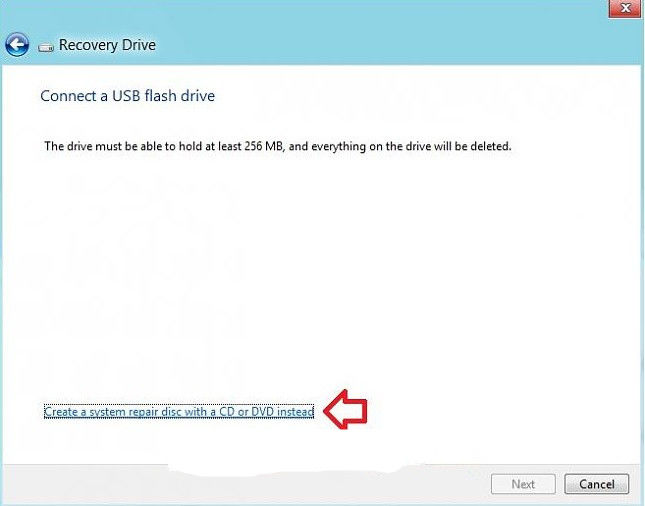
- Click on the Create a system repair disc with a CD or DVD instead link.

- Then the "Create a system repair disc" wizard is started. Select a CD/DVD drive and click Create disc.

- Windows is creating the disc. The process will take a bit of time.

- After the disc is finalized, a pop-up window is displayed asking you to label the disc, so that you know what you will find on it. Do as instructed and click or tap Close.

You now know all about the Recovery Disc creation tool for Window 7 and Windows 8. If you don't have one yet, just follow our instruction to create one.
