Files can easily get lost due to an accidental deletion, a power surge, etc. But most people realize to back up their files after it is too late. Now in Windows 8, a new feature called File History can automatically backs up files that are in your libraries, contacts list, favorites, and on your PC. And you easily restore files that are lost, corrupted, or deleted with File History.
Free Download Free DownloadPart 1: How to Use File History to Backup Files in Windows 8?
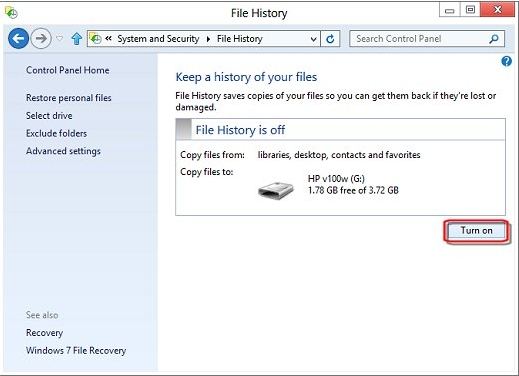
Steps below are for you to back up files with File History in Windows 8. Before File History can go to work, you need two things: An external hard drive for dependable, automatic backups; flip the On Switch to turn File History turn on.
- Plug in a USB drive in Windows 8 and a notification panel will pop up asking you how you want to use it. Choose "Configure this drive for backup – File History."

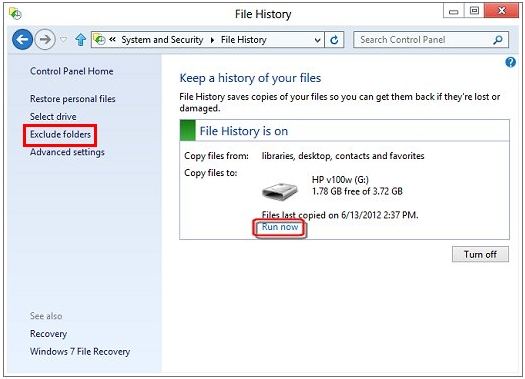
- If you need to switch the drive, click the Select Drive link from the window's left side and select a different drive.
- Type "File History" from the Windows 8 start screen, and select Settings. Click "File History".

- If you want to recommend this drive to other members of your homegroup, click Yes . Otherwise, click No to continue.
- To back up your files, click Run now. If there are specific folders or libraries you don't want to save, add them to the Excluded folders and libraries.

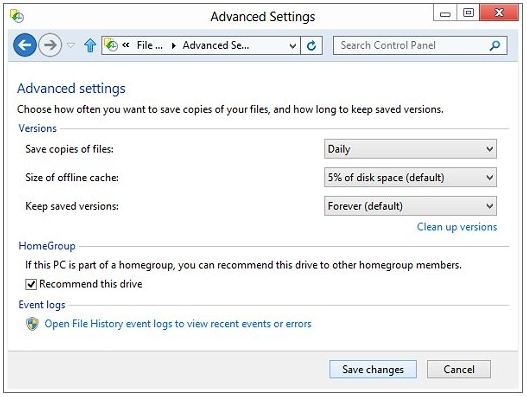
- Windows 8 normally backs up files automatically every hour. You can change that schedule by clicking the Advanced Settings then choose how often you want to save the copies of your files and how long you want to keep the saved versions.

Part 2: How to Use File History to Restore Files in Windows 8?
Using File History to Restore Files in Windows 8 is straightforward to operate. Follow the steps below to restore files with File History in Windows 8.
- Open File History from the Control Panel.
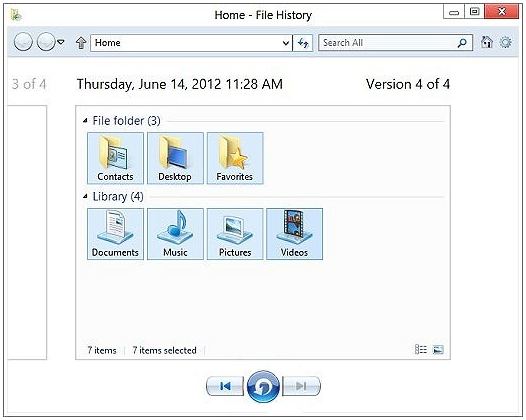
- To restore all or selected folders to their original locations, right click to select all folders or use Ctrl and left mouse click to select or deselect individual folders. Click the Restore button at the bottom of the window.

- To restore a selected folder(s) to a different location, select the folders first, then right click over the Restore button, click on Restore to. Select a new location to restore the files to.
So this is all for how to use File History to backup and restore files in Windows 8. It is very easy, right? If you haven't done that yet, just follow these steps to have a backup of your important files.
World's 1st Windows Password Recovery Software to Reset Windows Administrator & User Password.
Free Download Free Download


